At a Glance
Expert’s Rating
Pros
- Fully built and ready to print
- Built-in monitoring camera
- Print & control via Wi-Fi
Cons
- Small build volume
- Relatively expensive
Our Verdict
The Sermoon V1 Pro makes 3D printing accessible to the masses, and delivers very good results out of the box. You’ll pay a premium for it, though, and its print volume is quite small.
Best Prices Today: Creality Sermoon V1 Pro
Creality’s Ender 3 is one of the most popular 3D printers around, and the Sermoon V1 Pro represents a slight departure for the company. That’s because it’s one of the first enclosed models it has released, a printer that’s ready to go out of the box and supports printing using ABS as well as PLA filaments.
Typically, 3D printers aren’t very user friendly and have a steep learning curve. Some people expect them to be a 3D version of their inkjet printer, but the reality is very different. 3D printers aimed at consumers usually print in a single colour and need assembling and adjusting before they can print anything.
The Sermoon V1 Pro might have an odd name, but it’s one of the most user friendly 3D printers you can buy. It has a touchscreen, a built-in camera and can pause printing if someone opens the door.
This makes it ideal if you’re buying it for your kids to enjoy, or even as a first 3D printer for anyone who doesn’t want the hassle of assembly.
Features & design
- 175 x 175 x 165mm build volume
- 400 x 380 x 430mm machine dimensions
- 250°C max nozzle temperature
- 80°C max bed temperature
The Sermoon is about the size of a small laser printer, and doesn’t require a huge amount of space. Just remember that the spool of filament hangs on a fold-out arm on the outside of the printer, which adds another 120mm to the width.

The maximum print size is considerably smaller: models can be up to 175 x 175 x 165mm (WDH). That’s a lot less than the similarly priced Creality Ender 3 S1, which has a 220 x 220 x 270mm build volume.
When you unpack the Sermoon, the quick-start guide shows all the foam packing pieces that need removing from the inside of the printer, and all the cable ties that have to be cut off.
Once that’s done and you’ve checked the voltage switch is set correctly for your country, you can use the included snips to cut the end of the also-included spool of white PLA to a point, then feed it through the hole on the side of the printer.

When you first power it on, the Sermoon V1 Pro’s screen also guides you through loading the filament which is a simple job of pushing it through the tube until it reaches the extruder.
This has dual gears, a more reliable setup than single-gear extruders and, because it’s mounted directly on the print head as opposed to somewhere on the frame of the printer (a so-called Bowden setup), it’s direct drive.
Direct drive is beneficial if you want faster, more accurate printing, but in practice it doesn’t really matter which type your printer has.. each has pros and cons.

What’s important here is that the Sermoon V1 Pro is designed with ease of use as the top priority. Creality says the printer is “levelling free”, which is what beginners need, as levelling (or, more accurately, tramming) is a huge pain point.
Unless the print bed is perfectly level and the correct distance from the nozzle – the part the filament extrudes from – then prints will fail.
If you know about 3D printers you might think this is “automatic levelling”, but that’s not the case. What it means is that Creality has levelled the bed at the factory so – theoretically – the user can hit print and never worry about levelling.
In my experience, that isn’t true. Although some prints, particularly those with a fairly large footprint, would complete successfully, those that involve lots of small parts in contact with the print bed would fail as some pieces came unstuck before the model had finished printing.

Fortunately, it is fairly quick to use what I am calling the “assisted levelling” process. On the touchscreen, in the settings menu you’ll find an “Auto levelling” option. Armed with a small piece of paper, you need only to move it back and forth under the nozzle in five different positions, and use the up/down controls on the screen to fine-tune the height of the bed until you feel slight resistance when moving the paper.
It takes a few minutes, but solved all the problems I was having with prints failing to adhere to the bed. That bed is a plastic ‘tray’ that has a heated magnetic surface on which is a removable, flexible, textured sheet.
This is much more desirable than a glass sheet as the filament sticks much better to it without needing any painter’s tape or glue stick, and you can take it out of the printer and bend it to easily remove finished prints.

It’s worth noting that the print bed moves up and down, while the print head can move side to side and back to front. Usually, this type of 3D printer has a bed that moves backwards and forwards while the print head moves side to side and up and down.
Importantly, the bed is attached only on the right-hand side to a long worm screw (a single lead scew) which moves it up and down. For greater accuracy, many 3D printers have dual lead screws, one on either side of the printer.
However, unless you are printing tall models at high speeds, this doesn’t cause any problems.
Creality includes a few models on an SD card which you can pop into the printer and print straight away.
The touchscreen shows the temperature of the bed (which goes up to 80°C) and the nozzle, which is capable of 250°C.

It also shows the time elapsed, a blue progress bar and the percentage completed so far. While printing you can adjust temperatures, increase or decrease the print speed and turn the built-in light on and off.
Instructions and animations on the screen are very helpful for things like loading and unloading filament, and it makes the Sermoon V1 Pro very easy to use.
If you like, you can also enable a setting which automatically pauses printing if the front door is opened. It’s a safety feature to help prevent little hands getting hurt, but it can’t instantly cool the nozzle or bed which will be very hot.
This and the built-in web cam are the only two features that make this the Pro model different from the non-Pro.
You can view it full-screen when you rotate your phone to landscape, too.
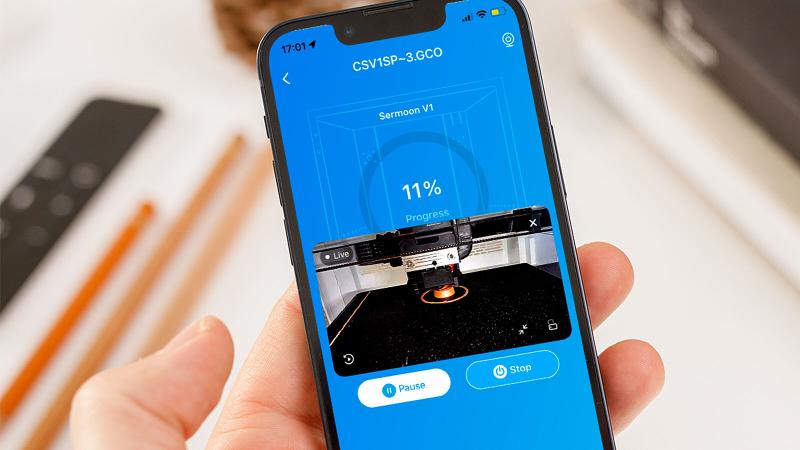
The app also allows you to see print progress as a percentage and change key settings as you can from the touchscreen, only remotely.
You can also download models created by the community and the built-in cloud slicer allows you to resize objects and print them from your phone.

A handy viewing window on top of the printer makes it easy to see printing progress from another angle, and this is removable to make it easier to access the print head, should you need to remove it to change the nozzle or clean it more easily.
Performance
First, let’s talk about noise. Creality says that the Sermoon V1 (and Pro) have ‘Silent Operation’ and produce less than 45dB. That figure, whether you know your dB scale or not, is definitely not silent.
I used a free sound meter app to see whether it showed 45dB because, to my ears, the printer seemed considerably noisier than my dishwasher, which also claims to be around 45dB, and which, generally, I cannot hear.
Even without the two additional case fans running, the app showed around 50-54dB. While I’m sure it isn’t as accurate as an expensive tool for measuring loudness, it’s probably close to the real figure.
It might seem close to the claimed figure, but remember that the dB scale isn’t linear: it’s logarithmic. Subjectively, the Sermoon is a bit quieter than open 3D printers, I’ve tested but not by much. It’s possible to work with the Sermoon whirring away in the same room, but you certainly wouldn’t want to sleep in a room while it’s printing.
Turn on those case fans, and noise levels jump to around 60dB, around the level of normal conversation or background music – or a laptop with the fans running at full speed. You might not care how loud a 3D printer is, but you will care about print quality. And the Sermoon V1 Pro is very good overall, when using PLA.

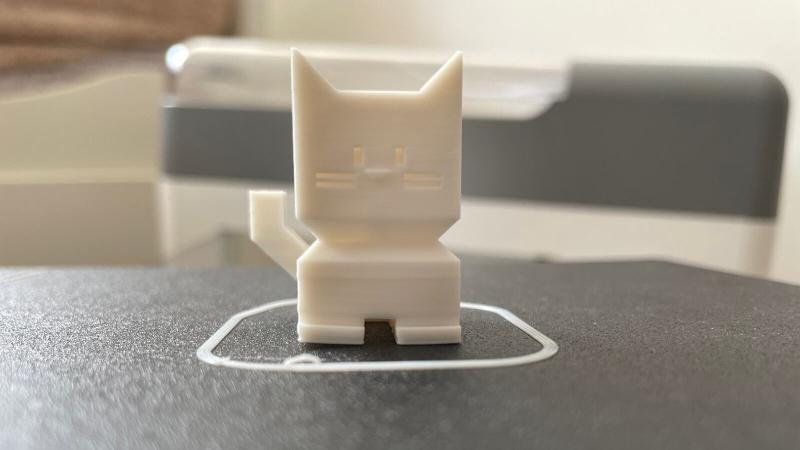
Prints are generally nice and clean and free of stringing, which is where different parts of the print have unwanted wisps of filament between them. The first Benchy I printed, at 100%, was one of the best I’ve seen, though as with all the prints I tried, there was a visible Z-seam (easy to see in the photo above on the hull).
This looks like a vertical join in each print, and exists where the nozzle begins and ends each layer. The default settings in Creality’s slicer are to put this join on the ‘Back’ of models, but there is no back – no side which isn’t seen – on models like this.
You can set it to randomise the location which will make the seam a lot less visible, and you can also calibrate the printer’s e-steps to ensure exactly the right amount of filament is extruded, which can also help.
Aside from this, prints are impressive. I tried printing various print-in-place articulated models and even at 0.2mm Standard quality, they were able to articulate after any stuck-together sections were freed with some careful application of force.
With 3D printing, you always trade off quality and speed. This means you can have more precise, better quality prints, but you’ll have to wait considerably longer for them to finish.
The only other issue was that the Sermoon V1 Pro doesn’t handle overhangs as well as other printers we’ve seen recently, including the Anycubic Vyper and Voxelab Aquila S2. The photo below shows the problem: filament droops where – on rival printers – it remains level, on the whole.

You can add supports to counter this, but that adds print time and they can be difficult to remove cleanly.
The fact the Sermoon is enclosed allows heat to be retained to increase the ambient temperature and keep it consistent. This is why Creality says the V1 Pro can print ABS.
Creality kindly supplied a reel of white ABS to test with, and I used the recommended slicer settings and preheated the bed to 80°C for 10 minutes before starting the print job itself.
Unfortunately, whether a small model or large, simple or complex, they all warped and wouldn’t stick to the bed as well as PLA does. This also happened when adding a brim, suggesting that despite the enclosure the Sermoon V1 Pro isn’t the best choice if you need to print using ABS. Indeed, many people recommend using a bed temperature of over 100°C for PLA, but the Sermoon’s bed tops out at 80°C.
ABS is notorious for warping, so it’s best to stick to PLA with this printer.
Price & availability
The Sermoon V1 Pro costs $539 from Creality , which is $120 more than the non-Pro version .
Both models are available from Creality’s UK website at £489 and £419 respectively.
However, you’ll find it on sale from other retailers at lower prices. For example, Box.co.uk was selling the V1 Pro for a much cheaper £349 in the UK at the time of review, though it wasn’t in stock.
For the same price you could buy the Ender 3 S1 which has true auto bed levelling and a bigger print volume.
Or, for less, you could opt for something like the excellent Anycubic Vyper or the Voxelab Aquila S2 which is even cheaper, prints up to 300°C but lacks auto bed levelling.
Verdict
The Creality Sermoon V1 Pro might have a strange name, but it’s a genuinely good little 3D printer for anyone who wants to print straight out of the box without having to build and fettle it first.
Aside from a few minor print issues, print quality with PLA is excellent and the only real drawback – aside from the fact it costs more than non-enclosed printers – is the relatively small build volume.
It’s worth thinking about the largest object you might want to print and ensuring you wouldn’t be better off opting for an open design that allows for larger models.
Assuming it is enough for you, the V1 Pro’s built-in camera and Creality Cloud app are genuinely useful and make an already easy-to-use printer, even more convenient.
Specs
Creality Sermoon V1 Pro: Specs
- FDM 3D printer
- requires 1.75mm PLA/ABS filament
- Printer size: 400mm×380mm×430mm
- Max print size: 175x175x165mm
- Prints from SD (card provided) or over Wi-Fi
- Layer thickness 0.1-0.4mm
- Nozzle diameter 0.4mm
- Positioning accuracy: 0.1mm
- Max nozzle temperature 250°C
- Max bed temperature 80°C
- AC 110-230V input
- 150W power consumption
- Machine weight 11.5kg
- Filament runout sensor: Yes
- Pause printing: Yes
- Wecam: 720p
Best Prices Today: Creality Sermoon V1 Pro
Author: Jim Martin, Executive Editor, Tech Advisor

Jim has been testing and reviewing products for over 20 years. His main beats include VPN services and antivirus. He also covers smart home tech, mesh Wi-Fi and electric bikes.
Recent stories by Jim Martin:
- The best 3D printers 2024
- Creality K1C review
- Bambu A1 review
Just a few years ago, 3D printing was a hobby for geeks and nerds. It was difficult, frustrating and slow.
Fast forward to 2024, and that has all changed completely. Now, you can buy – for a very reasonable sum – a printer that works out of the box, doesn’t require hours of tweaking and adjusting and prints large models in hours – not days. Small models can take mere minutes.
Since you’re reading this, you’ve probably made it past the point of wondering what on earth you’d use a 3D printer for, but if not, there are many useful tools and gadgets as well as fun things to print, all of which are available to download free from sites such as Thingiverse and Printables .
Here we’ll explain what to look for in a 3D printer and recommend what you should buy.
First, a brief word on colour: consumer 3D printers are single-nozzle devices which print one colour at a time. If you want to multicolour prints, then Bambu’s P1S Combo and A1 Combo can hold four spools of filament and change colour automatically. Multicolour prints can take a long time, though, and waste filament.
One other thing: until you’ve spent time getting to grips with a 3D modelling app such as Fusion 360 or Tinkercad , you’ll be limited to printing objects that other people have designed. There are lots of them, but if you want something bespoke, you’ll have to create it yourself.
Don’t be put off buying a 3D printer, though. Choose wisely and you’ll be rewarded with a device that can print intricate, articulated models from the off.
We’re focusing mainly on FDM (fused deposition modelling) printers here because these are the most popular type. The other type is a resin 3D printer, such as the Creality Halot One Plus, which works very differently, and are designed for printing small, intricate, solid models.
Best 3D printers 2024
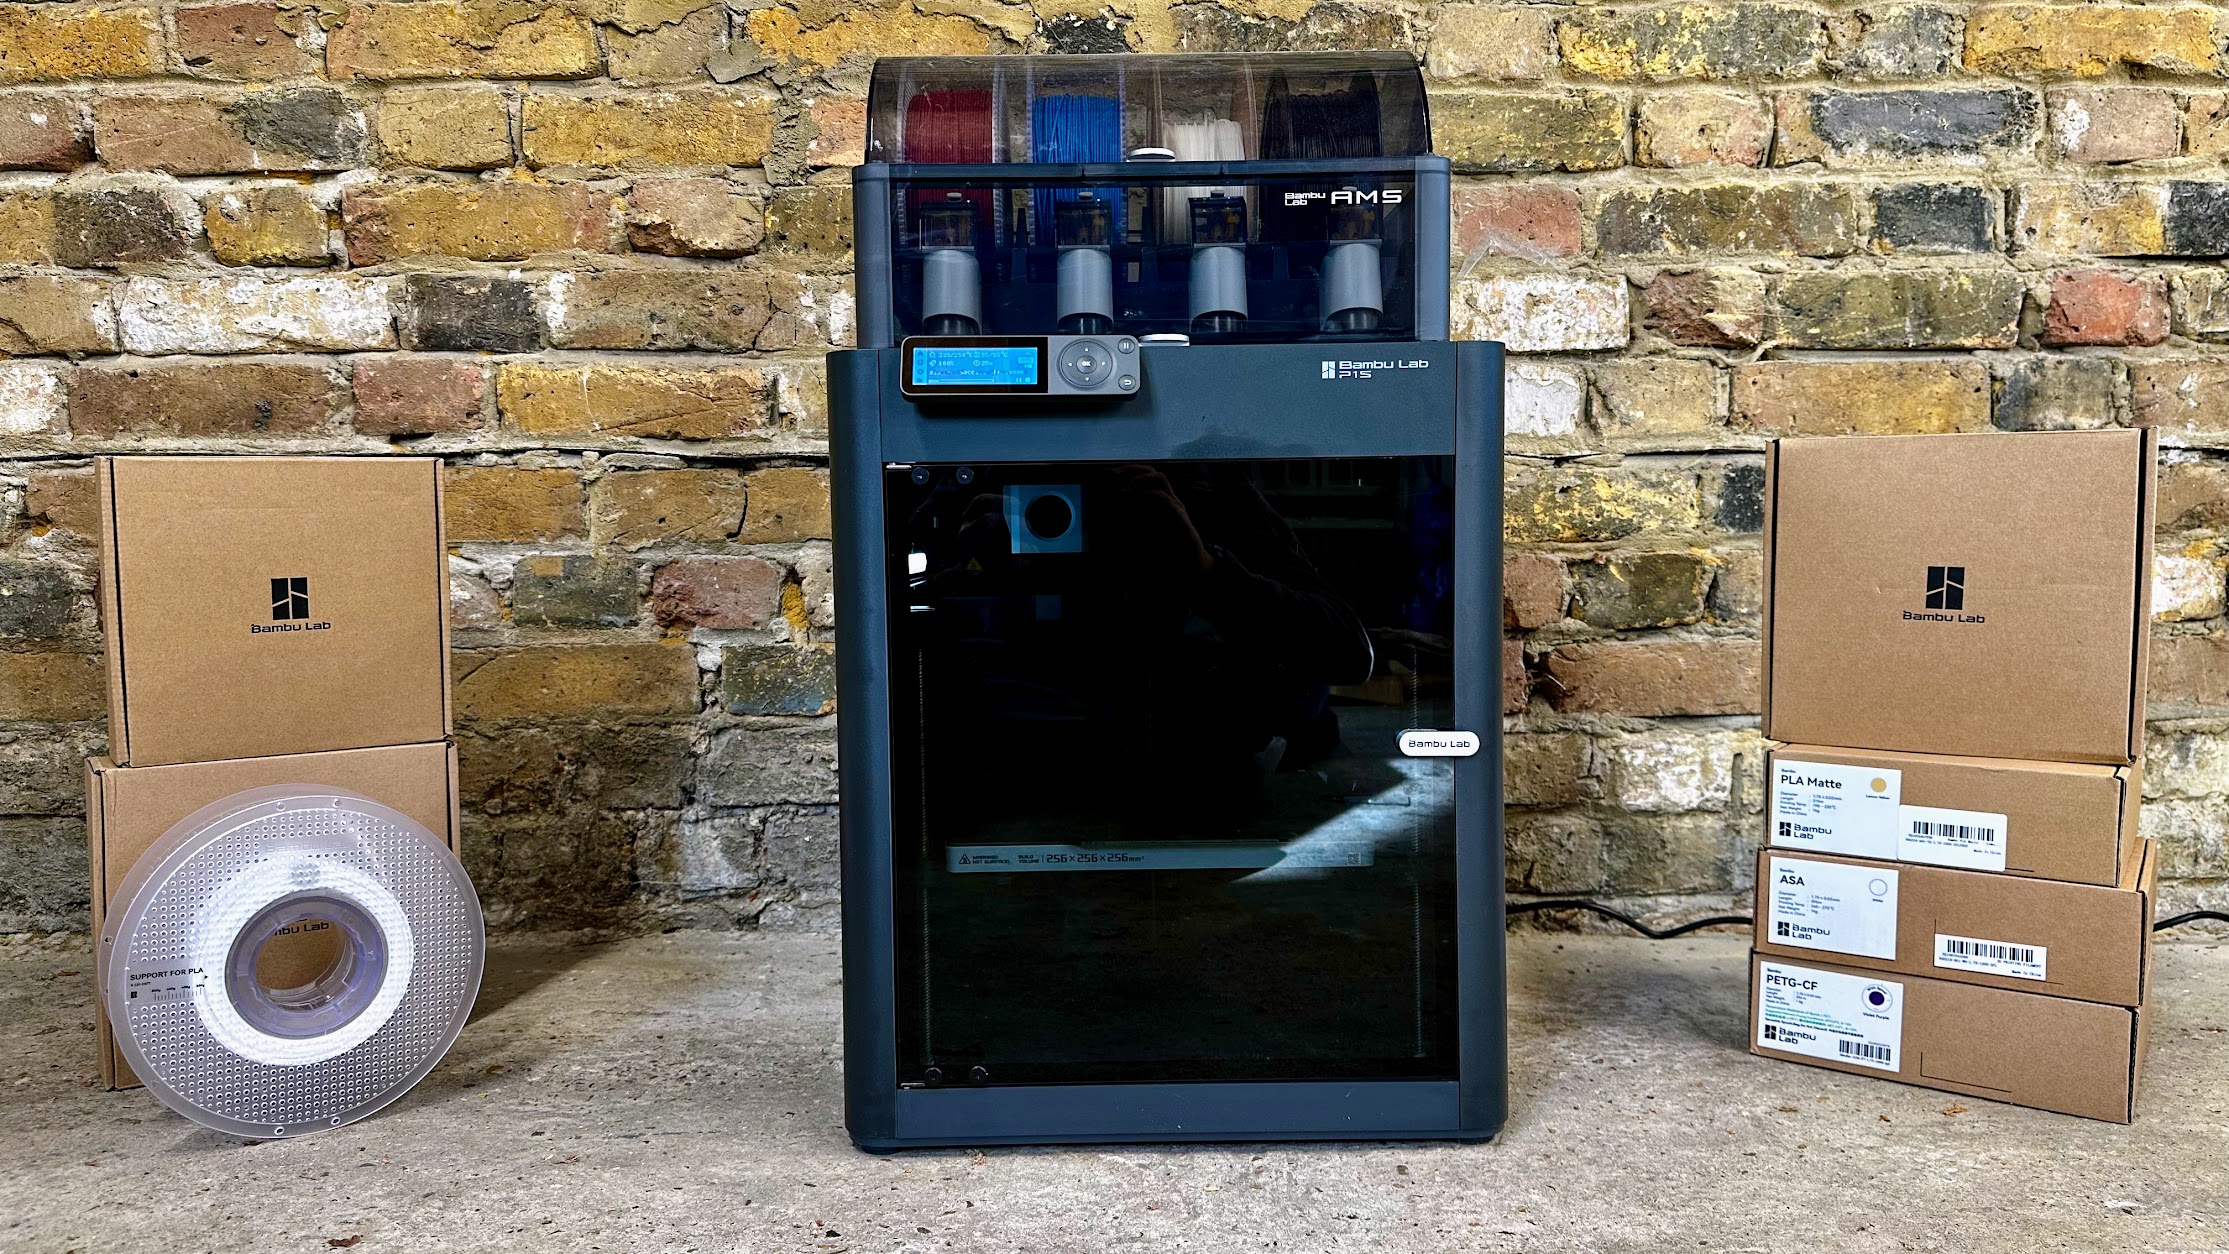
1. Bambu P1S – Best 3D printer for most people
Pros
- Excellent print quality
- Automatic colour changing
- Fast CoreXY motion system
Cons
- Basic non-touchscreen control panel
- Filament wastage can be high in multicolour printing
- No failed print detection
With so many tech products you get what you pay for. This inevitably means the “best” will also be the most expensive. It’s certainly the case here, but just because the P1S is expensive doesn’t mean it isn’t good value.
If you buy the P1S Combo, it will come with an AMS, a unit that sits on top of the printer. It holds four spools of filament and can load and unload them automatically and print in multiple colours without any assistance from you.
With only one nozzle, multicolour prints aren’t exactly fast. But the AMS also takes the pain out of changing filament when you want to print something in a different colour to the previous print.
If you don’t care about multicolour, you can buy the non-Combo version of the P1S for quite a bit less.
Overall, the P1S is a remarkably good printer. It’s really fast thanks to the use of a coreXY system, and as it’s fully enclosed it’s reliable even when printing with ASA, nylon, polycarbonate and other filament types because of the stable internal temperatures. More importantly, print quality is absolutely superb.
If there’s a downside, it’s the rubbish dot-matrix screen which seems very out of place on a printer this expensive. But, there are other ways to control the P1S, such as printing from a PC or phone via Wi-Fi. The Creality K1C is a good alternative if you must have a touchscreen, and it also has a few other features such as failed print detection.
If you just want to print with PLA, PETG and other filament types that don’t require an enclosure, take a look at Bambu’s A1 which is a lot cheaper.
Read our full Bambu P1S Combo review
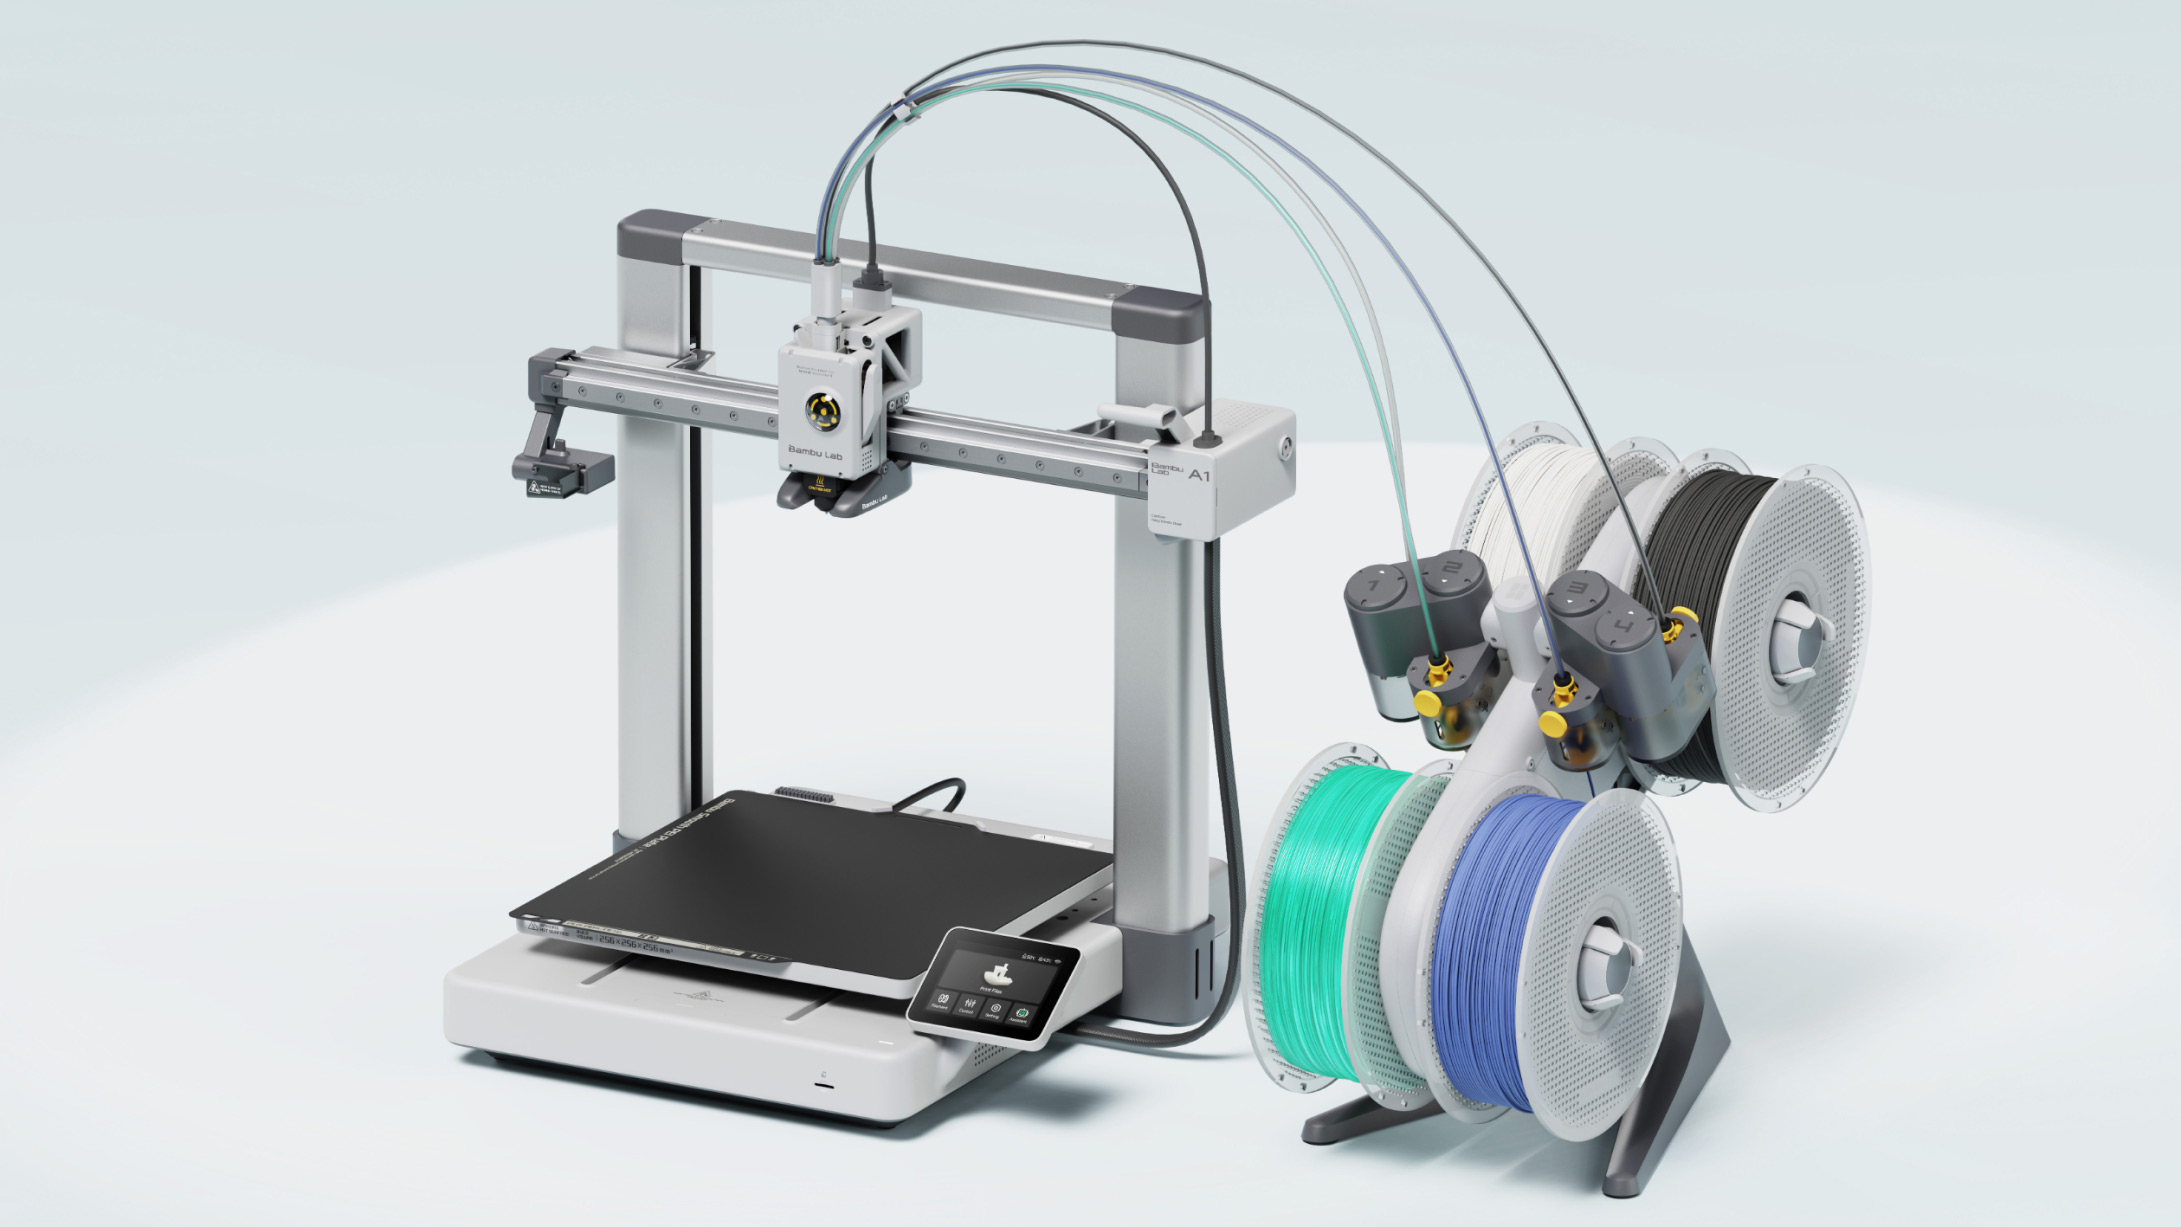
2. Bambu A1 – Best budget 3D printer
Pros
- Fast, reliable printing
- Fully automatic levelling
- Excellent value
Cons
- Doesn’t support more exotic filament
- AMS Lite adds significantly to the price
In our full review, we call the A1 “the 3D printer you’ve been waiting for”, and with good reason. It’s as close to ‘one click’ printing as you’ll get right now: it adjusts itself automatically for reliable printing and has all the features most people want, at a surprisingly affordable price. Bambu’s desktop and mobile apps are really good, too.
Like Bambu’s more expensive P1S, it can print models up to 256mm³ and you can buy the optional AMS Lite (shown to the right of the A1) for automatic multicolour printing.
The only drawback is that the A1 can’t really print nylon, ABS, ASA and other ‘exotic’ filaments because they require an enclosure. Without one, they tend to warp. The A1 can print carbon-fibre filaments if you buy Bambu’s hardened nozzle, which is very easy to fit.
Print quality, when using supported filament types, is sensational.
Read our full Bambu A1 review
3. Creality K1 Max – Best large 3D printer
Pros
- Fast, reliable printing
- Large build volume
- Fully automatic bed levelling
Cons
- Some features exclusive to Creality’s slicer
- No multi-colour capabilities
Some may say the K1 is just a poor copy of the Bambu P1S, but that does it a disservice when so many 3D printers are basically copies of each other. There are two models, the smaller K1 which is cheaper than the larger K1 Max.
The Max offers a 300x300x300 build volume, something not currently available from Bambu and it has an easy-to-use touchscreen. Bed levelling is fully automatic and it even has a LiDAR system that helps ensure prints are successful and good quality.
There’s built-in Wi-Fi and an ‘AI’ camera that can detect when prints are failing, as well as when you might have accidentally left a model or some tools on the build plate.
As both K1 and K1 Max use coreXY systems, they’re just as fast as the Bambu and although quality isn’t quite up to the P1S’s level, it’s still very good.
Read our full Creality K1 Max review
4. Elegoo Neptune 4 – Best cheap 3D printer

Pros
- Fast printing
- Automatic bed levelling
- Intuitive touchscreen controller
Cons
- No Wi-Fi
- More expensive in UK than US
- Elegoo’s slicer isn’t the best
The Neptune 4 offers everything most people are looking for in a first 3D printer. It’s easy to set up, has auto bed levelling, a colour touchscreen and is pretty fast to boot.
That’s already a lot for the low price, so it’s not too surprising it doesn’t have Wi-Fi. Unlike some of the budget models here, it competes with the coreXY printers for speed thanks to an upgraded print head with much improved cooling over the Neptune 3.
It’s a shame that like the Ender 3 S1 Pro levelling isn’t completely automatic, but once you’ve adjusted the knobs, subsequent levelling is automatic.
Print quality is very good at the default 300mm speed, but it’s a good idea to use an alternative to Elegoo’s slicer which caused us quite a few headaches when prints failed.
Read our full Elegoo Neptune 4 review
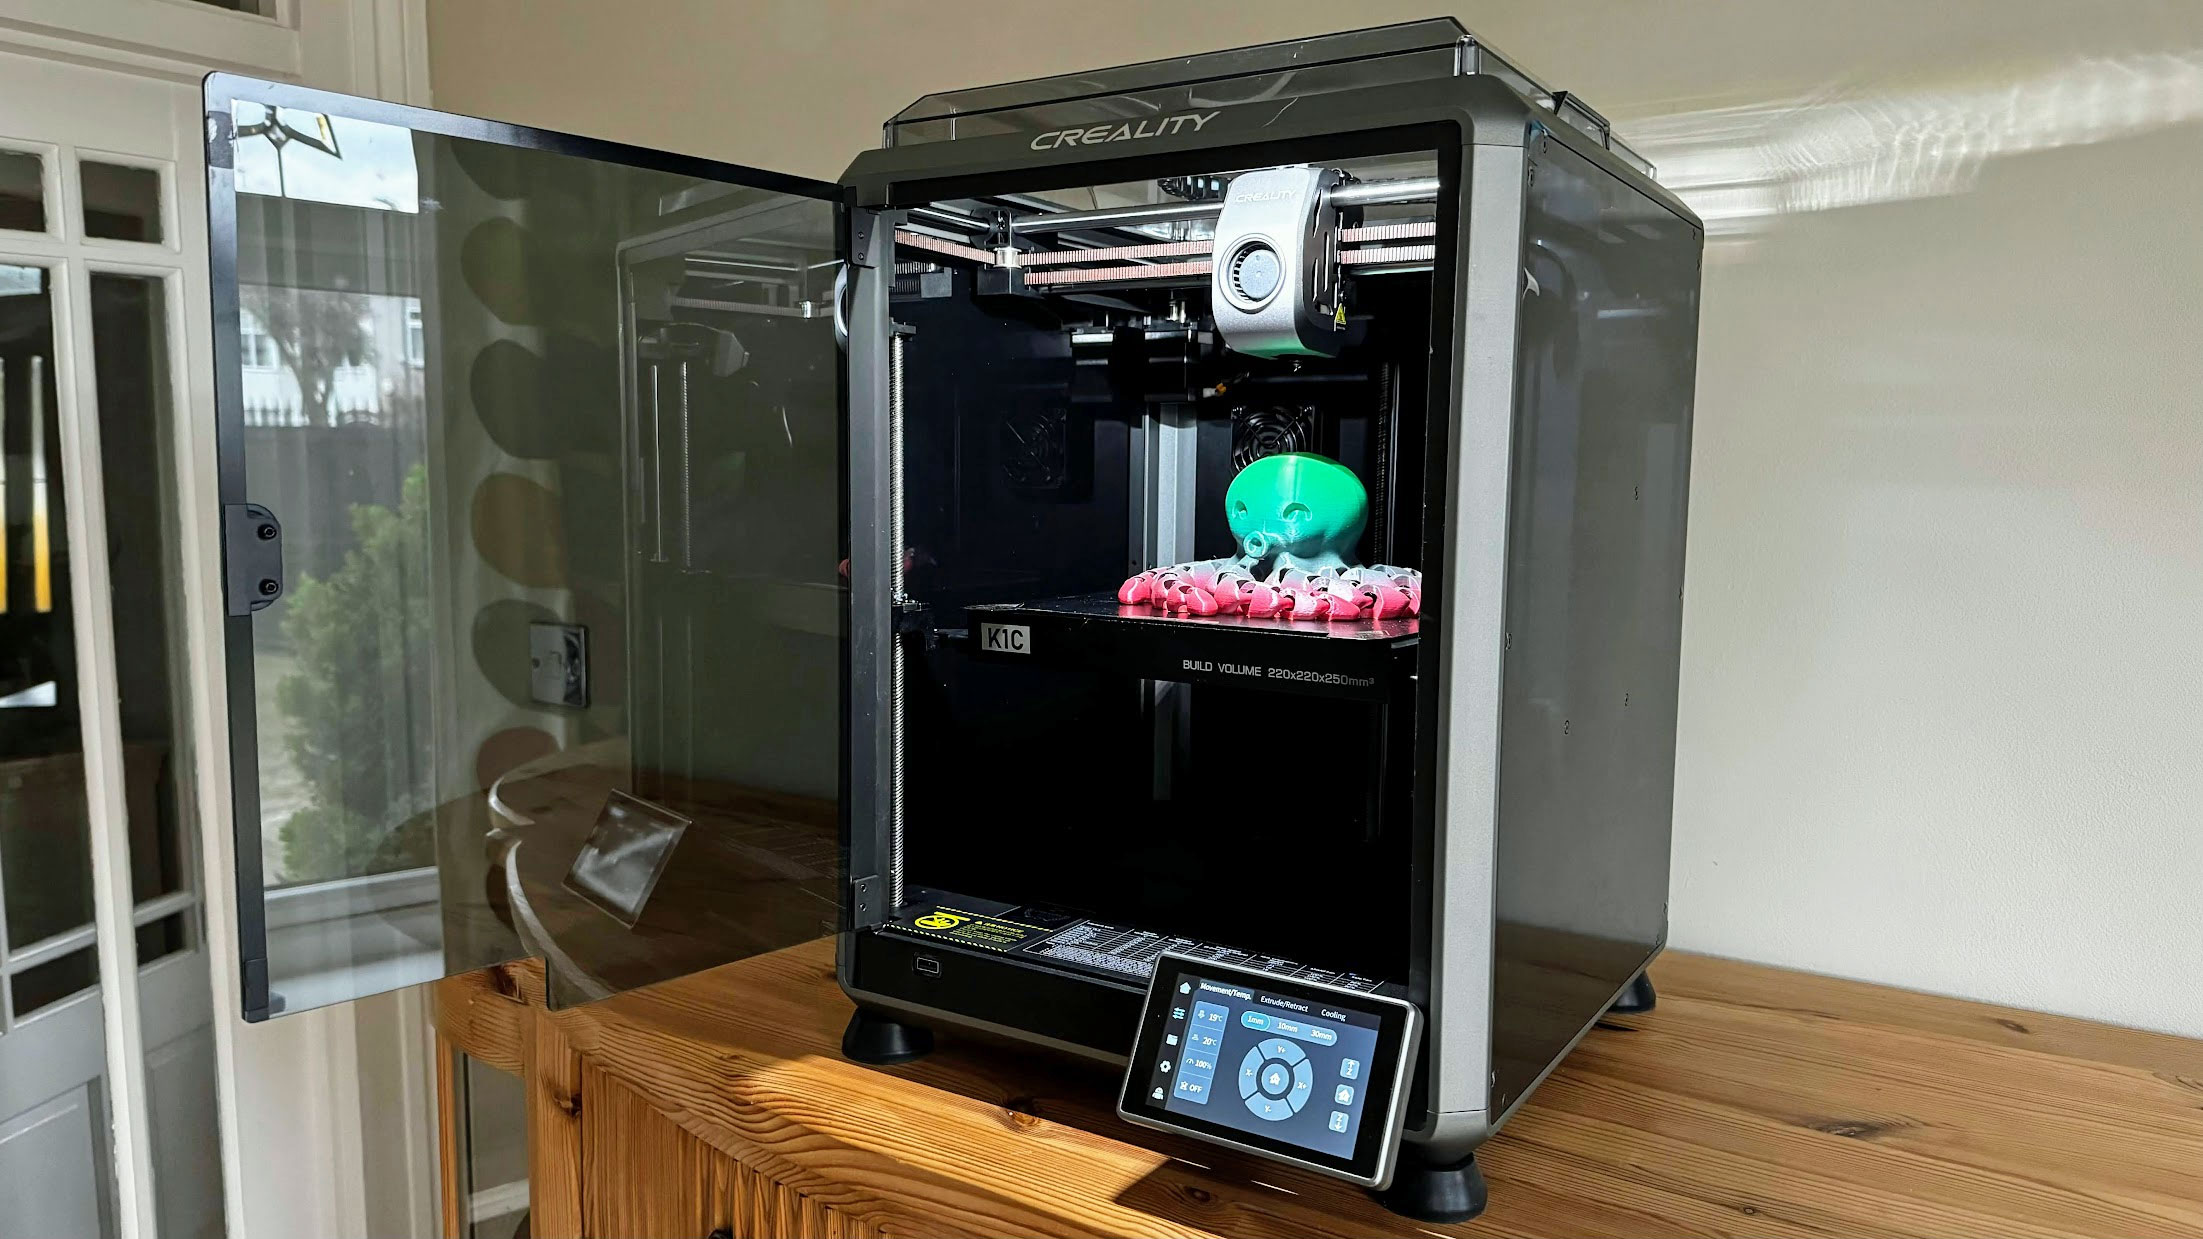
5. Creality K1C – Best for exotic filaments
Pros
- Can print carbon fibre filaments out of the box
- Can print ASA, nylon, ABS as well as PLA and PETG
- Built in camera
Cons
- Single colour printing only
- Can be very noisy
- Frustrating to change filament
The K1C can print models up to 220x220x250mm, and comes almost fully assembled. It’s fully automatic, which means there’s no need to make any manual adjustments: it prints reliably from the word go.
Effectively, it’s an upgrade of Creality’s K1 and has a hardened steel nozzle that can print abrasive filaments like carbon-fibre infused PLA and PETG. Unlike the K1 it also has a camera for monitoring print progress remotely, and it’ll detect and notify you of problems like foreign objects left on the build plate and failed prints.
The touchscreen makes it easy to use, and Creality’s desktop and mobile apps aren’t bad, although they lack the polish and ease of use of Bambu’s.
The only real limitation is that the K1C can’t print in multiple colours, but if you don’t need to do that, it’s a great choice.
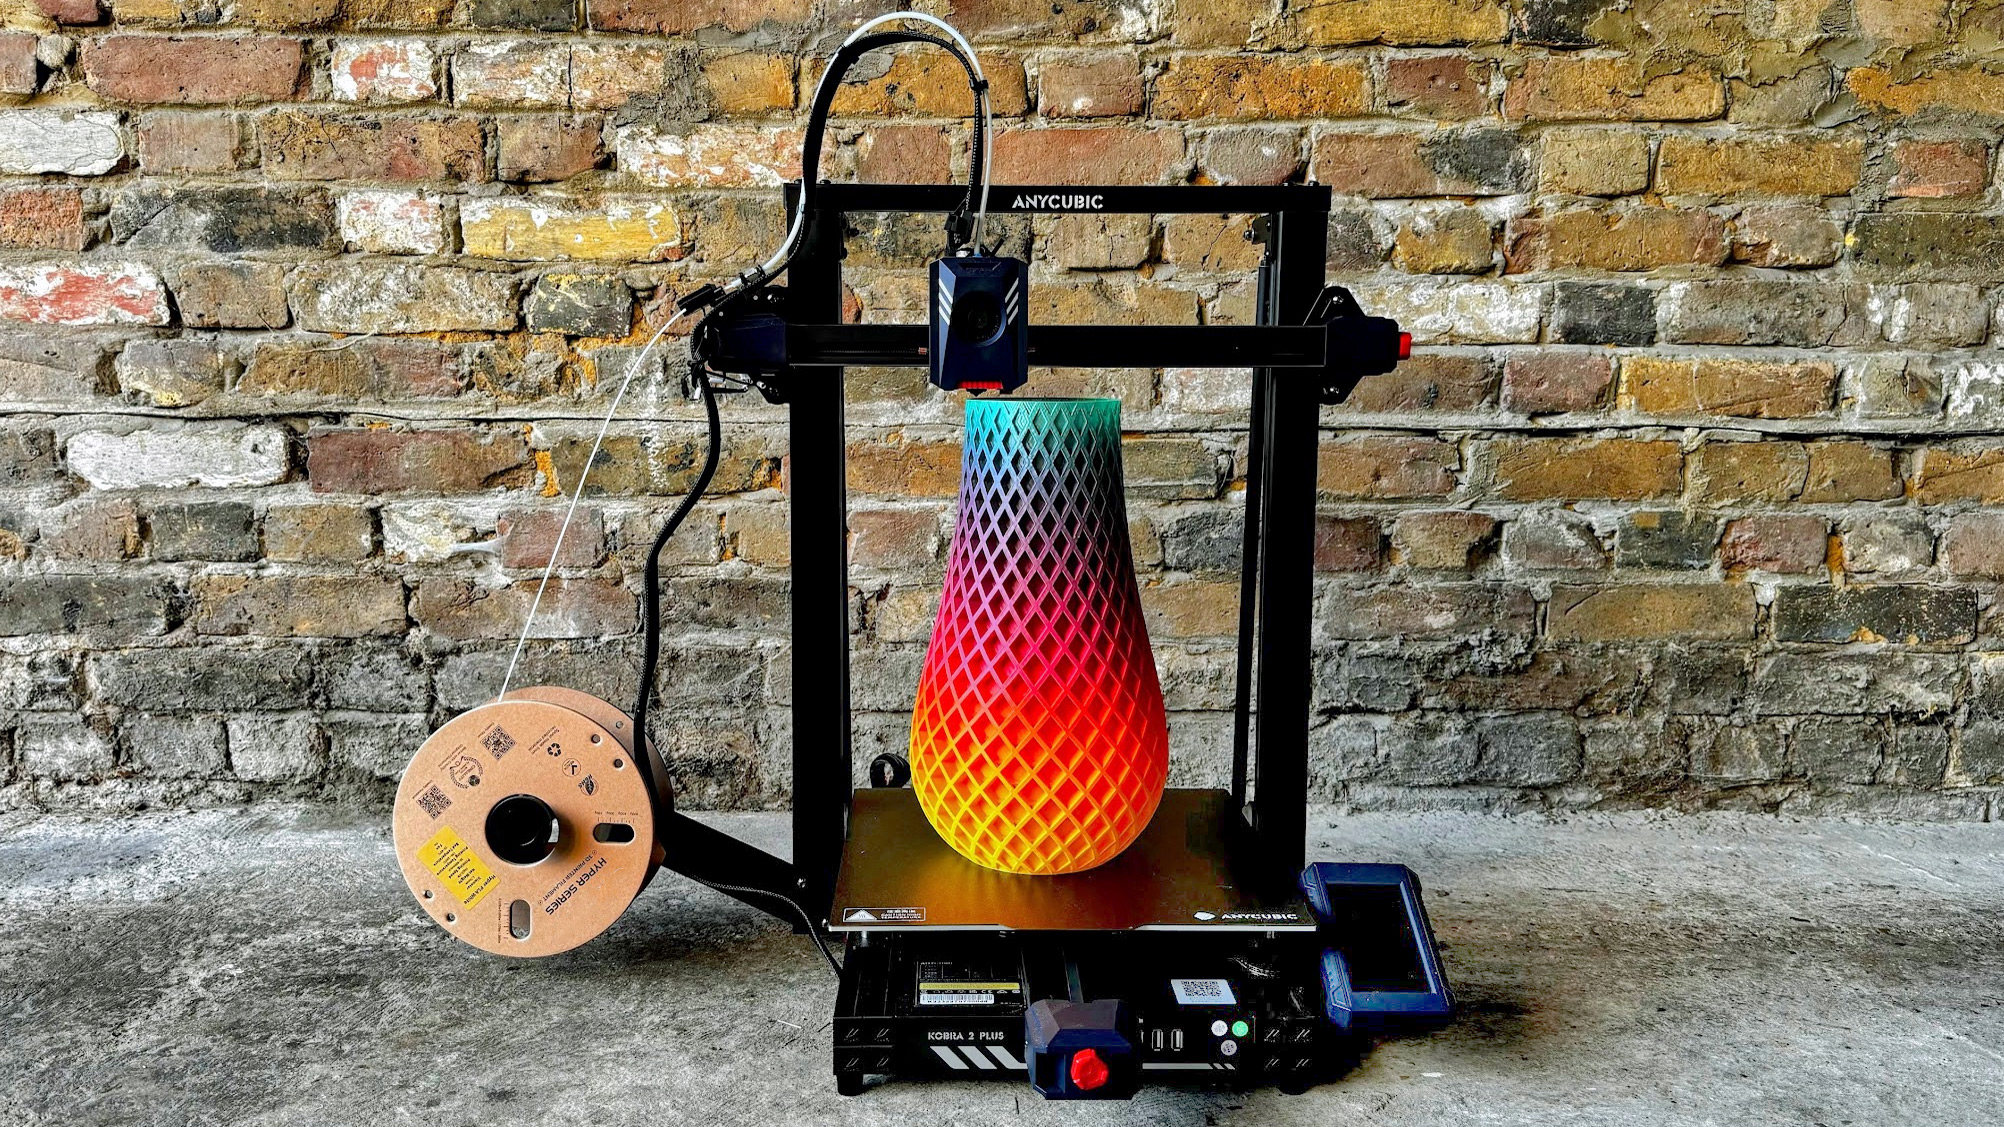
6. Anycubic Kobra 2 Plus – Best for printing huge models
Pros
- Massive build volume
- Fast
Cons
- Takes up a lot of space
- Not suitable for filaments which require an enclosure
With a build volume of 320 x 320 x 400mm (WDH), the Kobra 2 Plus can print very large models. If that’s not enough, there’s also the Kobra 2 Max with an even larger 420 x 420 x 500mm volume.
It’s a bed slinger, which means the build plate moves backwards and forwards. In turn, this means you need quite a lot of desk space for the Kobra 2 Plus. It’s fast and capable of good print quality, and is pretty easy to use thanks to automatic bed levelling, vibration compensation and a colour touchscreen.
Read our full Anycubic Kobra 2 Plus review
7. Creality 3D Ender 3 S1 Pro
Pros
- Great print quality
- Almost all the features you’d want
Cons
- Auto-levelling requires manual input
- Slow by today’s standards
The S1 Pro is really a budget 3D printer but it’s more expensive than the cheapest because it has had all the bells and whistles thrown at it.
There’s the Sprite direct drive print head with dual metal gears for reliable extrusion. It’s capable of heating to 300C, so you can print with a wide range of filaments. The bed goes up to 110C, too, which helps prints adhere when working with more awkward types of filament.
It isn’t enclosed, though, and is a bed-slinger, so needs room in front and behind it to accommodate its range of travel. There’s a useful LED strip which is really bright, and a colour touchscreen. Its interface could be improved a bit, but it’s not bad.
Print quality is very good, but it isn’t fast. To improve it you can buy Creality’s Sonic Pad – a Klipper-based touchscreen – but this adds a lot of cost and hassle. If speed is important, choose a printer that offers 300mm/sec out of the box like the Bambu A1.
Read our full Creality 3D Ender 3 S1 Pro review
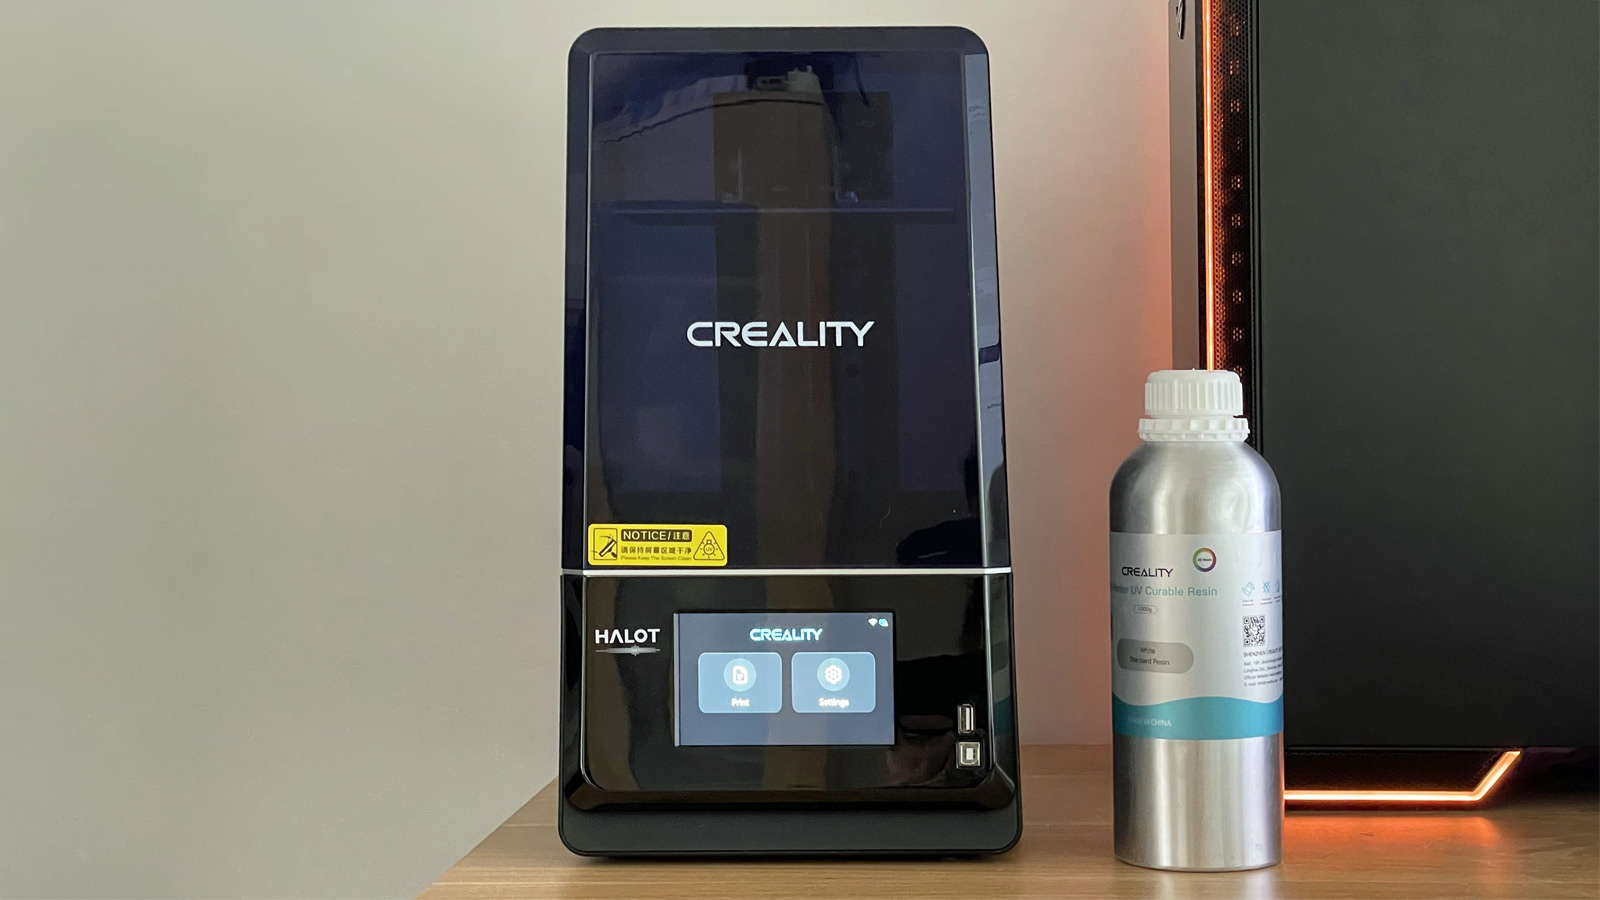
8. Creality Halot One Plus
Pros
- Easy to use & reliable
- Works with various slicers
- Great print quality
Cons
- Fan runs constantly during printing
- Requires post-printing cleanup + curing (like all resin printers)
- More expensive than some rivals
The Halot One Plus is an easy-to-use resin 3D printer that has a good-sized build volume, prints reliably and at high quality. It’s quite expensive compared to rivals, especially in the UK.
The Halot One Plus is a resin printer, so is very different to the others here. Instead of using filament on a reel, it prints using liquid resin which is cured, layer by layer, using UV light.
Build volume is smaller than the FDM printers here, but it’s still relatively large for a resin printer, and the screen’s high resolution means models have lots of fine detail.
The Halot One Plus printed ultra-reliably in our tests, but if you are keen on a resin printer, bear in mind that you have to clean up prints afterwards, which usually means buying a separate washing and curing device that looks a lot like a resin printer and takes up the same amount of desk space.
Read our full Creality Halot One Plus review
Buyer’s guide
Here are the key things you should look out for when choosing a 3D printer.
Automatic levelling
Unless the surface on which objects are printed is perfectly level, prints won’t stick to it and will fail sooner or later.
Manual levelling is a chore you could do without, so go for a printer with auto levelling. Be careful: some printers claim to have auto levelling, but rely on you to do a lot of the work. Which is why it pays to read reviews as well as knowing what to look for.
Heated bed
Almost all 3D printers have them, but it’s a must have. A heated bed will help prints to stick: don’t buy a printer without one.
PEI sheet
Models can be difficult to remove from the build plate. A PEI (polyetherimide) sheet helps immensely. It’s a flexible metal sheet with a textured coating is used, and held in place with magnets. When the model finishes printing, you simply lift the sheet off, flex it and the model pops off.
Touchscreen
Some printers still use a monochrome screen with a rotary dial or buttons. This isn’t nearly as easy to use as a touchscreen. Bambu P1S (and P1P) would be much better with a touchscreen, but it’s not the end of the world with those as you can print from your PC or phone using Bambu’s apps. When a printer doesn’t have Wi-Fi (or any networking) you are stuck using the screen it comes with.
Build volume
A printer’s build volume tells you how big an object it can print. It’s wise to assume that the actual maximum volume is a bit smaller than the specifications suggest, and go for one with a slightly larger volume than the biggest object you will need to print.
It can be hard to know this, and remember that a bigger volume means a bigger printer, which you’ll need space for.
Really large models can be printed in sections and superglued (or otherwise fixed) together, so you don’t necessarily need a huge printer.
Nozzle and bed temperatures
Most people print using PLA, the most common type of filament. It’s easy to work with, strong and durable.
All 3D printers have nozzles that go up to the 220°C or so that PLA requires. But if you want to print with ABS, PETG or another type that needs high temperatures, be sure to opt for a printer that can go up to around 300°C. But see Enclosure below, too.
Similarly, watch out for heated bed temperatures. Some won’t go beyond 80°C, but you’ll need 100°C or more for successful ABS prints.
Enclosure
Some materials such as ABS, ASA, polycarbonate and nylon need carefully controlled ambient temperature to prevent them from warping while printing. If you need to use these – perhaps because you want to print models that can survive exposure to sunlight, then look for an enclosed printer – essentially a self-contained box.
Run-out sensor
With large models taking many hours to print and the fact that you can’t always know if there’s enough filament left on the reel to complete it, a run-out sensor can be a life saver. It does it what it says: detects when the filament runs out and halts printing automatically, allowing you to load a new reel and carry on printing.
Without one, the filament could run out and the printer will carry on printing thin air, and you’d be none the wiser.
What’s the best 3D printer for beginners
The Bambu A1 is an excellent choice for beginners. It’s relatively affordable and is very easy to use because it handles so many things automatically. It’s also fast and offers top notch print quality.
How much does a beginner 3D printer cost?
Printers start from as little as $130 / £130, but you may want to spend more to get a better model with more features, faster speeds and better print quality. There are a lot of great printers under $500 / £500.
What type of 3D printer is best?
The most common type is FDM (printers that use filament on a spool), but the absolute best quality is from SLA printers, which use resin and are capable of printing much finer detail. There are lots of pros and cons of each type, but put simply, resin printers are best for small, intricate figurines, while filament printers are best for printing things that are useful around the home as well as models that hinge or articulate.
Is it cheap to use a 3D printer?
Spools of filament typically weigh 1kg and cost from $15 / £15 to $30 / £30. It’s therefore the weight of the model that matters most, not the size. So-called slicing software turns a 3D model into instructions a 3D printer can understand, and you can adjust the settings to save weight by minimising the amount of infill. Sometimes it’s cheaper to print your own parts, but sometimes you might find it’s cheaper to buy pre-made plastic things than to 3D print them.
Are 3D printers good for beginners?
3D printing is much easier than it used to be thanks to modern printers that automate a lot of the fiddly things like bed levelling. They can also compensate for vibrations, resume printing after a power cut or when the filament runs out. The difficult part is designing your own models to print, but there are thousands of pre-made models available online to download free.
Author: Jim Martin, Executive Editor, Tech Advisor
Jim has been testing and reviewing products for over 20 years. His main beats include VPN services and antivirus. He also covers smart home tech, mesh Wi-Fi and electric bikes.
Recent stories by Jim Martin:
- Creality K1C review
- Bambu A1 review
- Bambu A1: a full-size bed slinger 3D printer
