At a glance
Expert’s Rating
Pros
- Fast printing (relatively!)
- Automatic bed levelling
- Intuitive touchscreen controller
- Good for beginners
Cons
- No Wi-Fi
- More expensive in UK than US
- Unreliable Elegoo slicer software
Our Verdict
The Neptune 4 offers everything most people are looking for in a first 3D printer. Just don’t use Elegoo’s buggy slicer software.
Best Prices Today: Elegoo Neptune 4
There are so many 3D printers, especially budget ones, that it can be hard to know where to start if you’re a beginner. There’s so much more to think about than a “2D” printer. In fact, it’s best to consider a 3D printer a completely different breed from the inkjet or laser you might already have at home.
It might be tempting to take the tried-and-tested route and buy a Creality Ender 3 of some description. However, Elegoo’s Neptune 4 is certainly a worthy alternative. It makes it easy to get started with 3D printing, with a simple setup process, a good turn of speed and impressive results.
But is that enough to make it the go-to 3D printer for beginners? I spent a few weeks using it to find out.
Setup
- Relatively straightforward assembly
- All tools included
- Takes around 30 minutes
As with any 3D printer, you’ll need to finish bolting the Neptune 4 together once it arrives. Elegoo includes instructions in the box, but they’re confusing to follow, particularly if you’ve never set up a 3D printer before.
Instead, I’d recommend watching the official YouTube tutorial , which takes you through it step-by-step. Everything you need for assembly is included in the box, including Allen keys.
Like pretty much every rival, it’s a case of attaching the gantry frame to the base, then adding the touchscreen controller and connecting everything up. It’s also important to check the input voltage matches what will come out of your plug sockets – a switch on the back lets you choose between 115V and 230V.
Before printing anything, you’ll also need to make sure the bed is level. The Neptune 4 has automatic bed levelling, but it’s not completely automatic, which is weird considering the Neptune 3 was. First, you must do manual “auxiliary” levelling when you first set it up. It’s fairly straightforward – you’ll just need a piece of A4 paper and to adjust the bed screws – but it feels quite backward compared to all the fixed-bed 3D printers out there. Saying that, it’s the same sort of system the Creality Ender 3 S1 Pro uses, and that’s more expensive.
If this is your first time setting up a 3D printer, you can expect the full process to take around 30 minutes.
Features & Design
- Functional design
- Temperature-controlled bed and nozzle
- Useful touchscreen controller
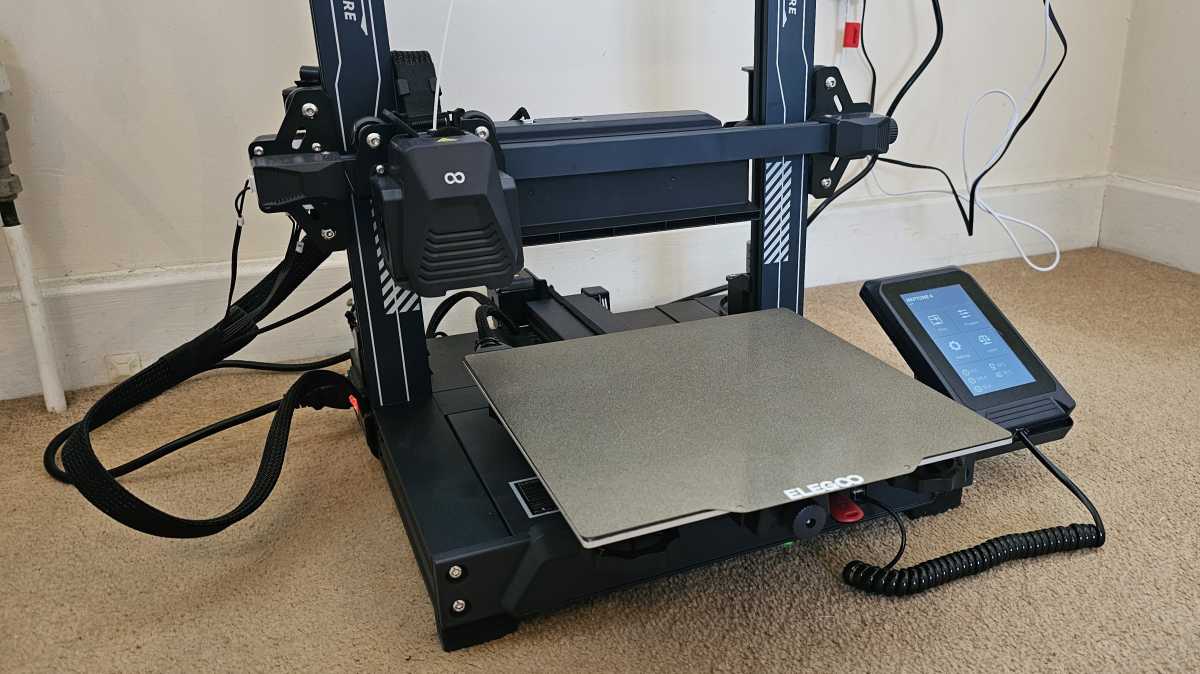
There are plenty of impressive things about the Neptune 4, but aesthetics isn’t one of them. Elegoo has opted for a very functional design here, which makes sense given its affordable price point.

Anyron Copeman / Foundry
It looks quite similar to the Anycubic Vyper , another budget 3D printer, but there are a few key differences. One is the position of the filament above the vertical frame, rather than off to the left side. This mean the Neptune 4 needs less desk space, but it’s still a bed-slinger. With this design the print bed moves backwards and forwards, while the print head moves only side to side, and it means you need more depth than you might imagine: you can’t shove it up against the wall.
Dual leadscrews on the z-axis (that’s up and down for the uninitiated) help ensure the print head remains level across the width of the bed, something that helps ensure the all-important first layer prints properly. The temperature of both the bed (or build plate) and nozzle can easily be controlled (up to 300°C for the nozzle and 110° for the bed), which is great to see on such an affordable printer.
The build plate itself measures 225 x 225mm, which is far from the biggest, but still enough for a lot of prints. They can be up to 265mm tall.
Anyron Copeman / Foundry
Even at 150%, most prints took up less than half of the total area. However, do note that you can rarely use the full extent of the bed, so have a think about the size of any objects you’d want to print as there are alternatives with bigger build volumes, up to around 300mm cubed. Bigger build volumes mean bigger printers, so bear that in mind too.
The textured build plate is made out of spring steel, which makes it easy to remove prints as you can lift the whole thing off the printer and flex it in your hands. Being magnetic ensures the build plate stays in place while printing.
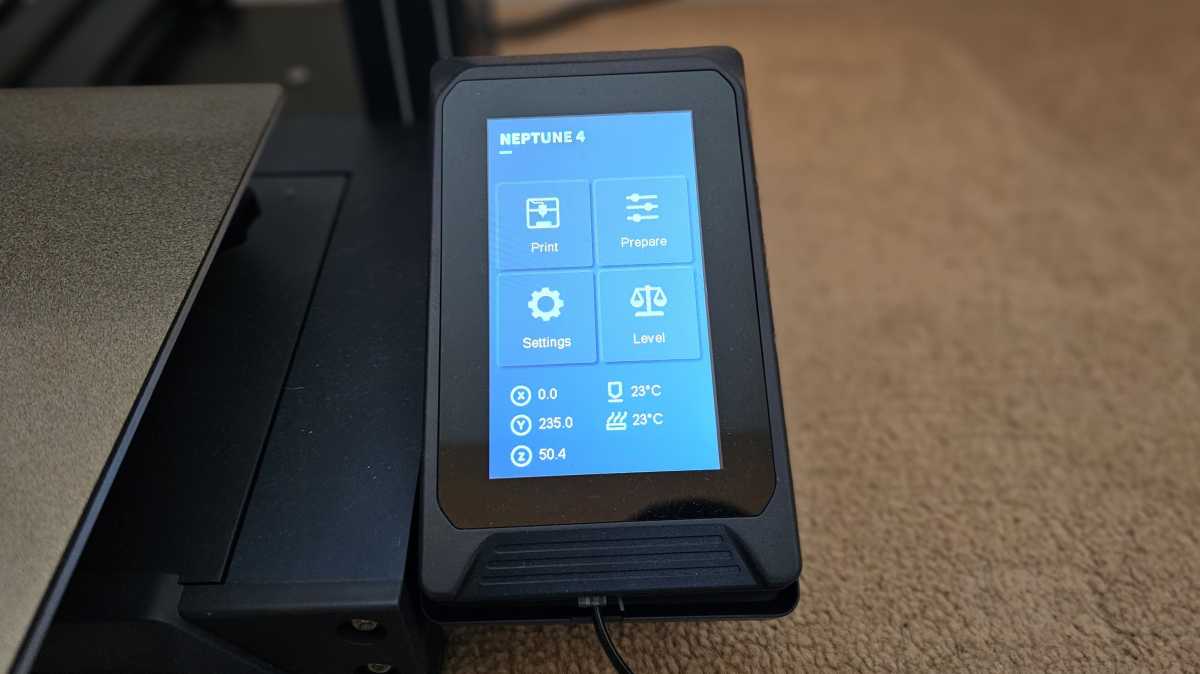
All the printer’s main settings are accessed via a 4.3in touchscreen. It’s docked in a base attached to the right side, but can easily be removed if visibility becomes an issue. However, it isn’t wireless: it needs to connected via a curly landline-style cable at all times.
Anyron Copeman / Foundry
The touchscreen runs the traditional Marlin firmware. It’s very easy to use, even for total beginners, but there aren’t that many features here. The Neptune 4 supports Klipper (which enables faster print speeds), but Elegoo decided not to include the more capable KlipperScreen firmware here.
If you do want to access Klipper, you’ll have to plug the printer directly into your router via ethernet, as there’s no Wi-Fi support. But for beginners, there’s no need to worry about this: you can still print the same stuff regardless.
Most people won’t print over a network with the Neptune 4 and instead pop prints onto a USB stick. There’s a slot for a microSD card and USB-C, both of which can be used to import G-Code files from your computer.
Performance
- Claimed speeds up to 500mm/s
- Generally fast and reliable
- Problems with Elegoo slicer software
The main reason to buy the Neptune 4 is because of its fast print speeds. Elegoo claims a maximum of 500mm/s, but even the recommended 250mm/s is a lot quicker than most budget 3D printers. That’s the setting I used for the majority of my testing time, and the results were generally impressive.
On the included 8GB USB stick, you’ll find a selection of prints that have already been sliced for you. A flowerpot and tool holder both looked great, but pre-sliced models are rarely a good test of a printer.
Much of the time, you’ll download a 3D model as an STL file. This needs to be “sliced” into G-Code files that can be read by the printer, and for that you’ll need slicer software. Elegoo recommends using its own version of the popular Cura slicer app. If you do that, it’s easy to use with the Neptune 4 because its profile can be selected: you don’t have to enter its build volume and other settings manually.
Despite checking all the settings were in order, printing using Elegoo Cura was annoyingly hit-and-miss.
Anyron Copeman / Foundry
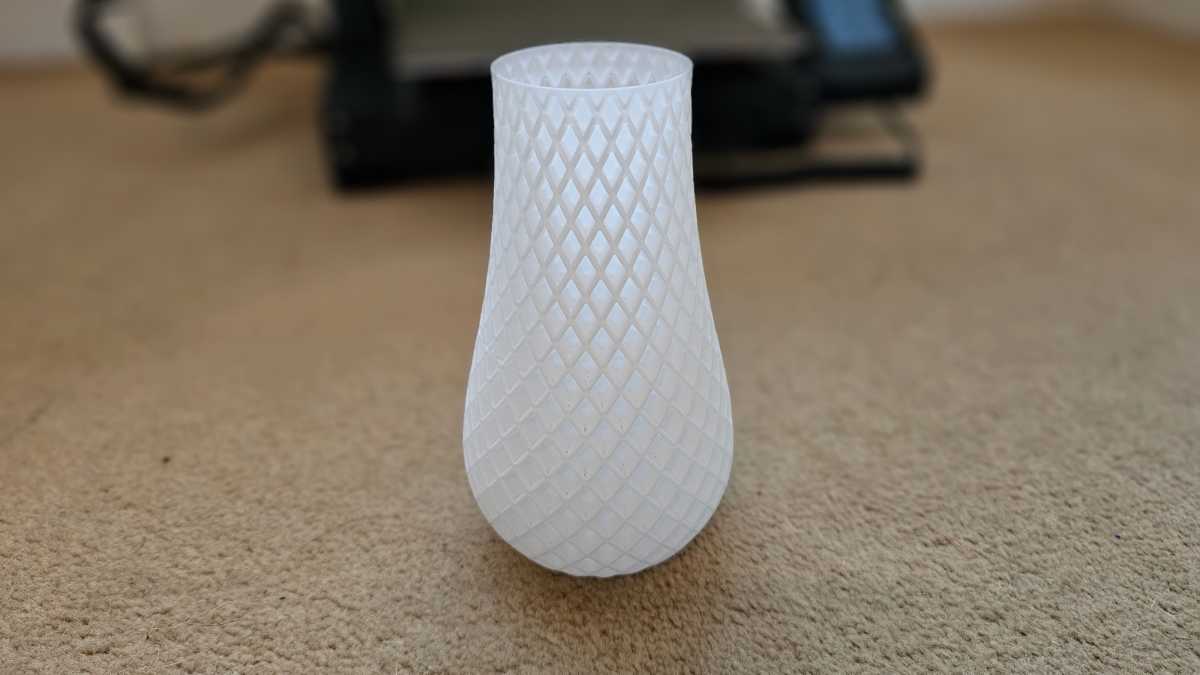
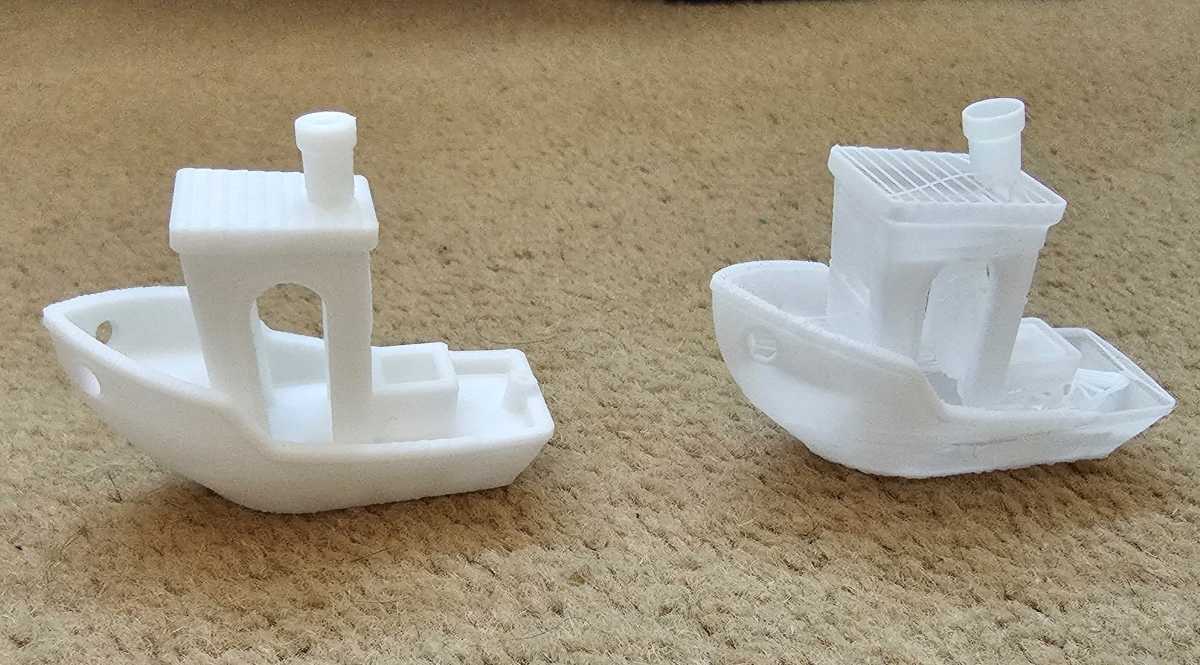
With the spiralize setting enabled, the Neptune 4 printed this vase flawlessly. The articulated axolotl was even more impressive – each individual joint was faithfully recreated, even without a brim.
Anyron Copeman / Foundry
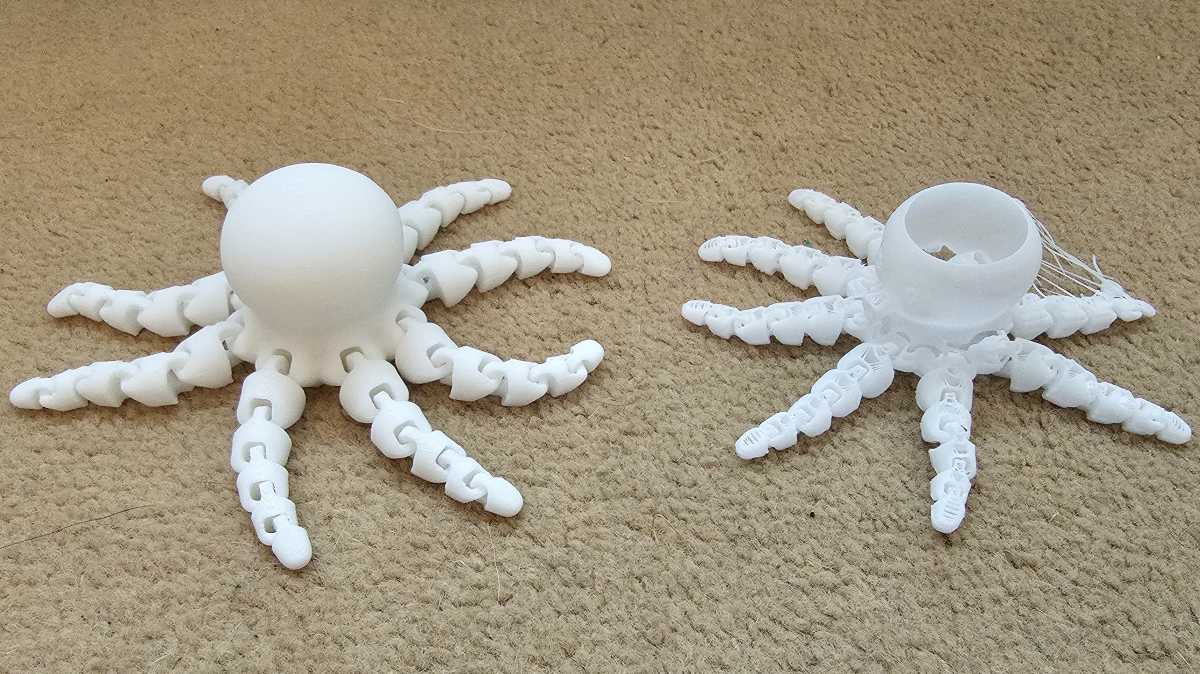
However, there were some bizarre failures with other models. The classic 3DBenchy was a total mess (below right), suffering from what appeared to be extreme under-extrusion. But the mini octopus (above right) was even worse, despite the software showing a preview that looked absolutely fine.
Anyron Copeman / Foundry
Was this a major hardware issue that means no-one should buy the Neptune 4? Fortunately not. Swapping Elegoo’s slicer software for the official Ultimaker version of Cura instantly fixed the problems (the Benchy and octopus on the left in the photos above were sliced using Ultimaker Cura). There’s no Neptune 4 profile there, but I discovered it was possible to select the Neptune 3 and adjust the print speed.
Since making that change, everything I’ve tried has printed without any issues. It’s possible that a specific combination of settings or future update will fix the issues on Elegoo Cura, but it’s nice to know that there wasn’t anything wrong with the printer itself.
As well as PLA you can also use ABS, TPU, PETG, Wood, Marble and Nylon, making the Neptune 4 impressively versatile. In theory. I tested the Neptune 4 using a spool of 1.75mm white PLA filament, which was all Elegoo supplied me with.
Price & Availability
Considering everything, the Neptune 4 is good value for money.
However, there are often deals available. And even at full price, it’s more affordable than a lot of 3D printers out there. The Neptune 4’s most obvious rival is the Anycubic Vyper ($359, approx £320), but the Elegoo model is still quite a bit cheaper in the US. Plus, the Vyper is much slower.
Should I buy the Elegoo Neptune 4?
The Elegoo Neptune 4 is a great 3D printer for beginners. Setup is relatively straightforward, and it delivers consistently impressive prints across a range of different speeds and designs.
However, you’ll want to avoid Elegoo’s Cura slicer software (go for the Ultimaker version instead) and you’ll have to make do without luxuries such as Wi-Fi which would make it simple to print direct from a laptop or PC.
But at this affordable price, it’s hard to complain. It offers the sort of high speeds you get from Creality’s K1 or a Bambu P1P at a fraction of the price – and that’s what makes it so good for beginners.
Best Prices Today: Elegoo Neptune 4
Author: Anyron Copeman, Mobile Editor, Tech Advisor

Anyron is Mobile Editor at Tech Advisor, where he’s been a mainstay of the editorial team since 2019. In his current role, Anyron is responsible for all smartphone, tablet and mobile network coverage on the site. A BA Journalism graduate, he has experience with a wide range of consumer tech products and services, including smartphones, tablets, foldables, wearables and more.
Just a few years ago, 3D printing was a hobby for geeks and nerds. It was difficult, frustrating and slow.
Fast forward to 2024, and that has all changed completely. Now, you can buy – for a very reasonable sum – a printer that works out of the box, doesn’t require hours of tweaking and adjusting and prints large models in hours – not days. Small models can take mere minutes.
Since you’re reading this, you’ve probably made it past the point of wondering what on earth you’d use a 3D printer for, but if not, there are many useful tools and gadgets as well as fun things to print, all of which are available to download free from sites such as Thingiverse and Printables .
Here we’ll explain what to look for in a 3D printer and recommend what you should buy.
First, a brief word on colour: consumer 3D printers are single-nozzle devices which print one colour at a time. If you want to multicolour prints, then Bambu’s P1S Combo and A1 Combo can hold four spools of filament and change colour automatically. Multicolour prints can take a long time, though, and waste filament.
One other thing: until you’ve spent time getting to grips with a 3D modelling app such as Fusion 360 or Tinkercad , you’ll be limited to printing objects that other people have designed. There are lots of them, but if you want something bespoke, you’ll have to create it yourself.
Don’t be put off buying a 3D printer, though. Choose wisely and you’ll be rewarded with a device that can print intricate, articulated models from the off.
We’re focusing mainly on FDM (fused deposition modelling) printers here because these are the most popular type. The other type is a resin 3D printer, such as the Creality Halot One Plus, which works very differently, and are designed for printing small, intricate, solid models.
Best 3D printers 2024
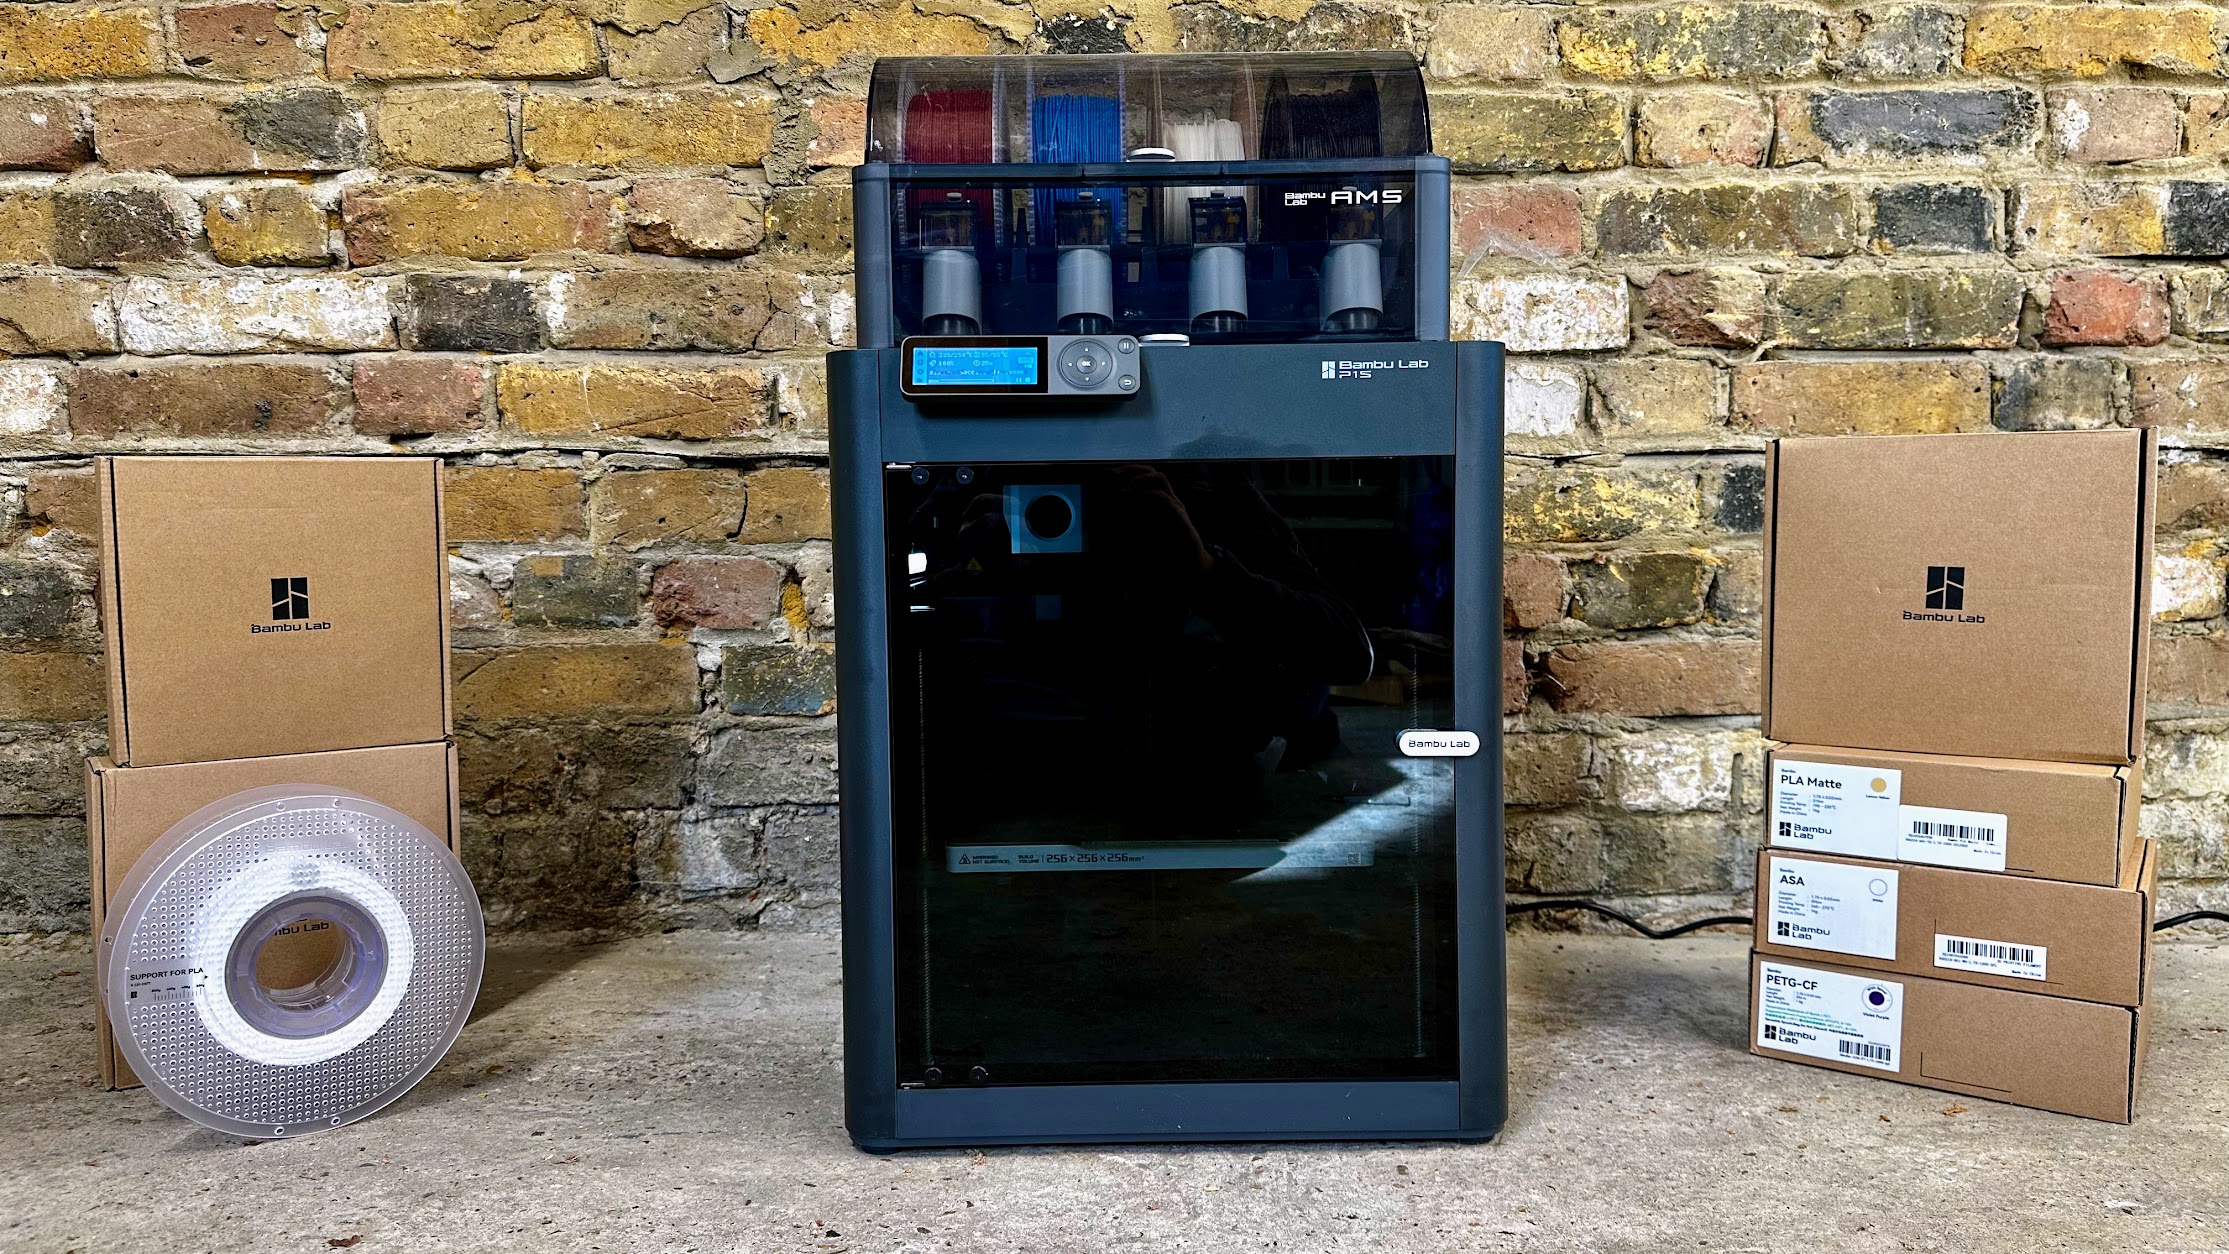
1. Bambu P1S – Best 3D printer for most people
Pros
- Excellent print quality
- Automatic colour changing
- Fast CoreXY motion system
Cons
- Basic non-touchscreen control panel
- Filament wastage can be high in multicolour printing
- No failed print detection
With so many tech products you get what you pay for. This inevitably means the “best” will also be the most expensive. It’s certainly the case here, but just because the P1S is expensive doesn’t mean it isn’t good value.
If you buy the P1S Combo, it will come with an AMS, a unit that sits on top of the printer. It holds four spools of filament and can load and unload them automatically and print in multiple colours without any assistance from you.
With only one nozzle, multicolour prints aren’t exactly fast. But the AMS also takes the pain out of changing filament when you want to print something in a different colour to the previous print.
If you don’t care about multicolour, you can buy the non-Combo version of the P1S for quite a bit less.
Overall, the P1S is a remarkably good printer. It’s really fast thanks to the use of a coreXY system, and as it’s fully enclosed it’s reliable even when printing with ASA, nylon, polycarbonate and other filament types because of the stable internal temperatures. More importantly, print quality is absolutely superb.
If there’s a downside, it’s the rubbish dot-matrix screen which seems very out of place on a printer this expensive. But, there are other ways to control the P1S, such as printing from a PC or phone via Wi-Fi. The Creality K1C is a good alternative if you must have a touchscreen, and it also has a few other features such as failed print detection.
If you just want to print with PLA, PETG and other filament types that don’t require an enclosure, take a look at Bambu’s A1 which is a lot cheaper.
Read our full Bambu P1S Combo review
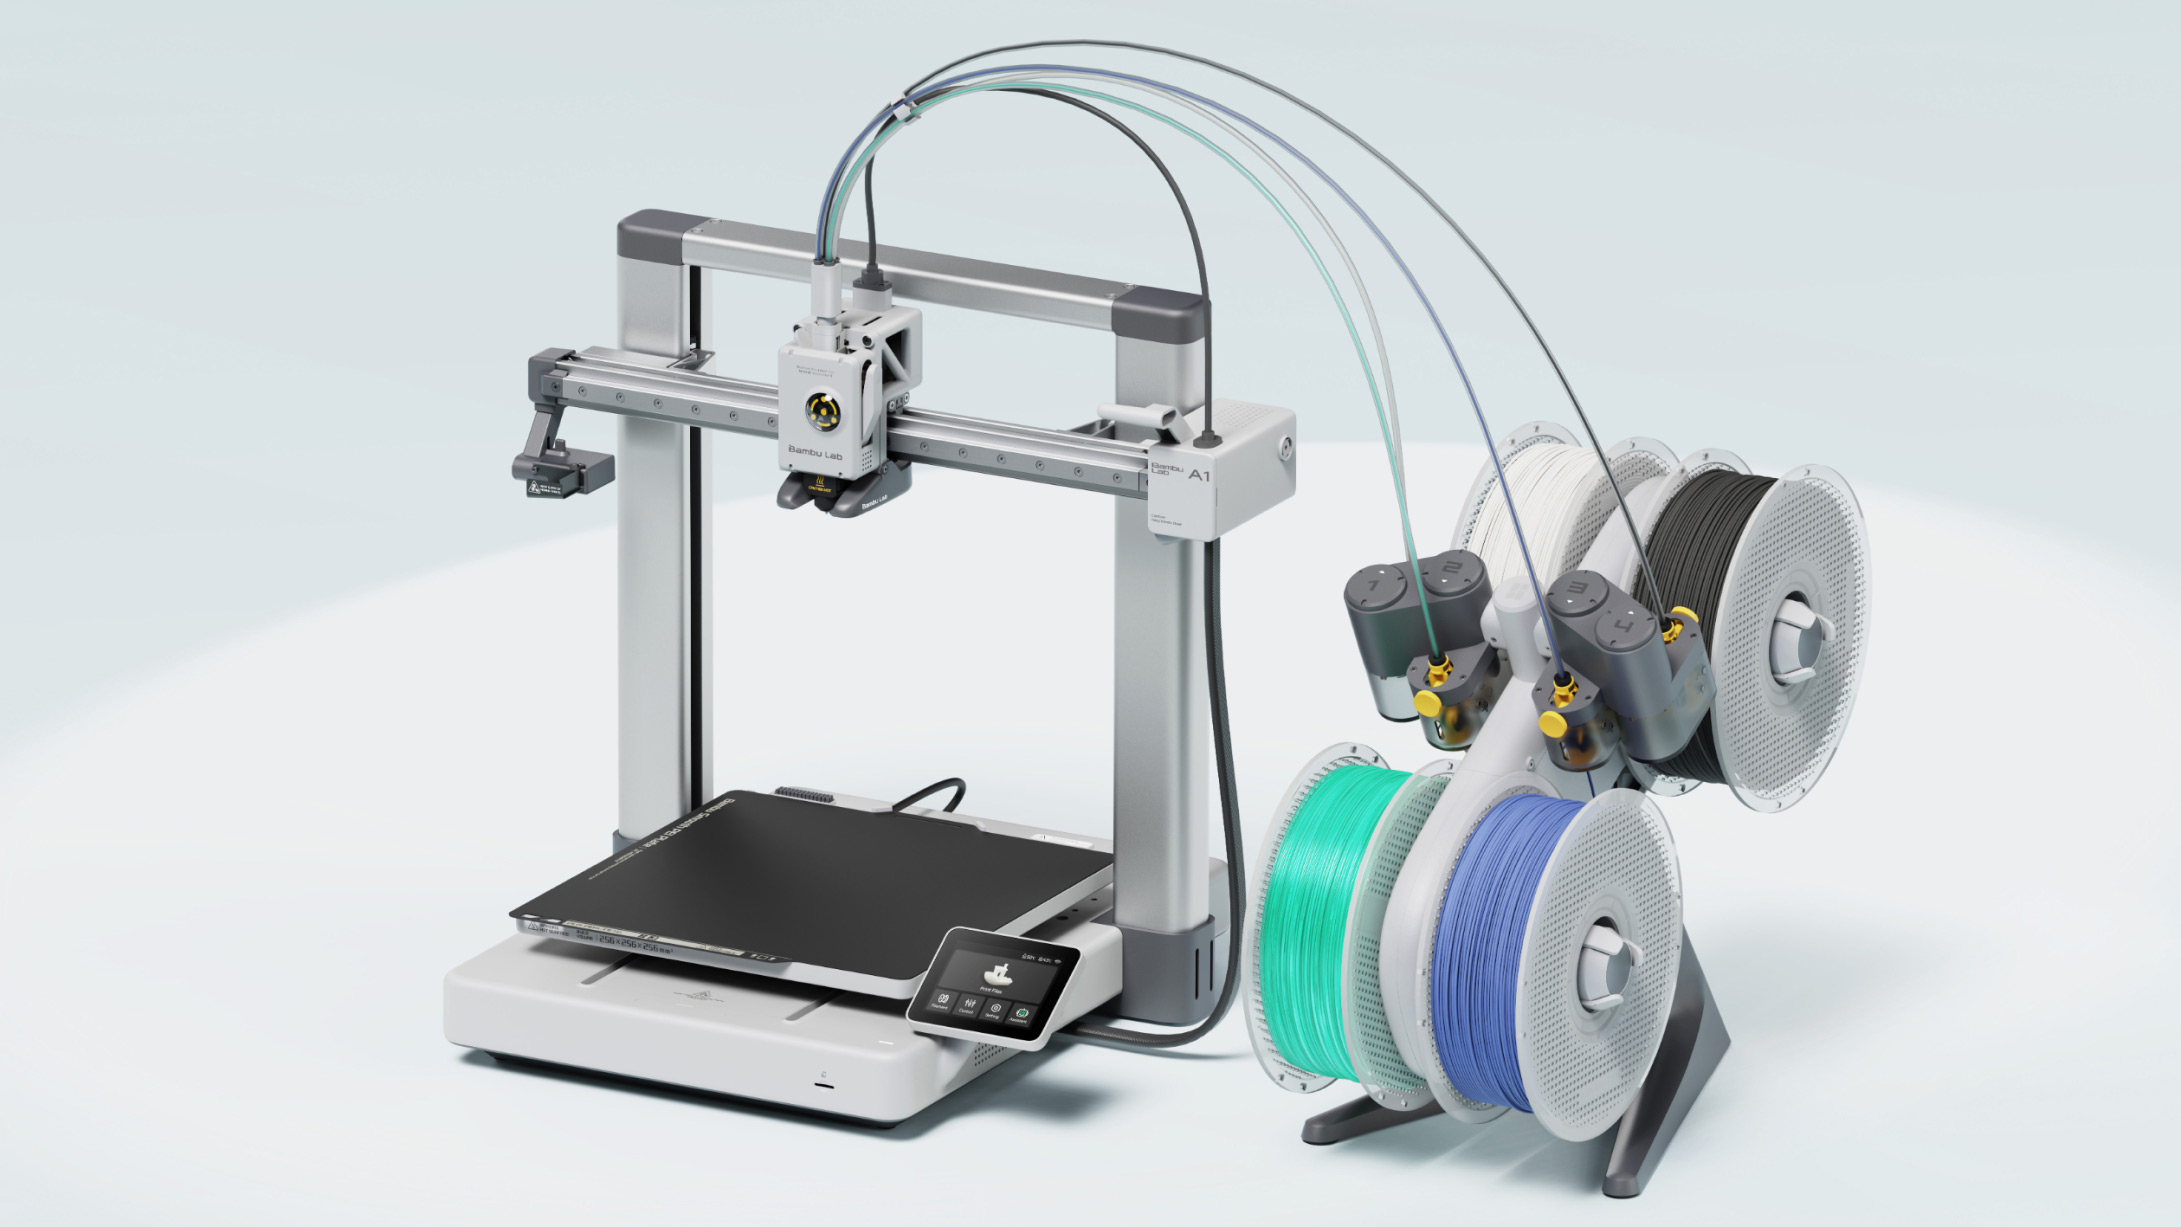
2. Bambu A1 – Best budget 3D printer
Pros
- Fast, reliable printing
- Fully automatic levelling
- Excellent value
Cons
- Doesn’t support more exotic filament
- AMS Lite adds significantly to the price
In our full review, we call the A1 “the 3D printer you’ve been waiting for”, and with good reason. It’s as close to ‘one click’ printing as you’ll get right now: it adjusts itself automatically for reliable printing and has all the features most people want, at a surprisingly affordable price. Bambu’s desktop and mobile apps are really good, too.
Like Bambu’s more expensive P1S, it can print models up to 256mm³ and you can buy the optional AMS Lite (shown to the right of the A1) for automatic multicolour printing.
The only drawback is that the A1 can’t really print nylon, ABS, ASA and other ‘exotic’ filaments because they require an enclosure. Without one, they tend to warp. The A1 can print carbon-fibre filaments if you buy Bambu’s hardened nozzle, which is very easy to fit.
Print quality, when using supported filament types, is sensational.
Read our full Bambu A1 review
3. Creality K1 Max – Best large 3D printer
Pros
- Fast, reliable printing
- Large build volume
- Fully automatic bed levelling
Cons
- Some features exclusive to Creality’s slicer
- No multi-colour capabilities
Some may say the K1 is just a poor copy of the Bambu P1S, but that does it a disservice when so many 3D printers are basically copies of each other. There are two models, the smaller K1 which is cheaper than the larger K1 Max.
The Max offers a 300x300x300 build volume, something not currently available from Bambu and it has an easy-to-use touchscreen. Bed levelling is fully automatic and it even has a LiDAR system that helps ensure prints are successful and good quality.
There’s built-in Wi-Fi and an ‘AI’ camera that can detect when prints are failing, as well as when you might have accidentally left a model or some tools on the build plate.
As both K1 and K1 Max use coreXY systems, they’re just as fast as the Bambu and although quality isn’t quite up to the P1S’s level, it’s still very good.
Read our full Creality K1 Max review
4. Elegoo Neptune 4 – Best cheap 3D printer

Pros
- Fast printing
- Automatic bed levelling
- Intuitive touchscreen controller
Cons
- No Wi-Fi
- More expensive in UK than US
- Elegoo’s slicer isn’t the best
The Neptune 4 offers everything most people are looking for in a first 3D printer. It’s easy to set up, has auto bed levelling, a colour touchscreen and is pretty fast to boot.
That’s already a lot for the low price, so it’s not too surprising it doesn’t have Wi-Fi. Unlike some of the budget models here, it competes with the coreXY printers for speed thanks to an upgraded print head with much improved cooling over the Neptune 3.
It’s a shame that like the Ender 3 S1 Pro levelling isn’t completely automatic, but once you’ve adjusted the knobs, subsequent levelling is automatic.
Print quality is very good at the default 300mm speed, but it’s a good idea to use an alternative to Elegoo’s slicer which caused us quite a few headaches when prints failed.
Read our full Elegoo Neptune 4 review
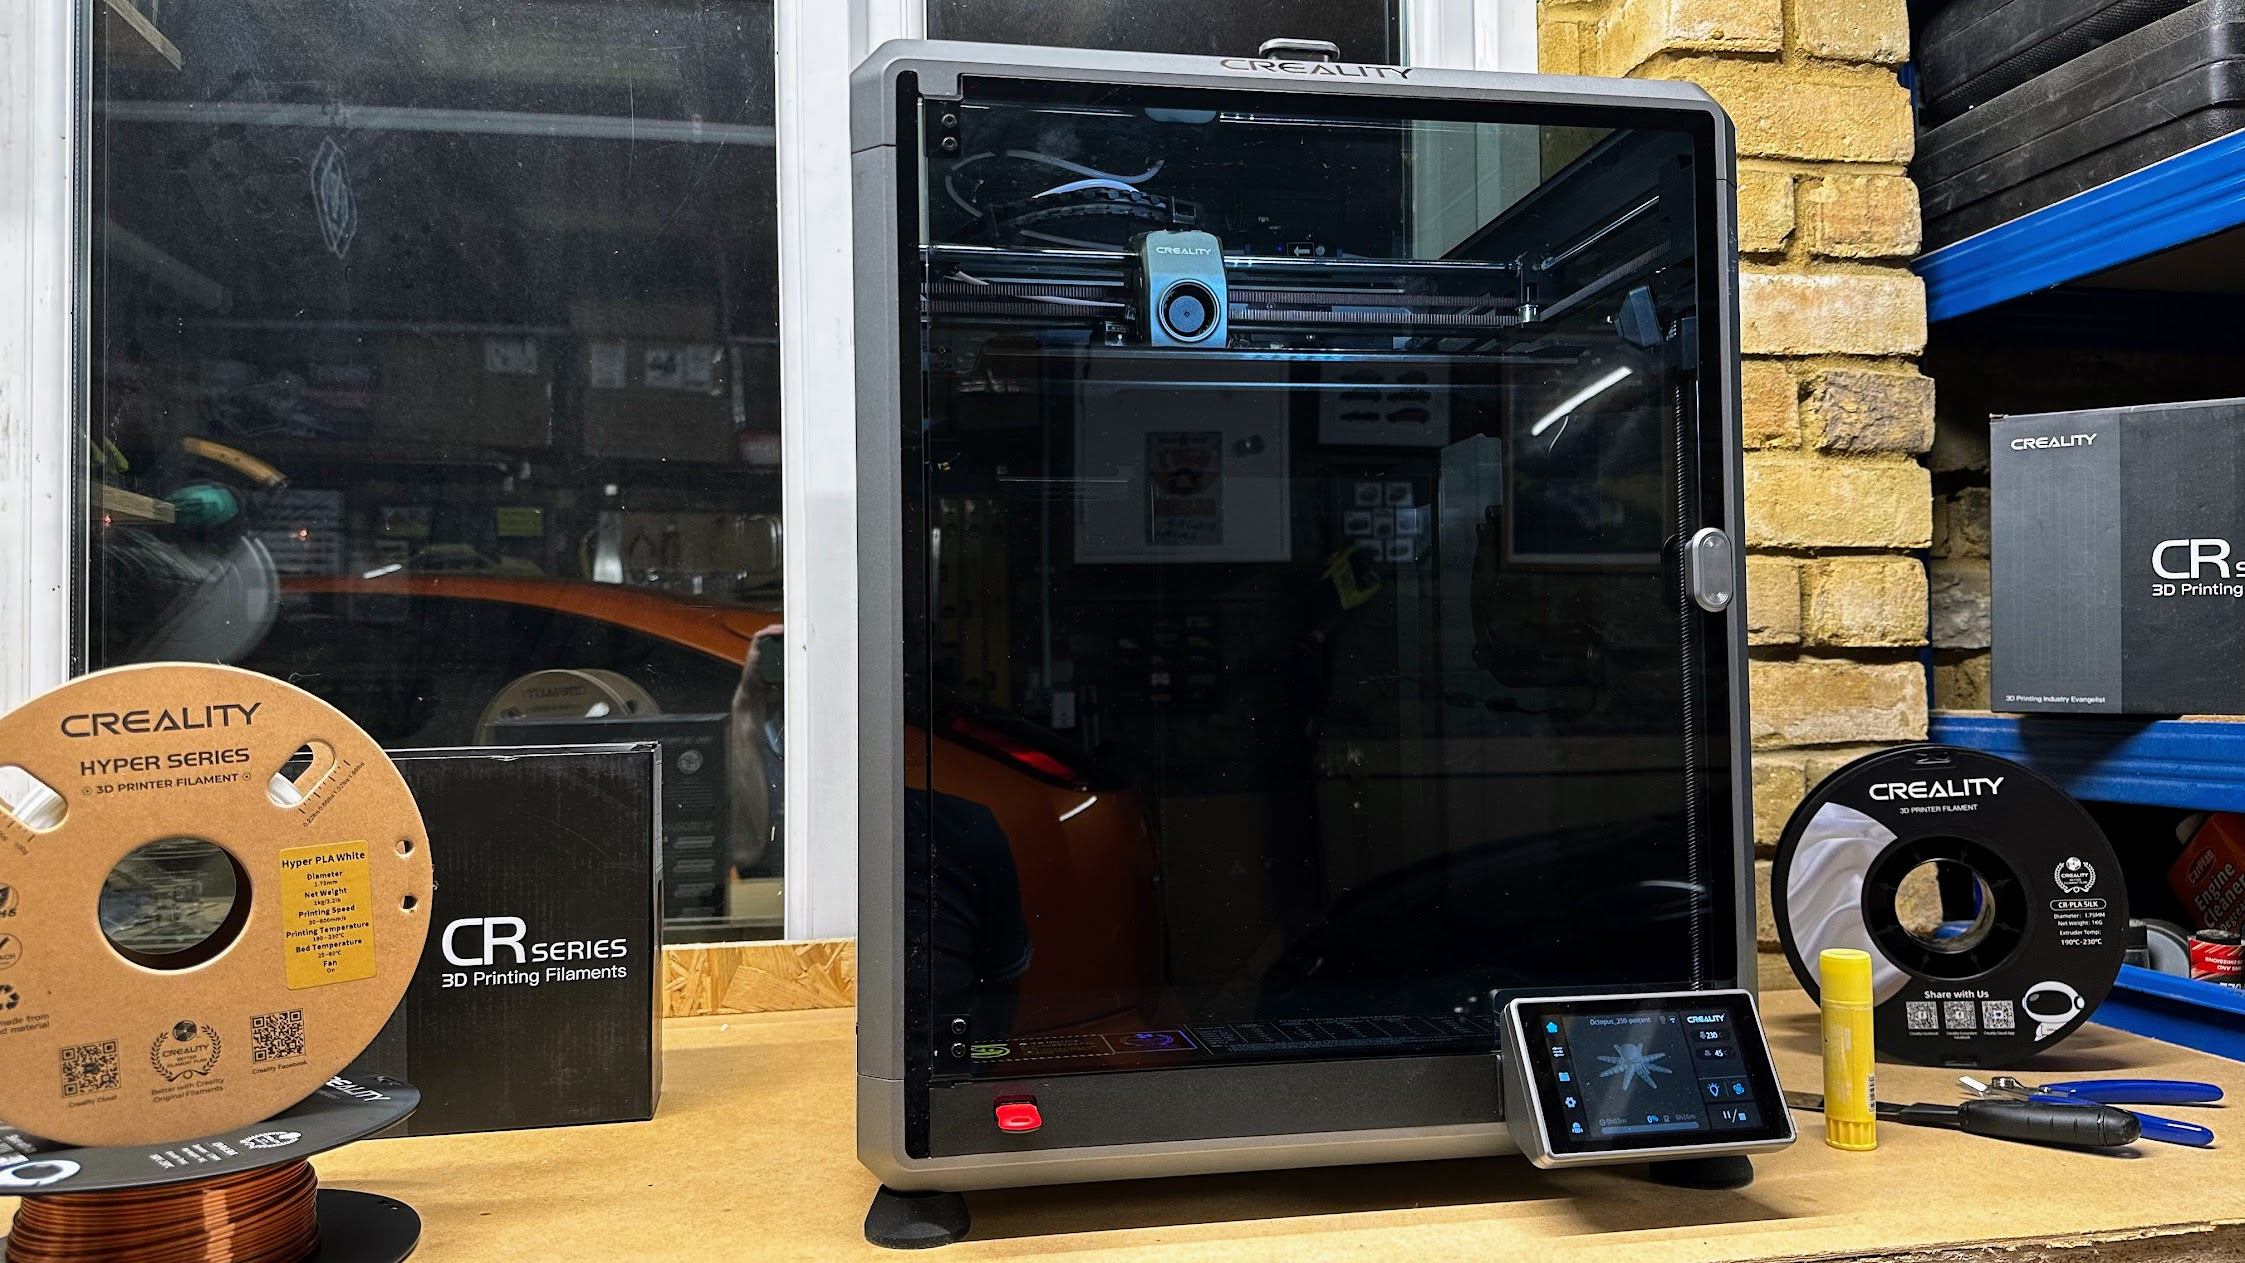
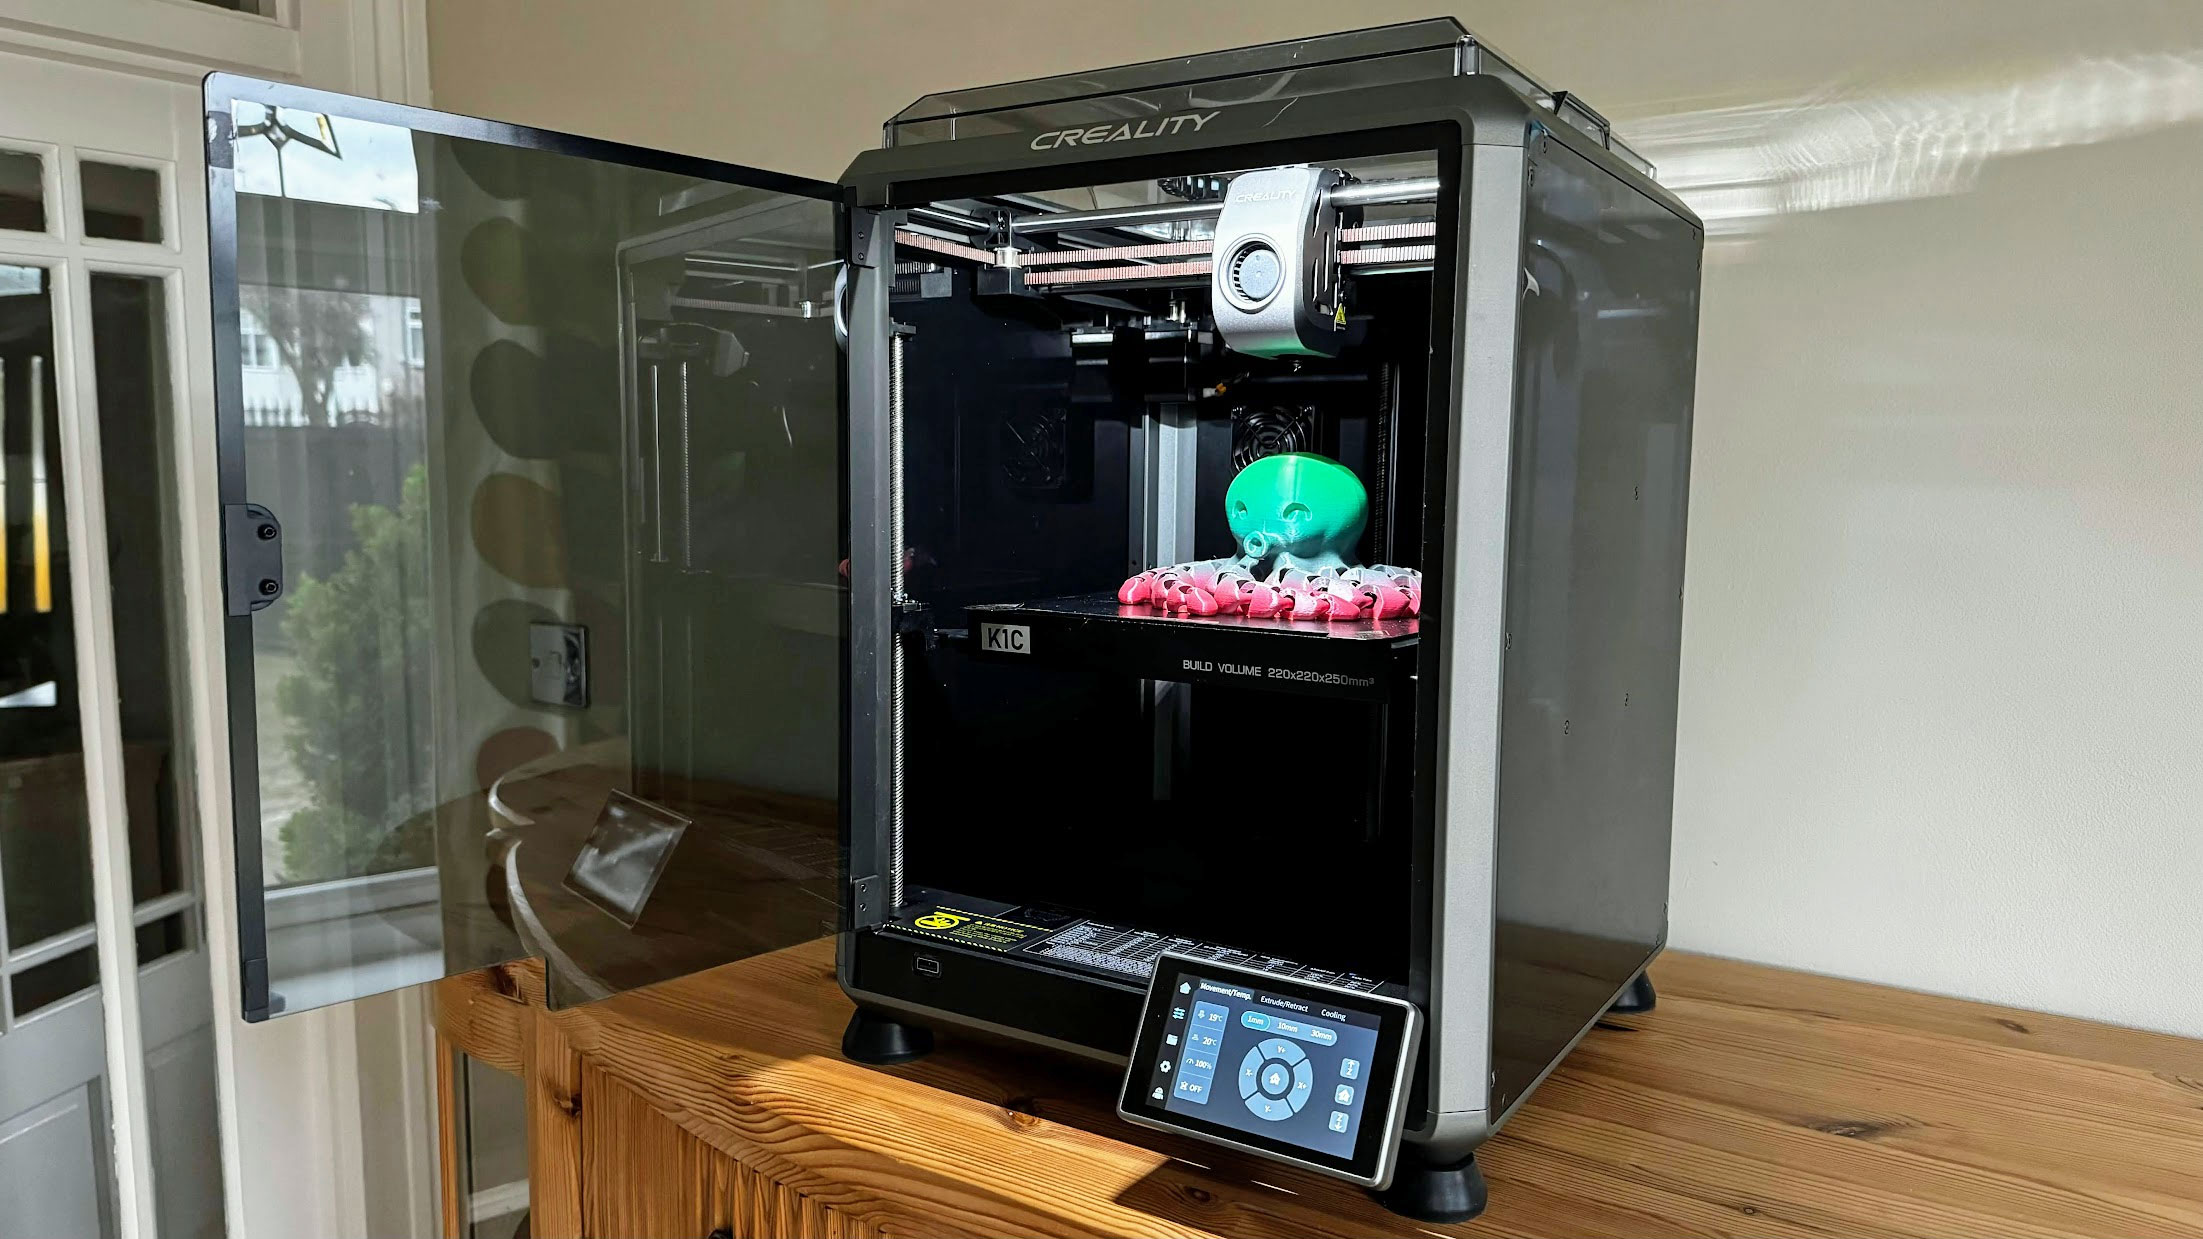
5. Creality K1C – Best for exotic filaments
Pros
- Can print carbon fibre filaments out of the box
- Can print ASA, nylon, ABS as well as PLA and PETG
- Built in camera
Cons
- Single colour printing only
- Can be very noisy
- Frustrating to change filament
The K1C can print models up to 220x220x250mm, and comes almost fully assembled. It’s fully automatic, which means there’s no need to make any manual adjustments: it prints reliably from the word go.
Effectively, it’s an upgrade of Creality’s K1 and has a hardened steel nozzle that can print abrasive filaments like carbon-fibre infused PLA and PETG. Unlike the K1 it also has a camera for monitoring print progress remotely, and it’ll detect and notify you of problems like foreign objects left on the build plate and failed prints.
The touchscreen makes it easy to use, and Creality’s desktop and mobile apps aren’t bad, although they lack the polish and ease of use of Bambu’s.
The only real limitation is that the K1C can’t print in multiple colours, but if you don’t need to do that, it’s a great choice.
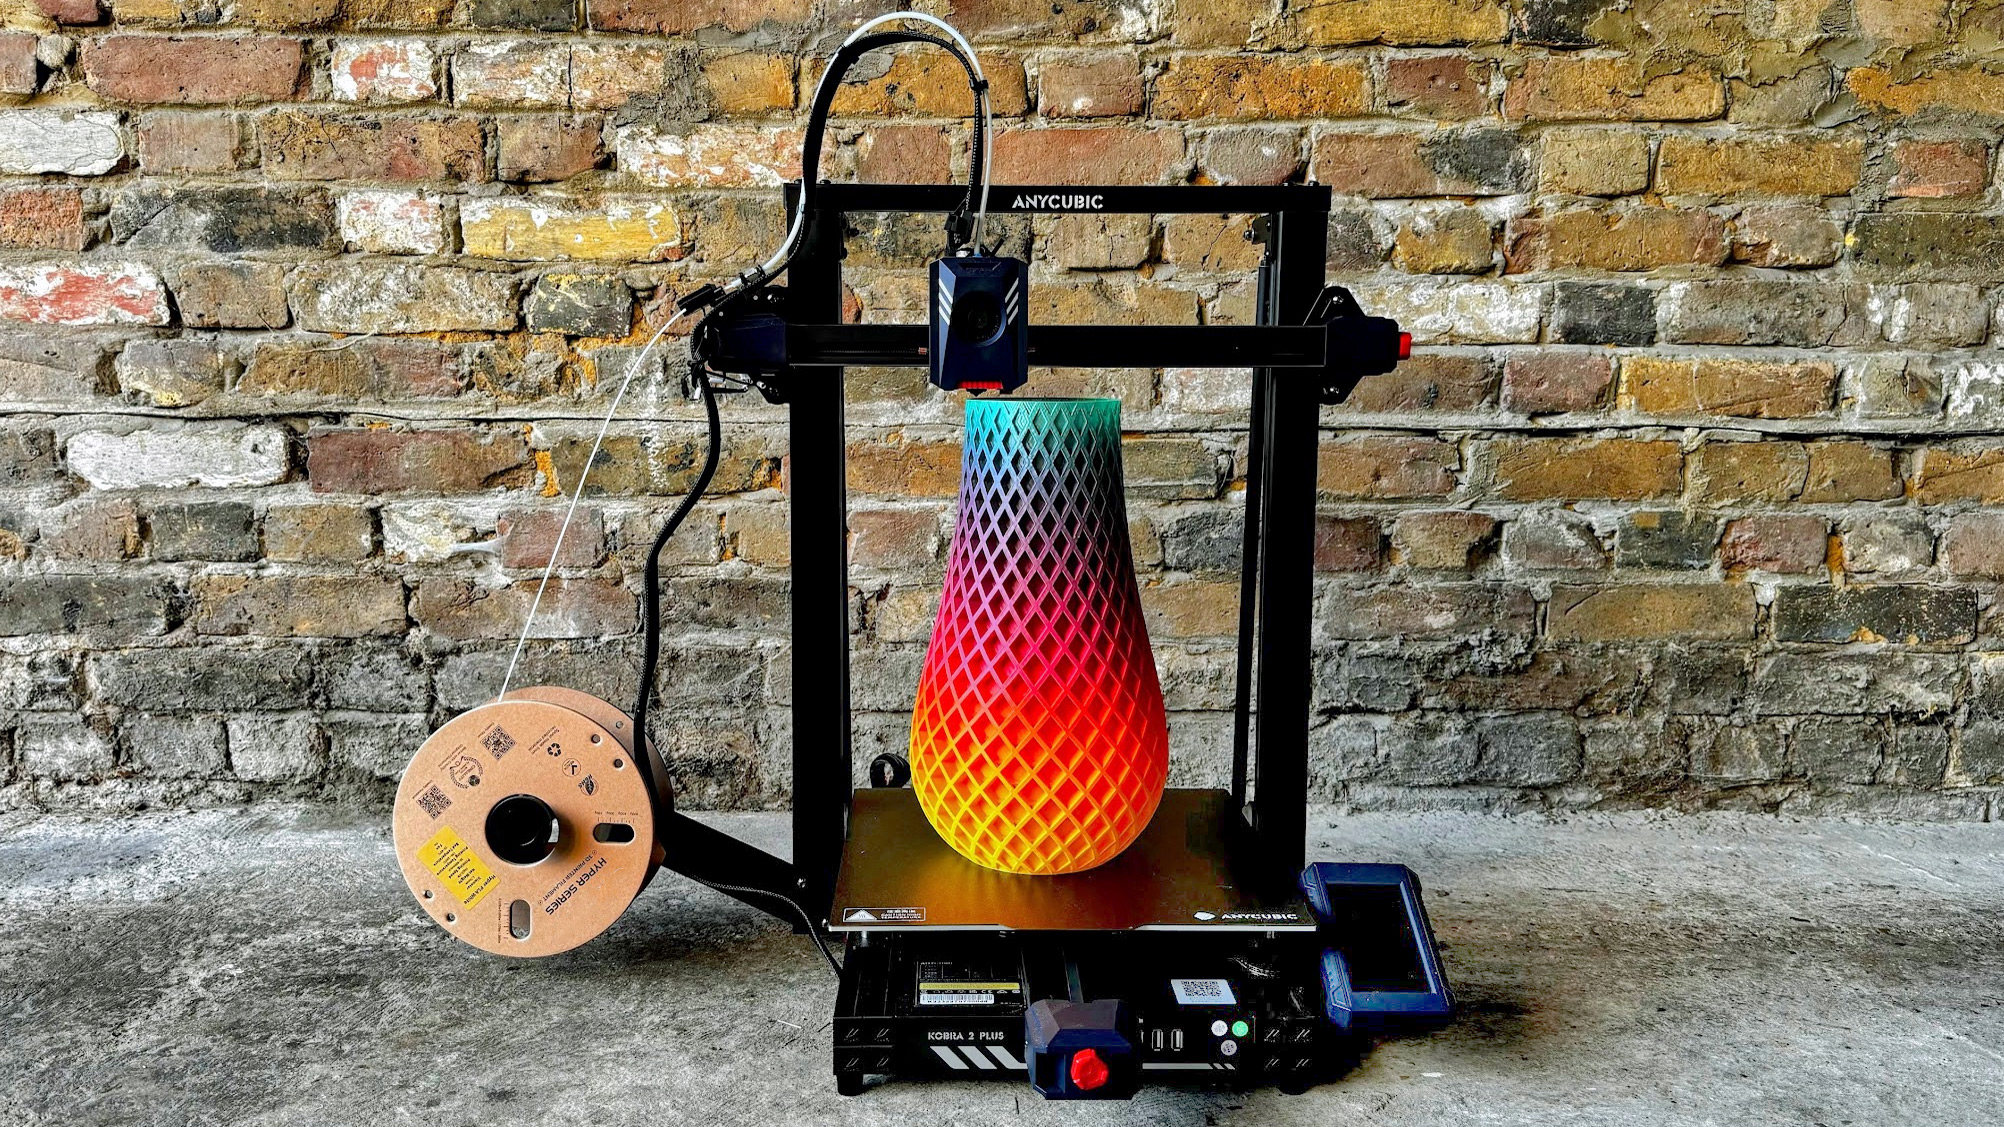
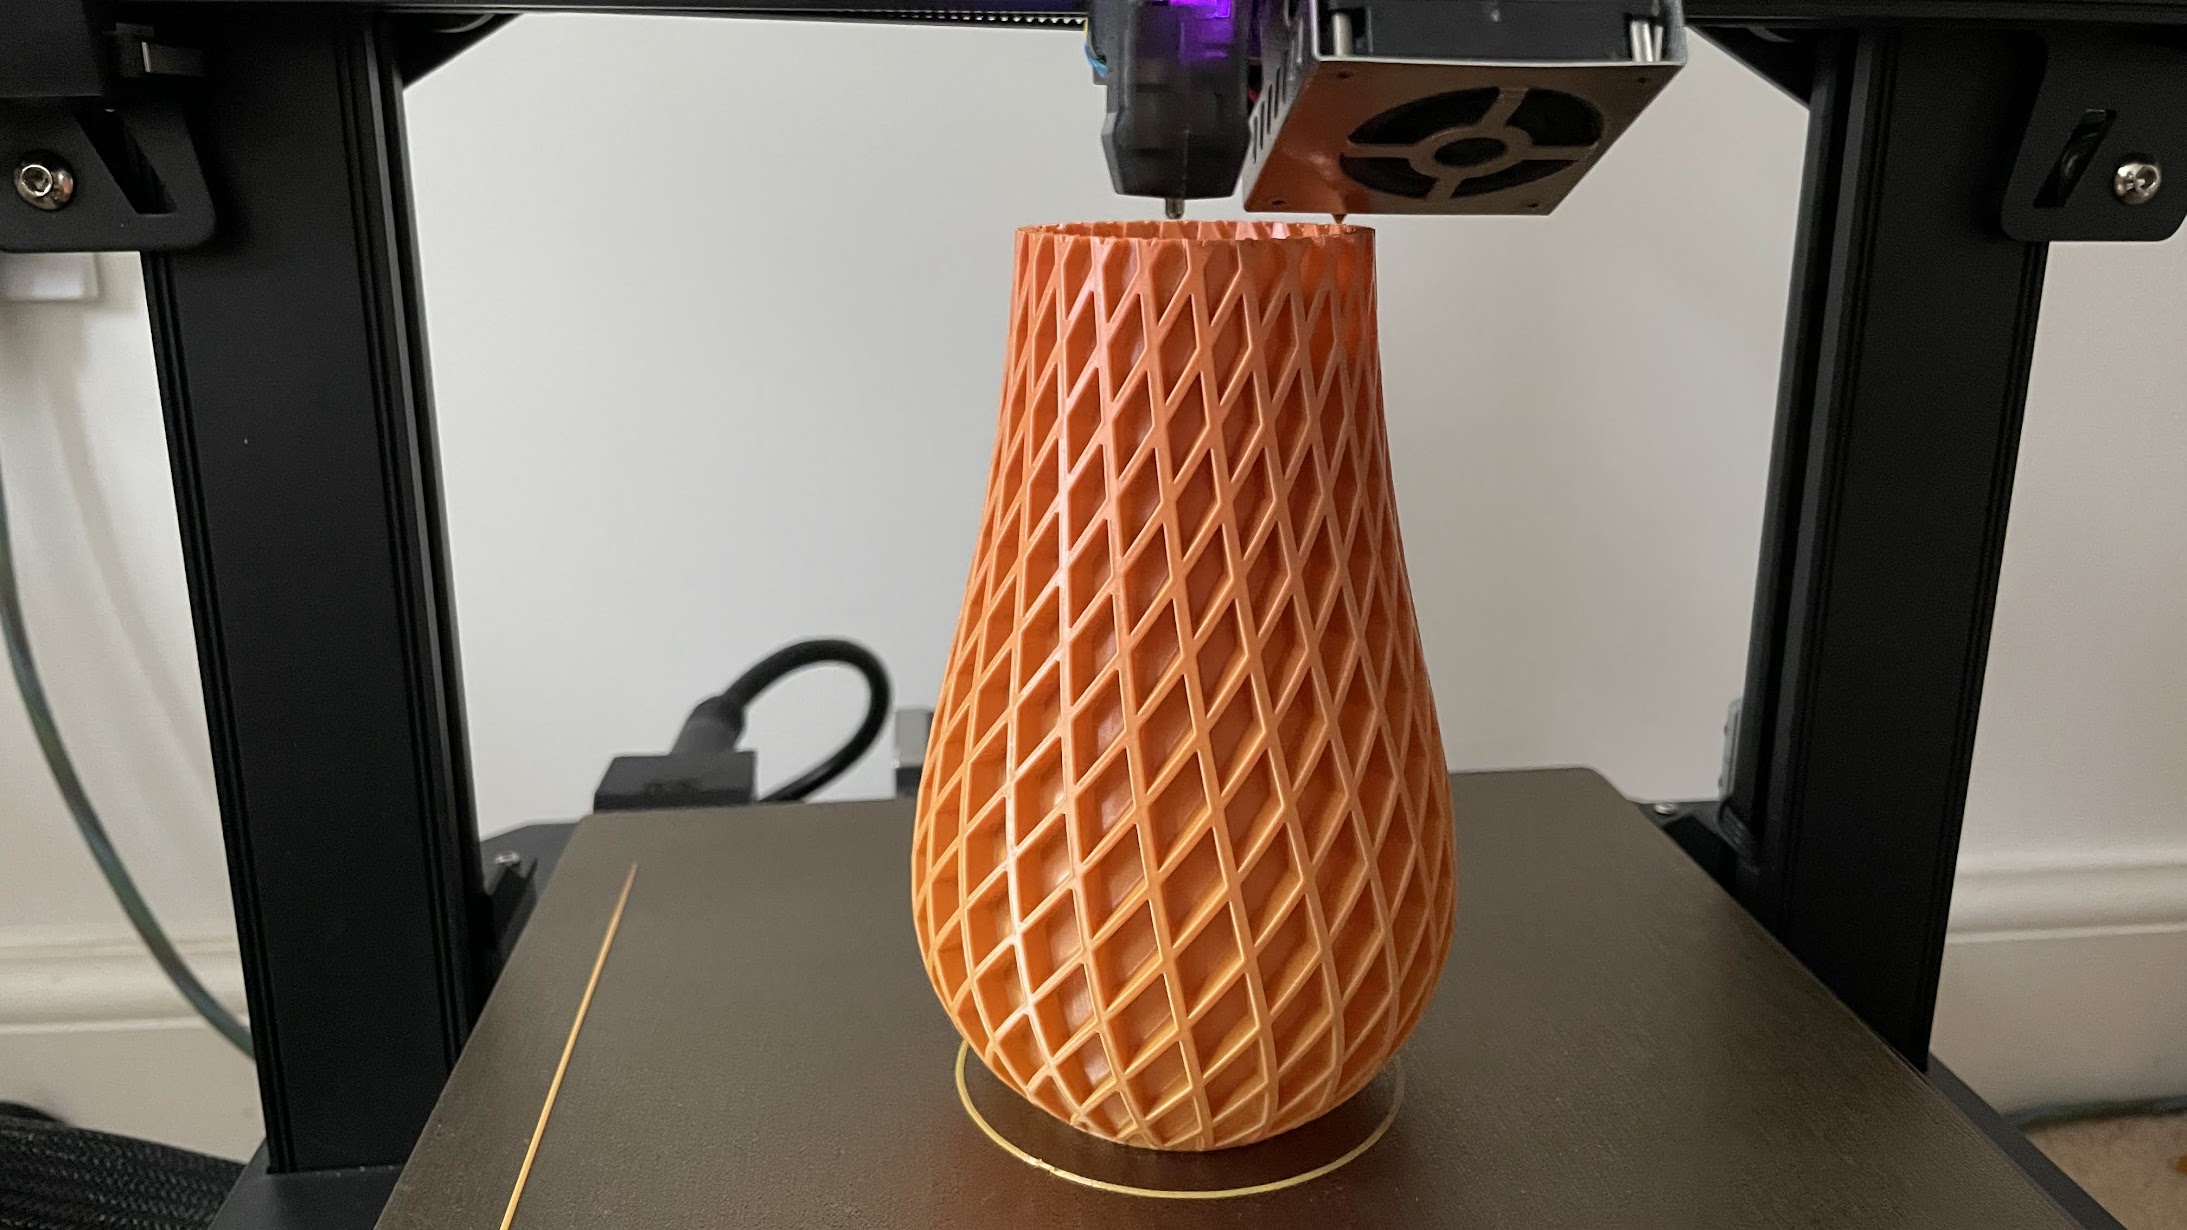
6. Anycubic Kobra 2 Plus – Best for printing huge models
Pros
- Massive build volume
- Fast
Cons
- Takes up a lot of space
- Not suitable for filaments which require an enclosure
With a build volume of 320 x 320 x 400mm (WDH), the Kobra 2 Plus can print very large models. If that’s not enough, there’s also the Kobra 2 Max with an even larger 420 x 420 x 500mm volume.
It’s a bed slinger, which means the build plate moves backwards and forwards. In turn, this means you need quite a lot of desk space for the Kobra 2 Plus. It’s fast and capable of good print quality, and is pretty easy to use thanks to automatic bed levelling, vibration compensation and a colour touchscreen.
Read our full Anycubic Kobra 2 Plus review
7. Creality 3D Ender 3 S1 Pro
Pros
- Great print quality
- Almost all the features you’d want
Cons
- Auto-levelling requires manual input
- Slow by today’s standards
The S1 Pro is really a budget 3D printer but it’s more expensive than the cheapest because it has had all the bells and whistles thrown at it.
There’s the Sprite direct drive print head with dual metal gears for reliable extrusion. It’s capable of heating to 300C, so you can print with a wide range of filaments. The bed goes up to 110C, too, which helps prints adhere when working with more awkward types of filament.
It isn’t enclosed, though, and is a bed-slinger, so needs room in front and behind it to accommodate its range of travel. There’s a useful LED strip which is really bright, and a colour touchscreen. Its interface could be improved a bit, but it’s not bad.
Print quality is very good, but it isn’t fast. To improve it you can buy Creality’s Sonic Pad – a Klipper-based touchscreen – but this adds a lot of cost and hassle. If speed is important, choose a printer that offers 300mm/sec out of the box like the Bambu A1.
Read our full Creality 3D Ender 3 S1 Pro review
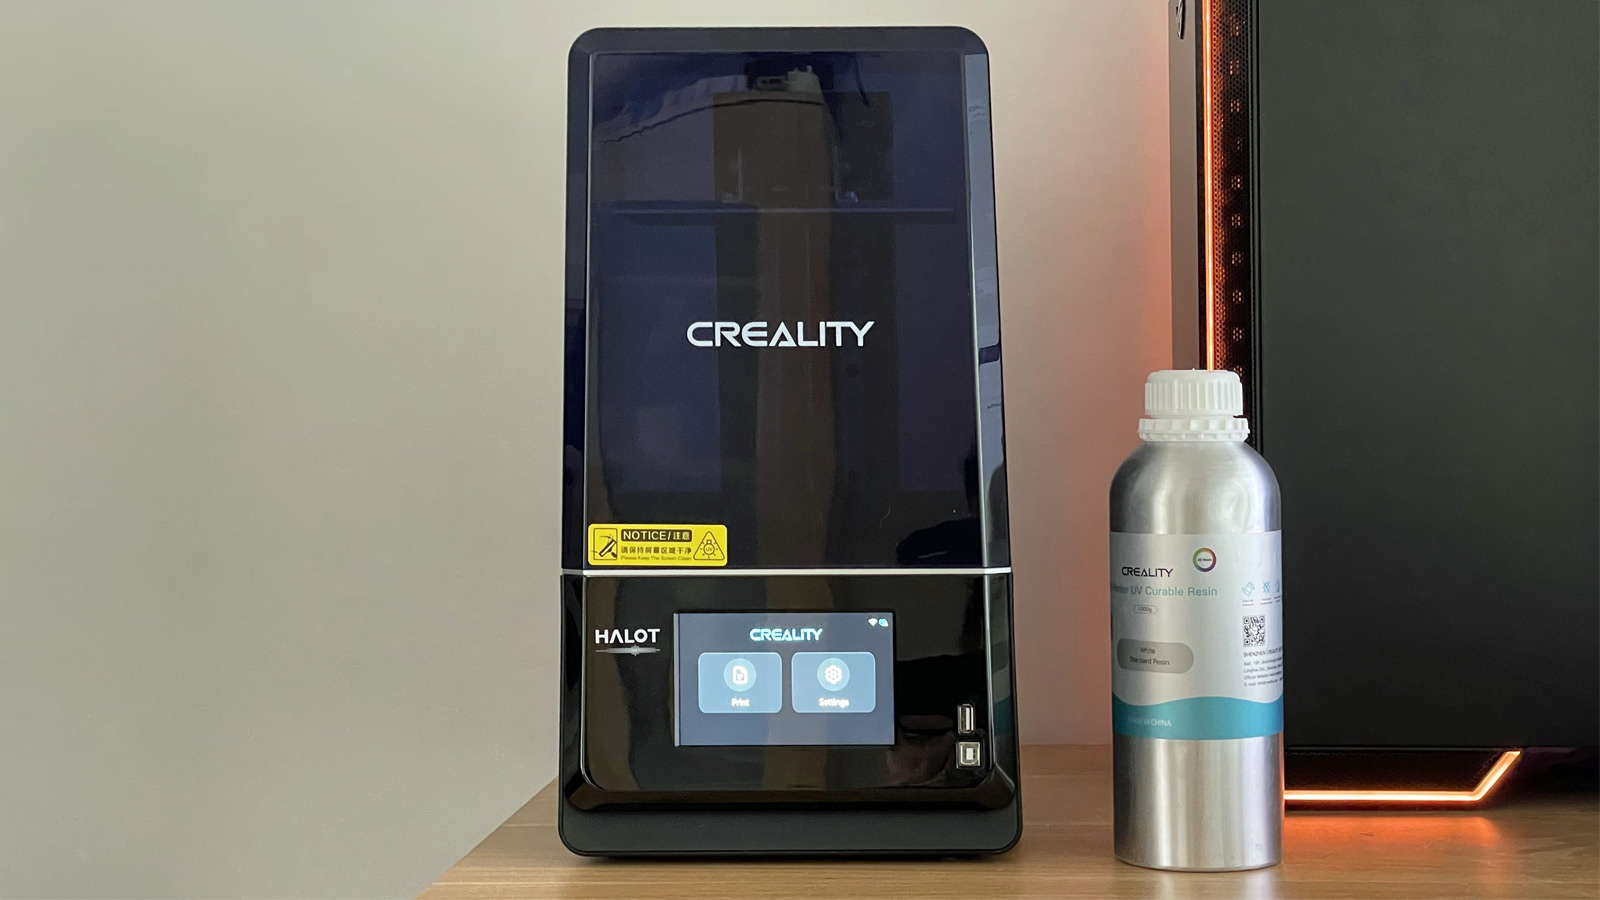
8. Creality Halot One Plus
Pros
- Easy to use & reliable
- Works with various slicers
- Great print quality
Cons
- Fan runs constantly during printing
- Requires post-printing cleanup + curing (like all resin printers)
- More expensive than some rivals
The Halot One Plus is an easy-to-use resin 3D printer that has a good-sized build volume, prints reliably and at high quality. It’s quite expensive compared to rivals, especially in the UK.
The Halot One Plus is a resin printer, so is very different to the others here. Instead of using filament on a reel, it prints using liquid resin which is cured, layer by layer, using UV light.
Build volume is smaller than the FDM printers here, but it’s still relatively large for a resin printer, and the screen’s high resolution means models have lots of fine detail.
The Halot One Plus printed ultra-reliably in our tests, but if you are keen on a resin printer, bear in mind that you have to clean up prints afterwards, which usually means buying a separate washing and curing device that looks a lot like a resin printer and takes up the same amount of desk space.
Read our full Creality Halot One Plus review
Buyer’s guide
Here are the key things you should look out for when choosing a 3D printer.
Automatic levelling
Unless the surface on which objects are printed is perfectly level, prints won’t stick to it and will fail sooner or later.
Manual levelling is a chore you could do without, so go for a printer with auto levelling. Be careful: some printers claim to have auto levelling, but rely on you to do a lot of the work. Which is why it pays to read reviews as well as knowing what to look for.
Heated bed
Almost all 3D printers have them, but it’s a must have. A heated bed will help prints to stick: don’t buy a printer without one.
PEI sheet
Models can be difficult to remove from the build plate. A PEI (polyetherimide) sheet helps immensely. It’s a flexible metal sheet with a textured coating is used, and held in place with magnets. When the model finishes printing, you simply lift the sheet off, flex it and the model pops off.
Touchscreen
Some printers still use a monochrome screen with a rotary dial or buttons. This isn’t nearly as easy to use as a touchscreen. Bambu P1S (and P1P) would be much better with a touchscreen, but it’s not the end of the world with those as you can print from your PC or phone using Bambu’s apps. When a printer doesn’t have Wi-Fi (or any networking) you are stuck using the screen it comes with.
Build volume
A printer’s build volume tells you how big an object it can print. It’s wise to assume that the actual maximum volume is a bit smaller than the specifications suggest, and go for one with a slightly larger volume than the biggest object you will need to print.
It can be hard to know this, and remember that a bigger volume means a bigger printer, which you’ll need space for.
Really large models can be printed in sections and superglued (or otherwise fixed) together, so you don’t necessarily need a huge printer.
Nozzle and bed temperatures
Most people print using PLA, the most common type of filament. It’s easy to work with, strong and durable.
All 3D printers have nozzles that go up to the 220°C or so that PLA requires. But if you want to print with ABS, PETG or another type that needs high temperatures, be sure to opt for a printer that can go up to around 300°C. But see Enclosure below, too.
Similarly, watch out for heated bed temperatures. Some won’t go beyond 80°C, but you’ll need 100°C or more for successful ABS prints.
Enclosure
Some materials such as ABS, ASA, polycarbonate and nylon need carefully controlled ambient temperature to prevent them from warping while printing. If you need to use these – perhaps because you want to print models that can survive exposure to sunlight, then look for an enclosed printer – essentially a self-contained box.
Run-out sensor
With large models taking many hours to print and the fact that you can’t always know if there’s enough filament left on the reel to complete it, a run-out sensor can be a life saver. It does it what it says: detects when the filament runs out and halts printing automatically, allowing you to load a new reel and carry on printing.
Without one, the filament could run out and the printer will carry on printing thin air, and you’d be none the wiser.
What’s the best 3D printer for beginners
The Bambu A1 is an excellent choice for beginners. It’s relatively affordable and is very easy to use because it handles so many things automatically. It’s also fast and offers top notch print quality.
How much does a beginner 3D printer cost?
Printers start from as little as $130 / £130, but you may want to spend more to get a better model with more features, faster speeds and better print quality. There are a lot of great printers under $500 / £500.
What type of 3D printer is best?
The most common type is FDM (printers that use filament on a spool), but the absolute best quality is from SLA printers, which use resin and are capable of printing much finer detail. There are lots of pros and cons of each type, but put simply, resin printers are best for small, intricate figurines, while filament printers are best for printing things that are useful around the home as well as models that hinge or articulate.
Is it cheap to use a 3D printer?
Spools of filament typically weigh 1kg and cost from $15 / £15 to $30 / £30. It’s therefore the weight of the model that matters most, not the size. So-called slicing software turns a 3D model into instructions a 3D printer can understand, and you can adjust the settings to save weight by minimising the amount of infill. Sometimes it’s cheaper to print your own parts, but sometimes you might find it’s cheaper to buy pre-made plastic things than to 3D print them.
Are 3D printers good for beginners?
3D printing is much easier than it used to be thanks to modern printers that automate a lot of the fiddly things like bed levelling. They can also compensate for vibrations, resume printing after a power cut or when the filament runs out. The difficult part is designing your own models to print, but there are thousands of pre-made models available online to download free.
Author: Jim Martin, Executive Editor, Tech Advisor

Jim has been testing and reviewing products for over 20 years. His main beats include VPN services and antivirus. He also covers smart home tech, mesh Wi-Fi and electric bikes.
Recent stories by Jim Martin:
- Creality K1C review
- Bambu A1 review
- Bambu A1: a full-size bed slinger 3D printer
