Superheroes are dominating our cinemas and TV screens right now – and now you can get in on the action. In this tutorial, master of Photoshop Fabio Sasso demonstrates how to create your own Human Torch using little more than stock imagery, a little patience, and a lot of Photoshop know-how.
You could also use the same technique for a fireball-thowing mage in a fantasy work, a real-world magician or someone who’s just been very unlucky near a camp fire.
Sasso will talk you through honing your use of layers, tweaking the same image several times and layering up the central model. You’ll use layer styles and adjustment layers to build up effects and achieve a subtle, polished finish.
Sasso also has plenty of tips on how to seamlessly blend stock photography, using the Warp tool, simple Photoshop effects, and some layer masks. Throughout the tutorial, you’ll be subtly applying blending modes until you reach the impressive effect shown above.
All the images you’ll need can be bought at a low cost from Shutterstock, or you can easily substitute your own photos if you’d prefer.
We’ve used Adobe Photoshop to complete this process, which is available separately or as part of Adobe Creative Cloud . Some students are eligible for an extended free trial of Creative Cloud , and there are also ways to get Photoshop for free .
- Tools required: Adobe Photoshop
- Cost: From $19.99/£19.97 per month (free trial available)
Step 1
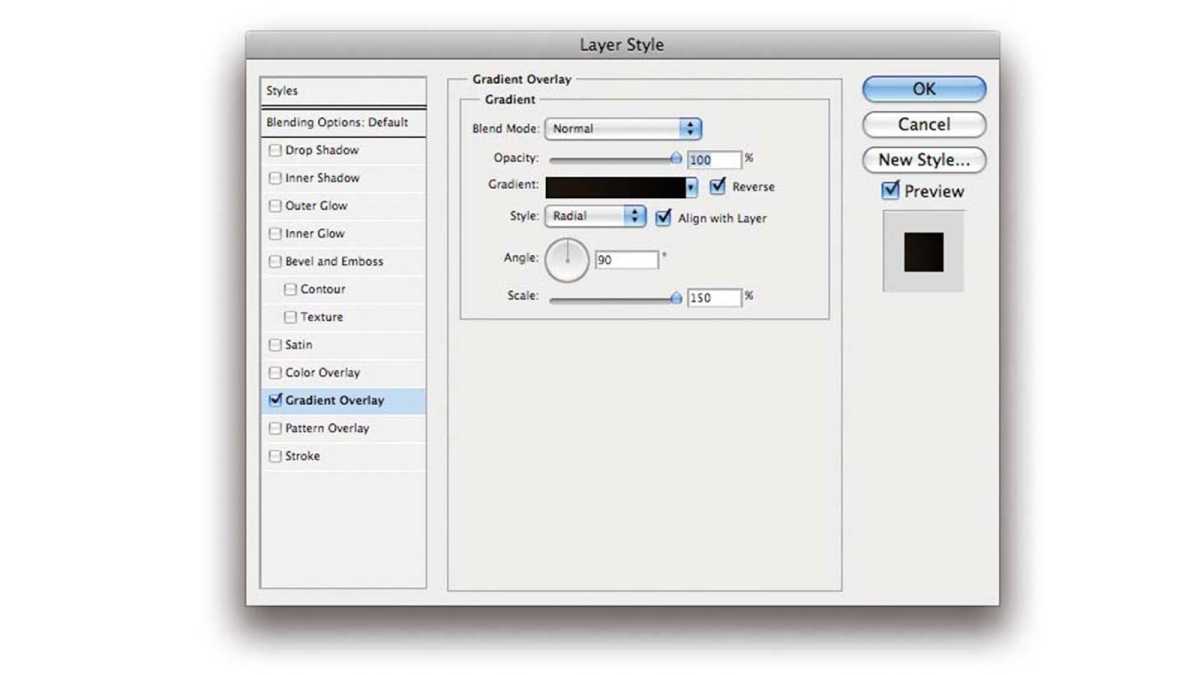
Foundry
Open Photoshop and create a new document measuring 1,920-x-1,200 pixels. In the Background layer apply a Layer Style ( Layer > Layer Style ) and use a Gradient Overlay, setting the blending mode to Normal, the opacity to 100%, and the style to Radial. Increase the scale to 150%. Now for the colours use 040302 for the darker colour, and 1b140b for the lighter.
Step 2
Foundry
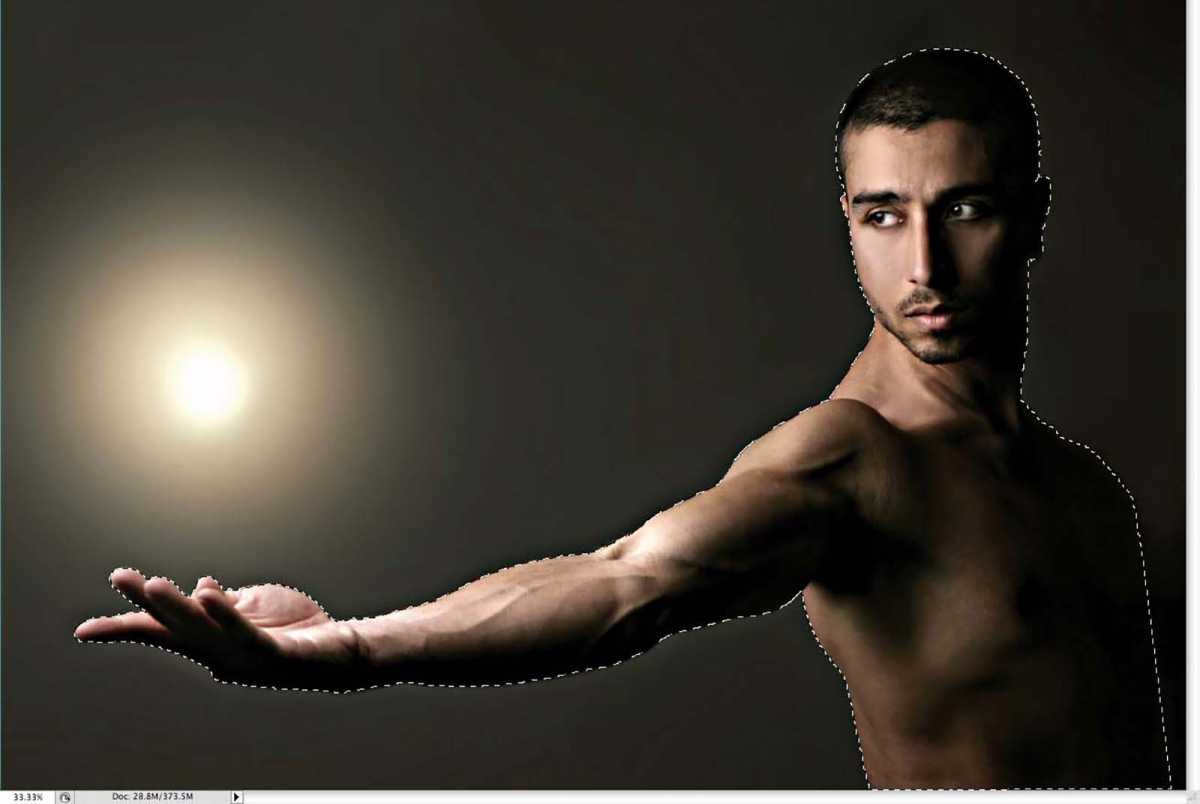
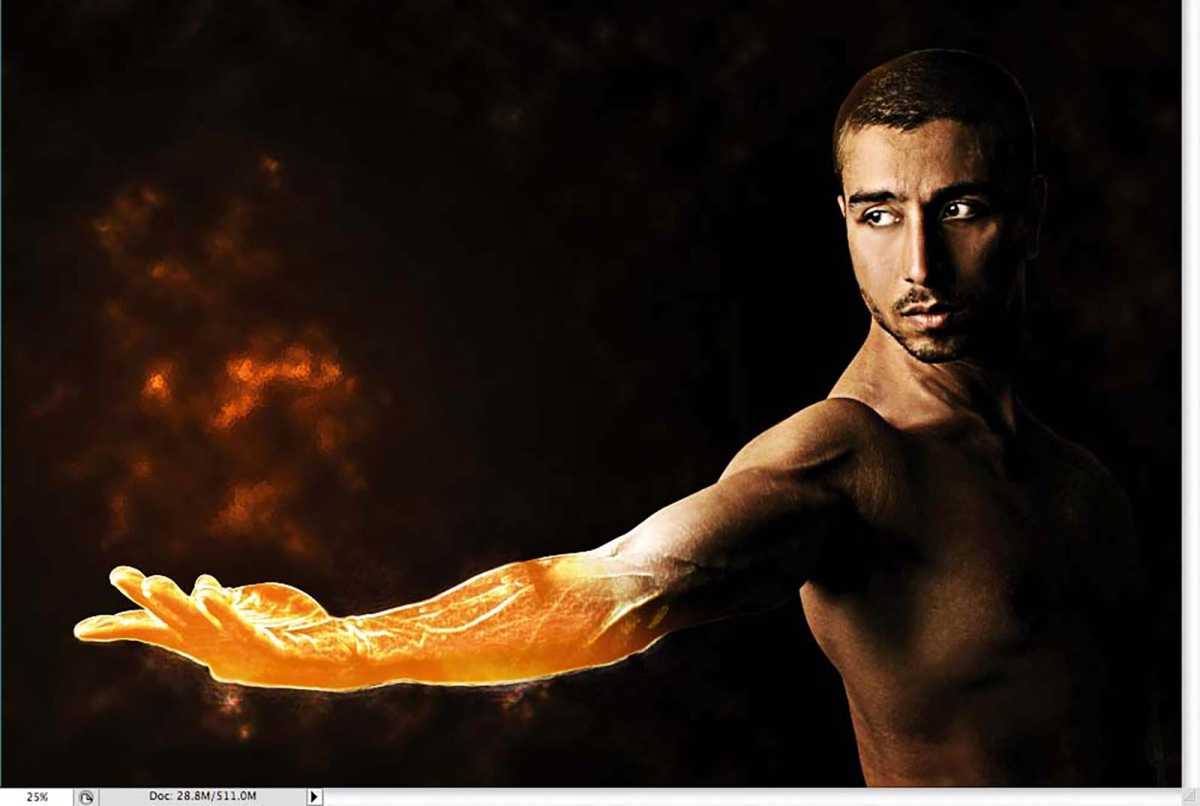
Now let’s add a photo: buy the image from Shutterstock , or use a similar photo of your own. Then use the Pen tool ( P ) to create a path to extract the man from the background. Convert the path to a selection by holding Cmd/Ctrl and clicking on the thumbnail of the path.
Step 3
Foundry
Duplicate the image onto a new layer and use a big, soft brush to erase part of the arm, painting over the mask. Name this new layer ‘model arm’, and the initial layer ‘model’.
Step 4

Foundry
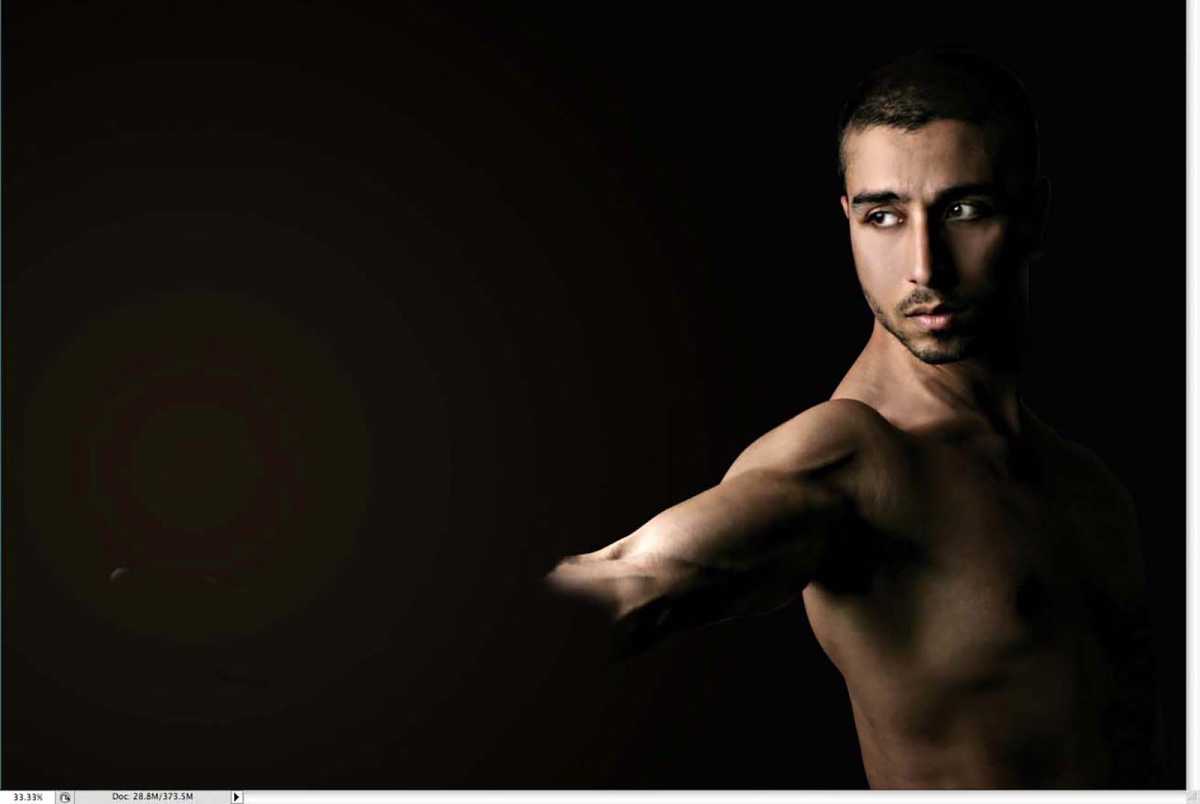
Duplicate the ‘model arm’ layer and go to Filter > Others > High Pass . Set the radius to 10 pixels, and the blending mode to Hard Light.
Step 5

Foundry
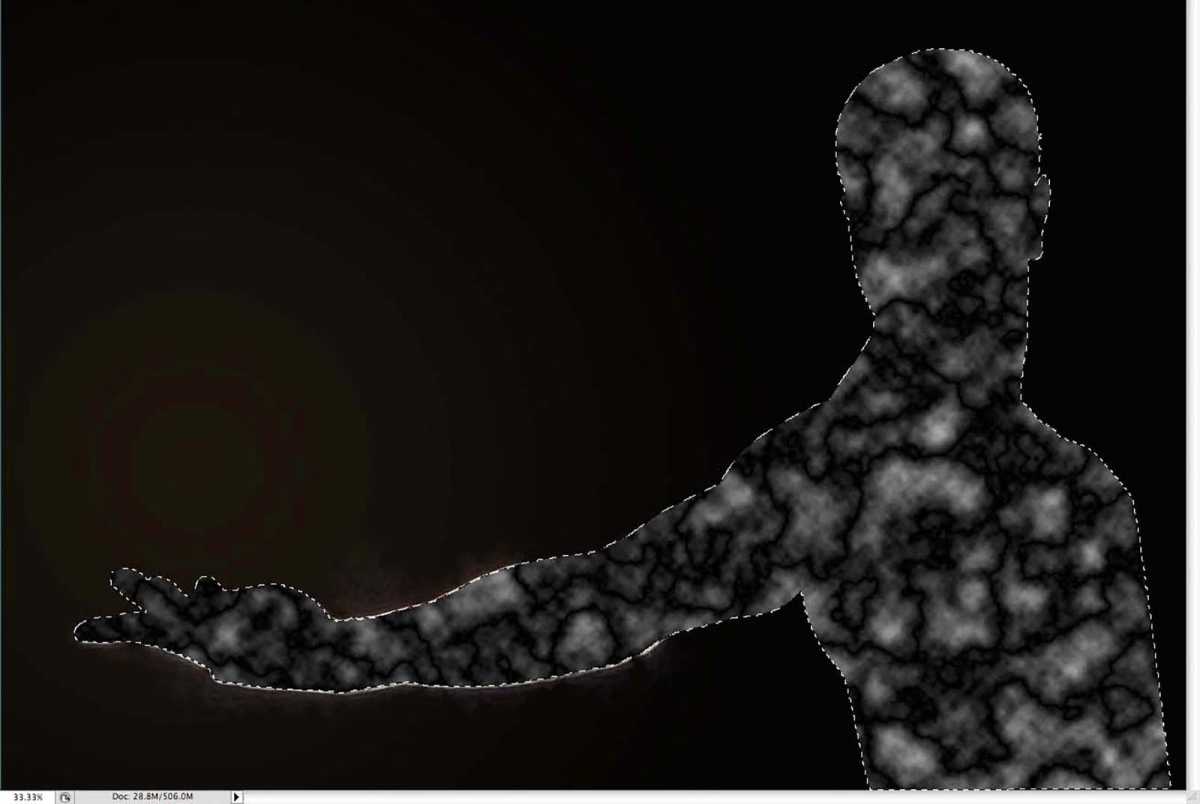
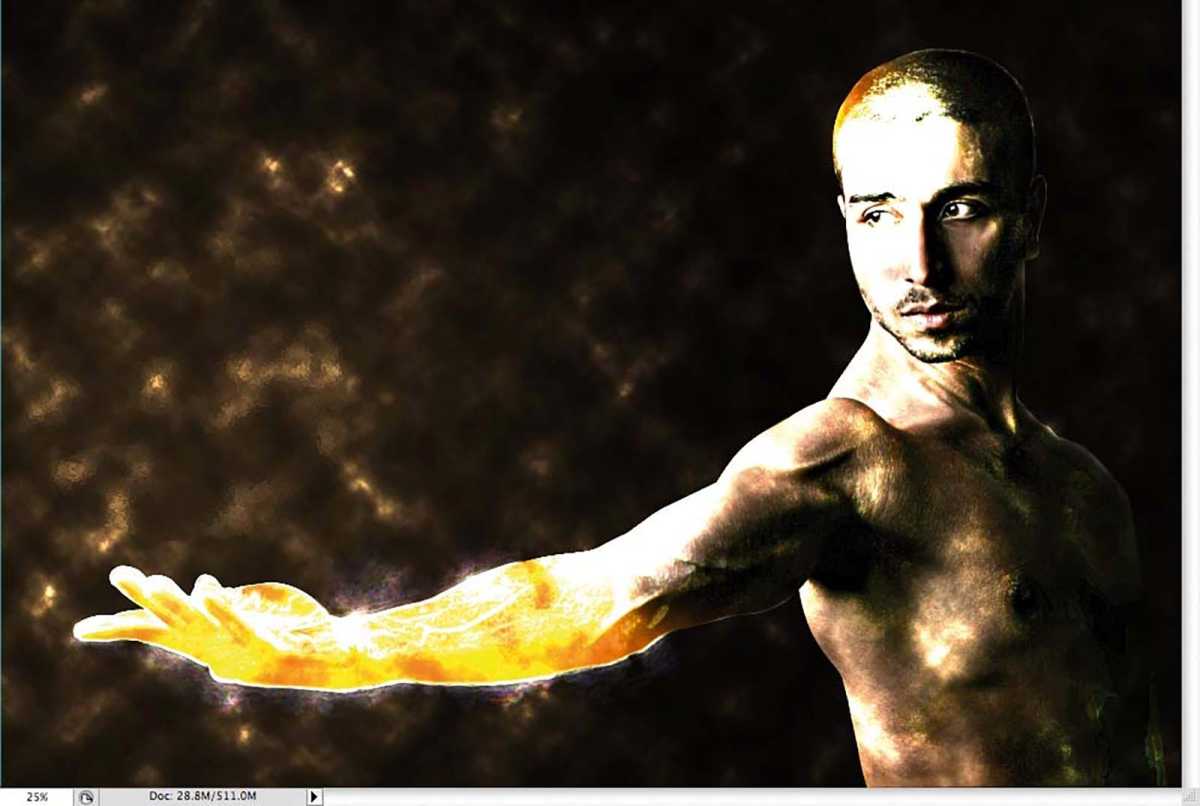
Now duplicate the ‘model’ layer, naming the new layer ‘model glow’. Go to Filter > Stylize > Glowing Edges . Set the edge width to 6, the edge brightness to 7, and the softness to 7.
Step 6

Foundry
Still in the ‘model glow’ layer, delete the rest of the body, leaving only the arm. This will be the highlights of the fire. Also, change the blending mode to Screen.
Step 7
Foundry
Add a new layer, naming it ‘model mask’, then select Filter > Render > Clouds , setting black and white as the foreground and background colours, respectively. Go to the Paths palette and load the path you created in step 2. With the selection loaded, go to Layer > Layer Mask > Reveal Selection.
Step 8
Foundry
Delete the rest of the body in the ‘model mask’ layer, leaving only the hand, then go Layer > Layer Styles , and select Color Overlay. Pick an orange, change the blending mode to Linear Dodge, and set the opacity to 88%. Use an orange for the colour and change the Blend Mode to Linear Dodge (Add). Change the layer’s blending mode to Color Dodge.
Step 9
Foundry
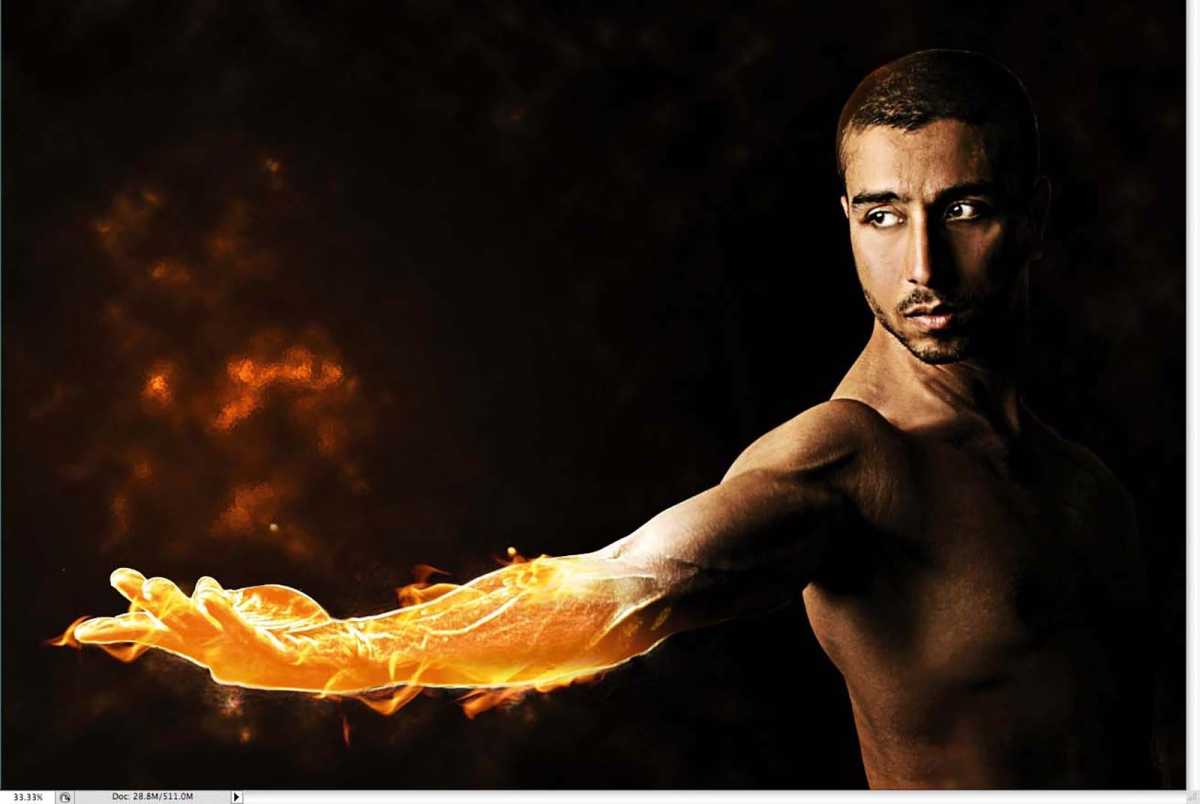
Add another layer on top of the others and name it ‘smoke’. Go to Filter > Render > Clouds . Again make sure you have black and white for the background and foreground colours. Change the blending mode to Color Dodge and with the Eraser tool ( E ) set to a big, soft brush, delete most of the areas of the layer, leaving only the part close to the arm that you’re going to set on fire.
Step 10

Foundry
Select Layer > New Fill Layer > Solid Color , then click on the layer to open the Layer Style dialog box. Select Gradient Overlay and change the blending mode to Overlay.
For the colours, use orange and a very dark orange; set the style to Radial and keep the scale at 100%. Move the gradient so the lighter part is on top of the model’s hand.
Step 11

Foundry
Select Layer > New Adjustment Layer > Gradient Map , and change the blending mode to Soft Light.
Step 12
Foundry
Now let’s add some flames. To do this, we’ll need another stock photo. You can buy the one used here , or use a similar photo of your own. Start copying parts of the flame and pasting them over the model’s flaming arm. Set the blending mode to Screen, and then go Edit > Transform > Warp , and distort it to match the model’s arm.
Step 13
Foundry
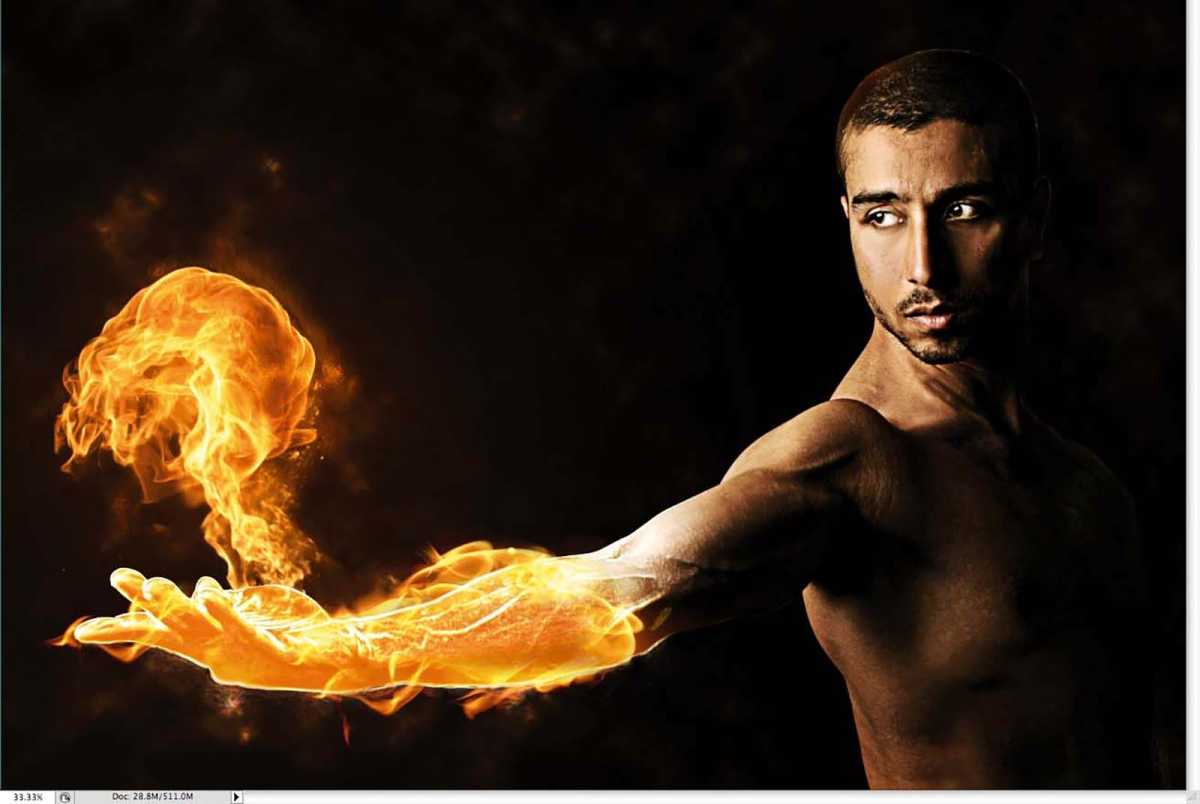
Now let’s add a fireball. Again we’ll use another stock photo – you can buy the one used here . Change the blending mode to Screen and select Image > Adjustments > Levels . Increase the white input a bit so that the colours match with the other flames.
