The dispersion effect is a great way to add a bit of drama and flare to your images – and once you understand the basics, you can get as creative as you want.
You will need to install separate Disintegration brushes which you can find online for free. We’ve used this pack from Brusheezy .
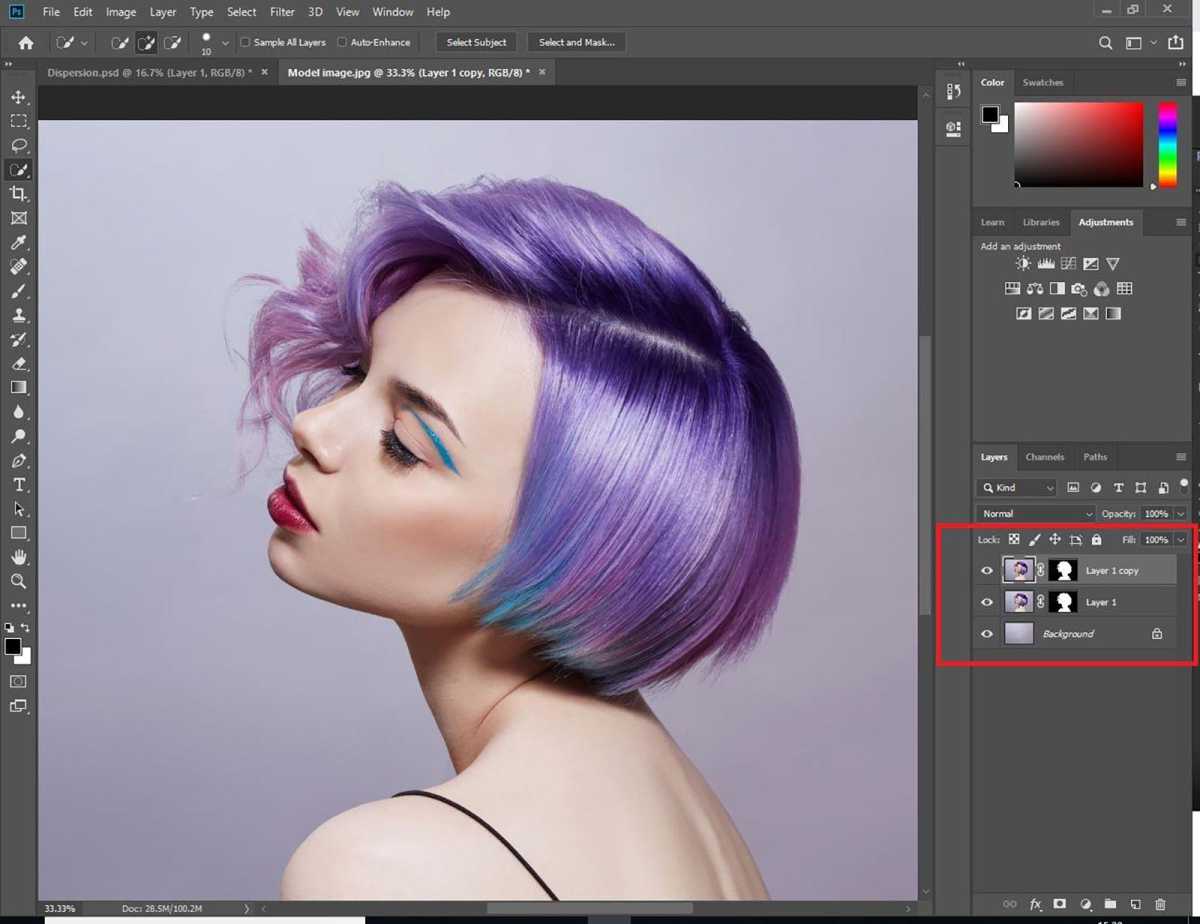
We recommend starting with an image with a plain background, similar to the one we’ve used. If you want to experiment with stock photography, you can try Adobe Stock free for one month too.
We’ve used Adobe Photoshop to complete this process, which is available separately or as part of Adobe Creative Cloud . Some students are eligible for an extended free trial of Creative Cloud , and there are also ways to get Photoshop for free .
- Time to complete: 45 minutes
- Tools required: Adobe Photoshop
- Cost: $19.99/£19.97 per month (free trial available)
Step 1
Foundry
Open your image in Photoshop and duplicate the layer (Alt + J or Command + J on Mac).
Next, hide the new layer by clicking on the Eye icon.
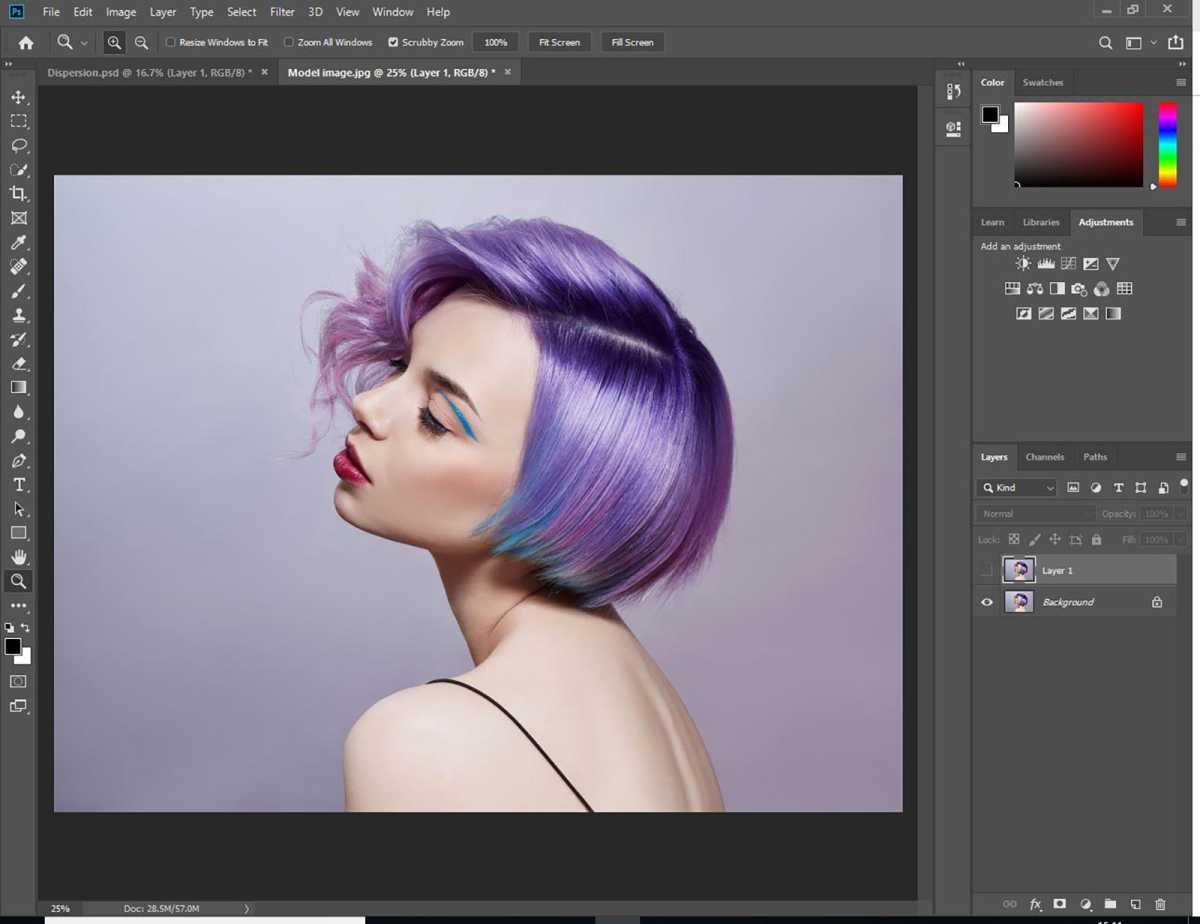
Step 2

Foundry
Select the original layer and use the Lasso tool to draw around the subject. The selection doesn’t have to be precise, it just needs to include the entire subject.
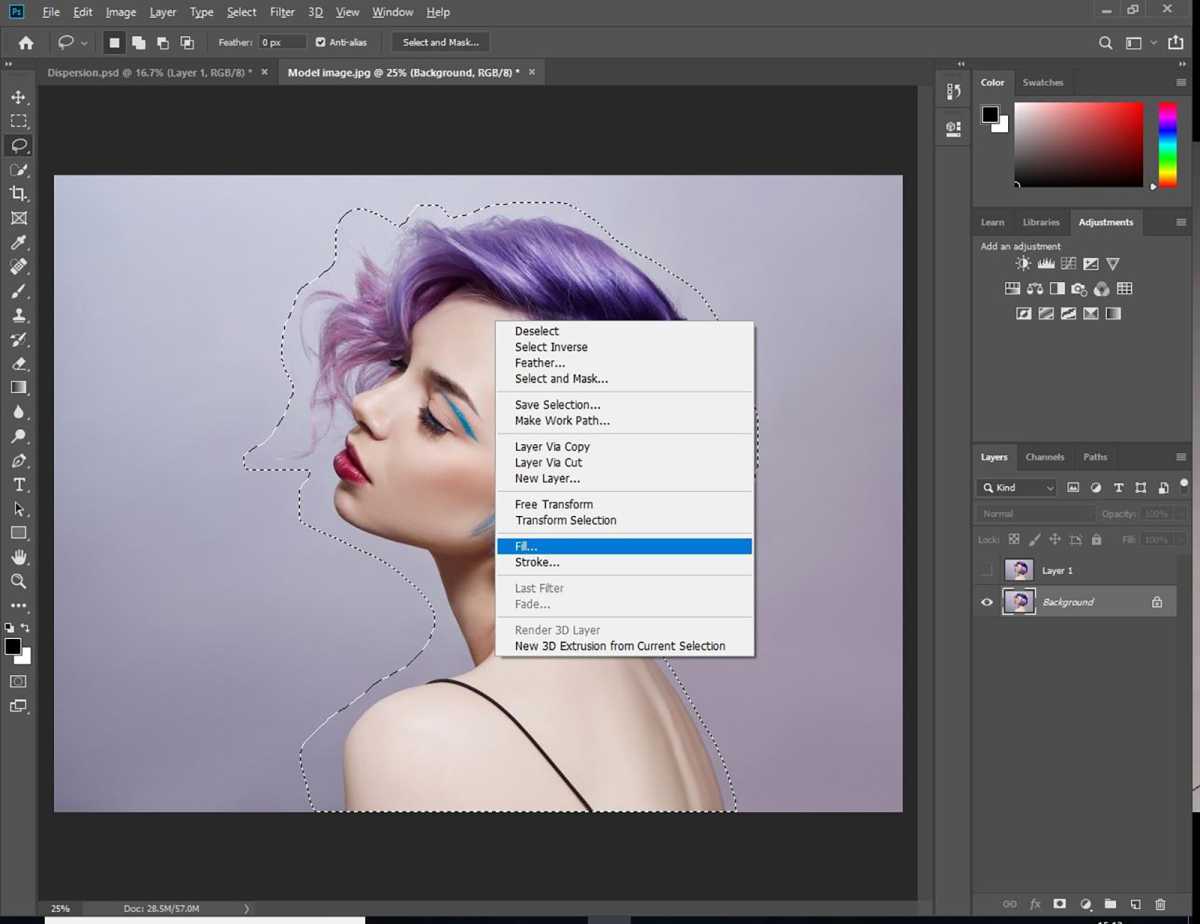
Step 3
Foundry
Right click on the selection and choose Fill.
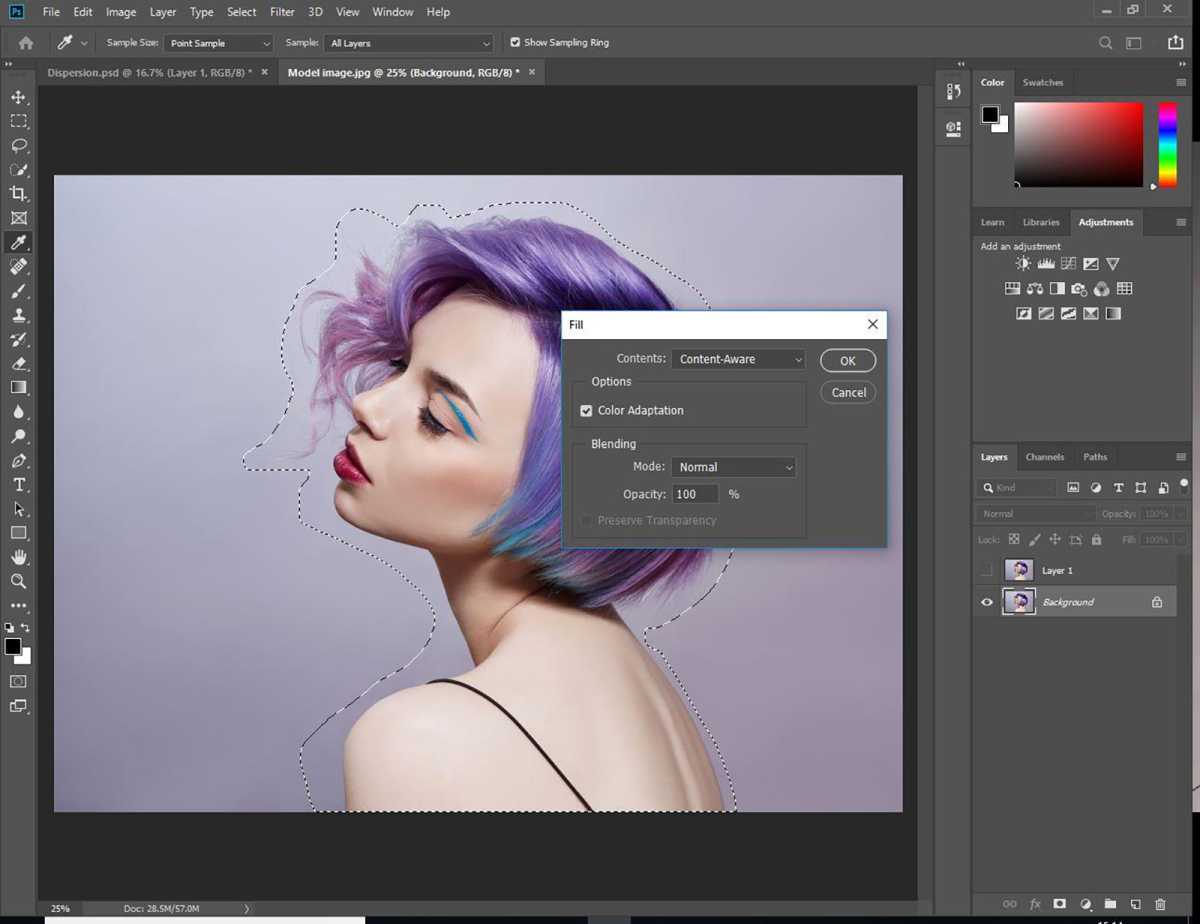
Step 4
Foundry
Ensure that “Content-Aware” is selected and click OK.
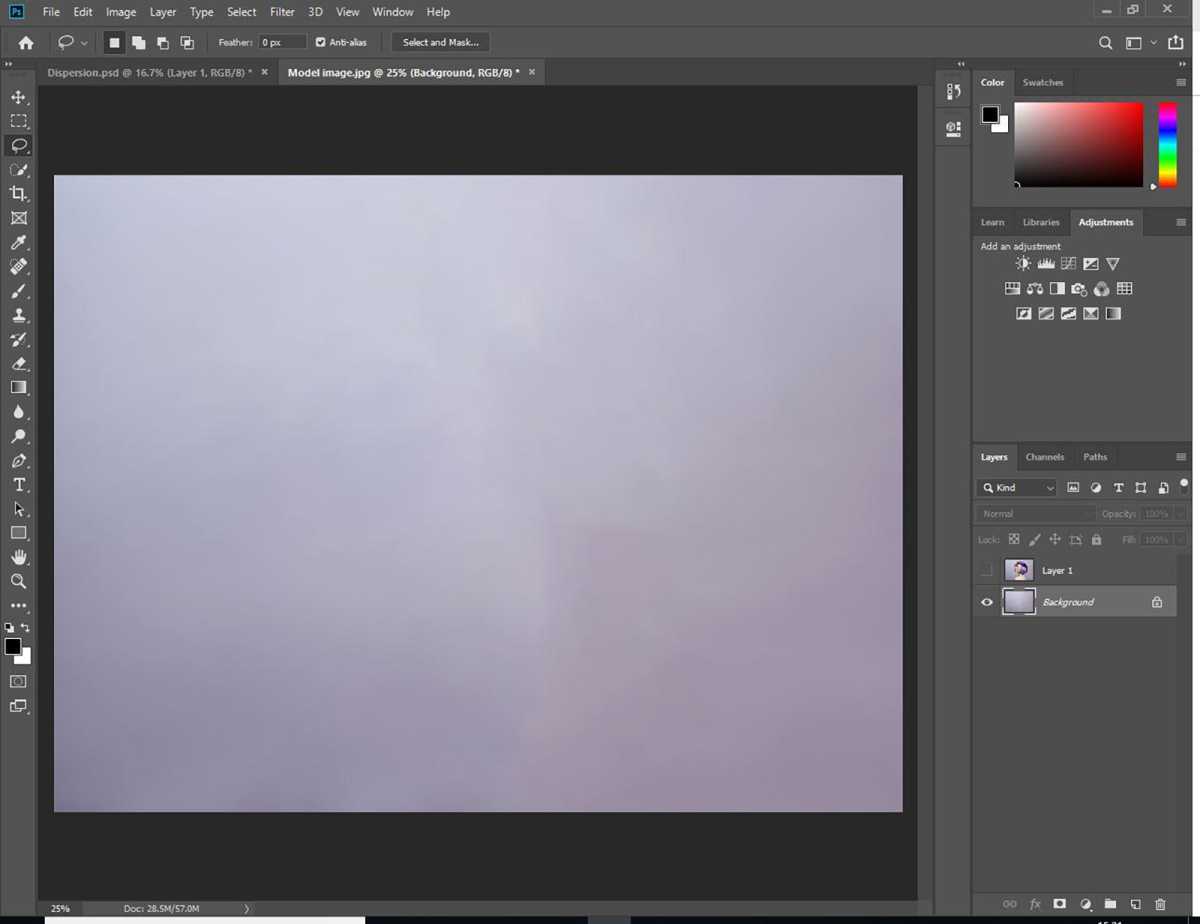
Step 5
Foundry
This should leave you with just the image background. Deselect the Lasso tool’s selection if you still see it. You can do this by going to the Select Menu at the top and choosing Deselect, or use the keyboard shortcut Ctrl + D or Command + D on Mac.
Step 6

Foundry
Now, select the new layer in the Layers panel. Then use the Quick Selection tool from the Tools menu on the left to select the entire subject of your image.
Step 7
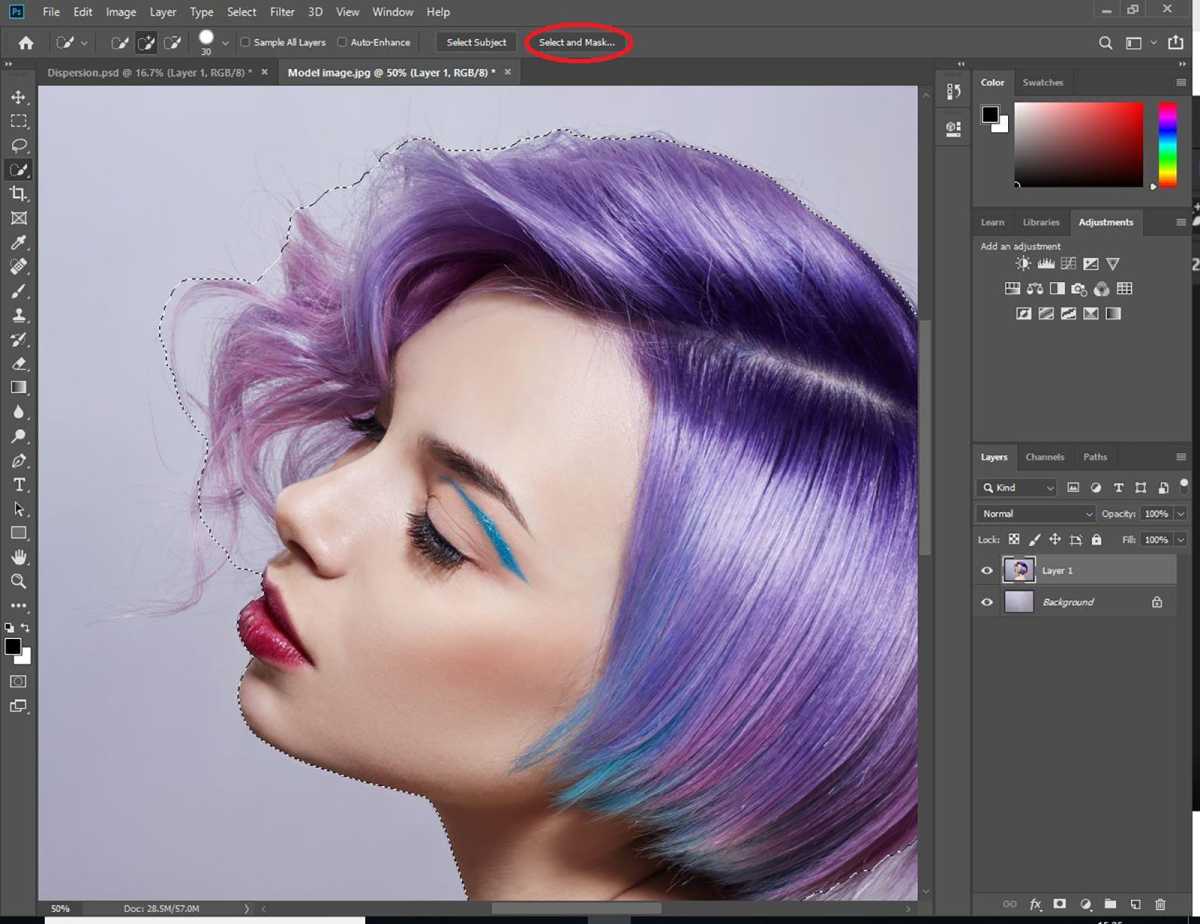
Foundry
Once you’re happy with your selection, click on Select and Mask, which is at the top. If you’re using an older version of Photoshop, click Refine Edge instead.
Step 8
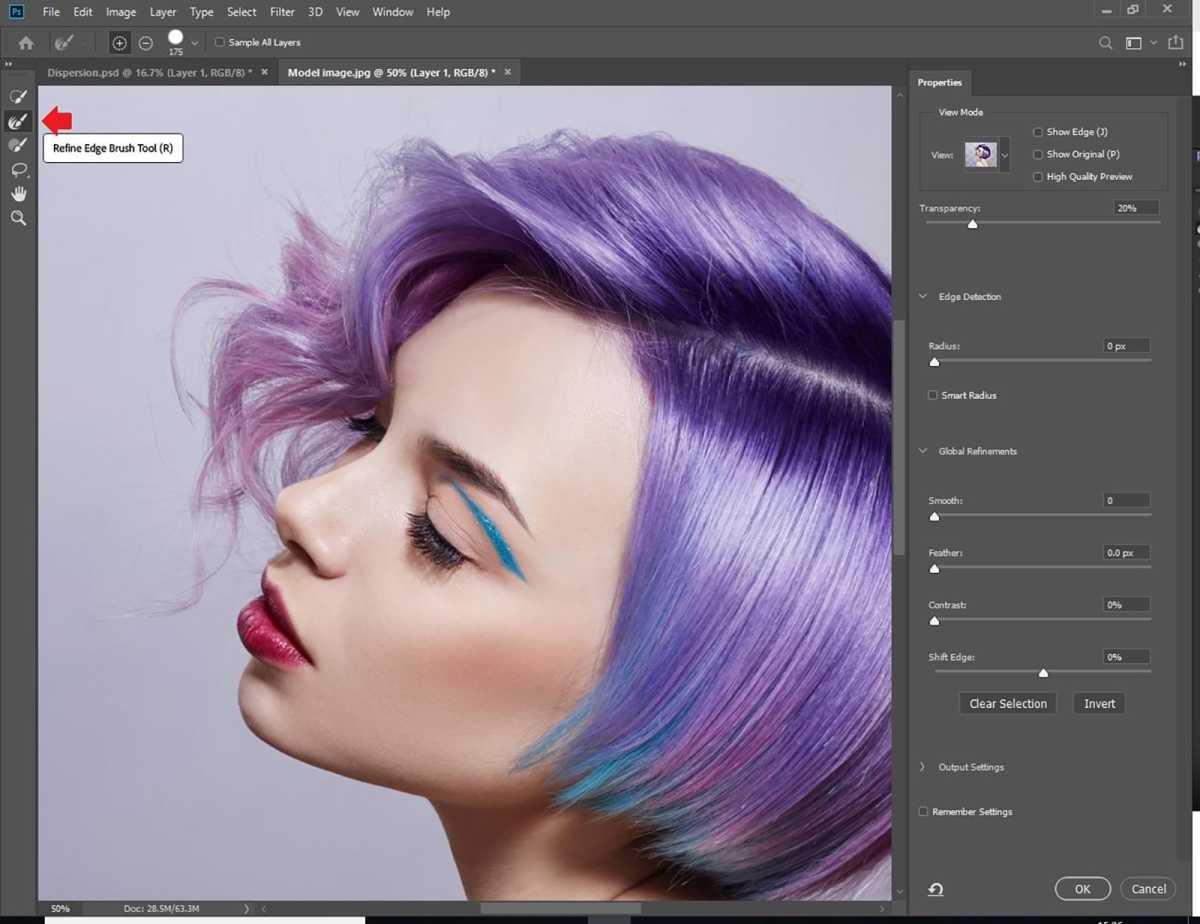
Foundry
Click on the Refine Edge button on the left. We will use this to mask finer details like wisps of hair.
Step 9
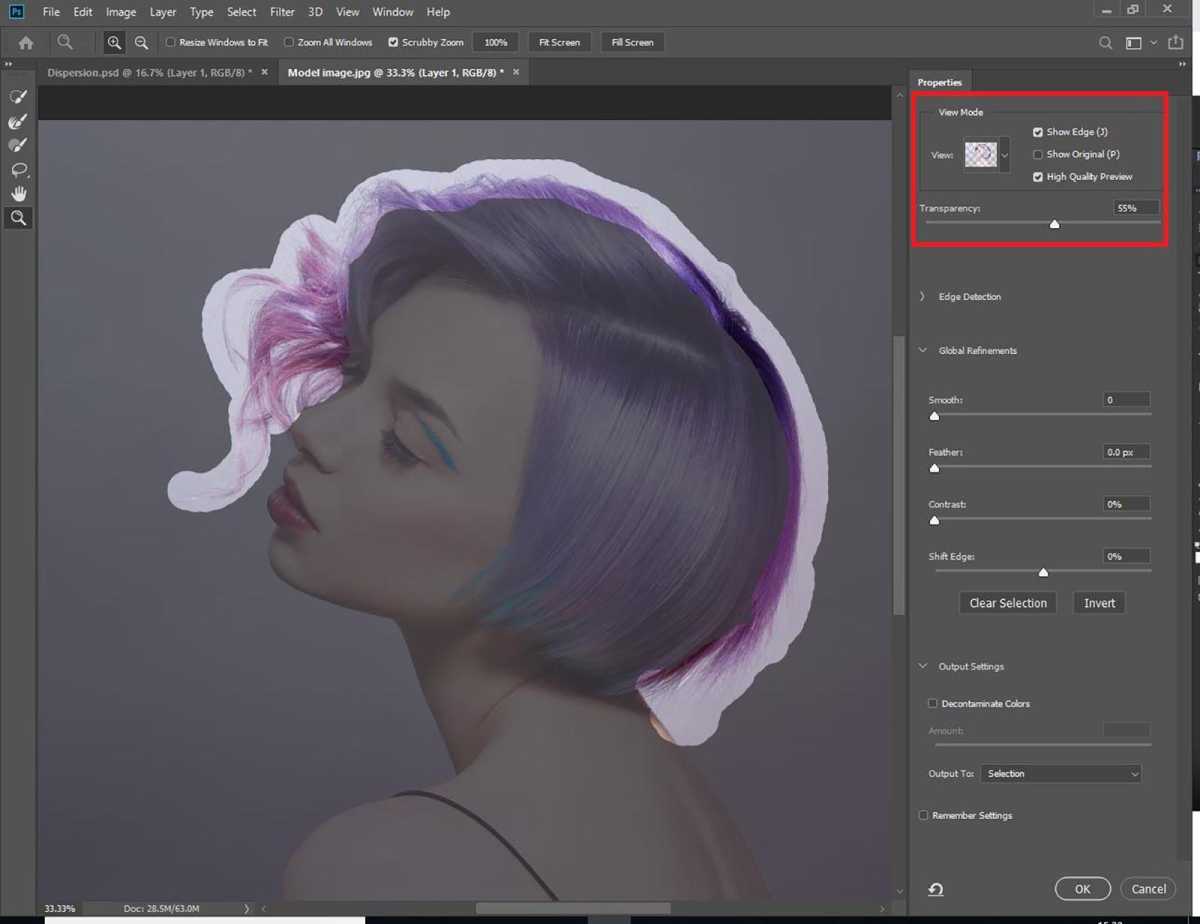
Foundry
Select the edge of the hair. If you can’t see the selected area, click on “Show Edge” under View Mode in the Properties panel.
Step 10
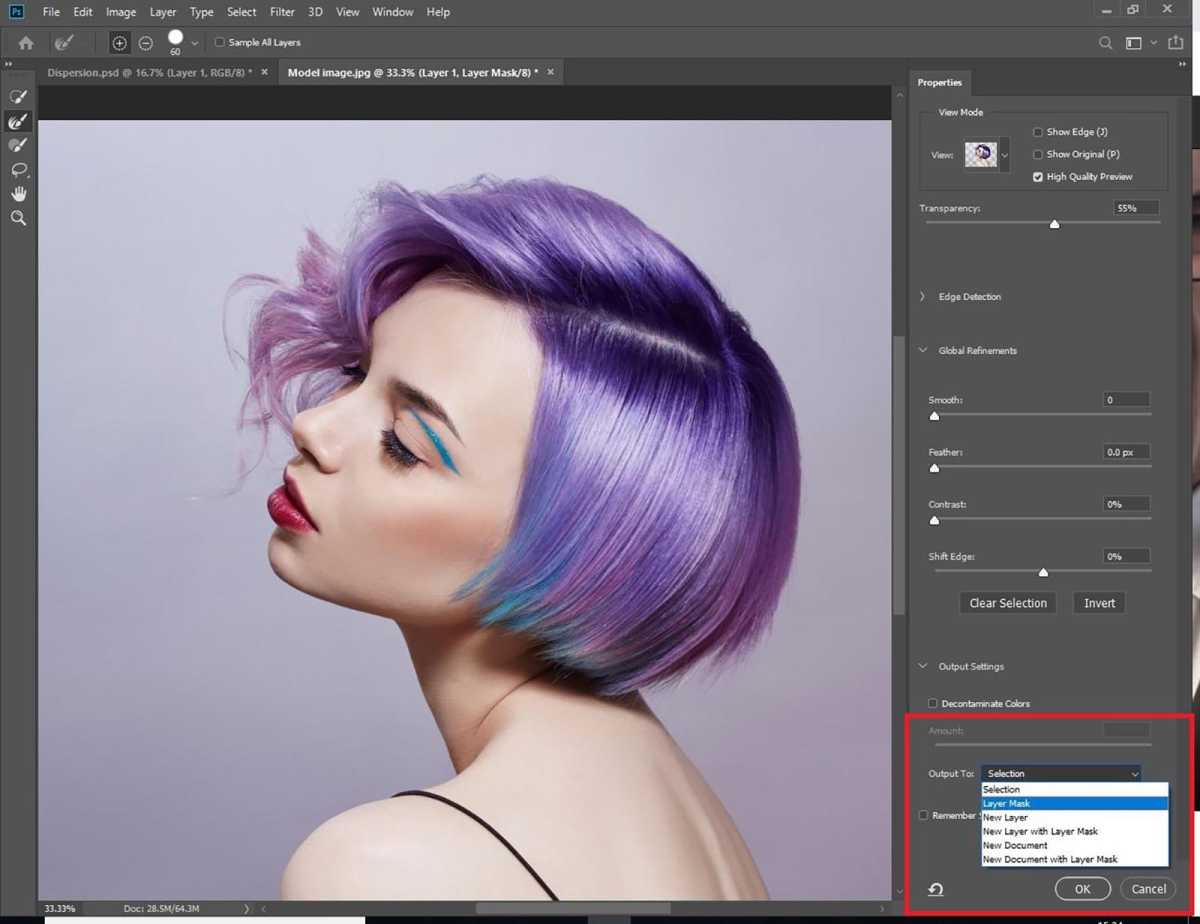
Foundry
At the bottom of the Properties panel, select “Layer Mask” from the Output To drop down. Click OK.
Step 11
Foundry
You should see a Layer Mask applied. Duplicate this layer.
Step 12
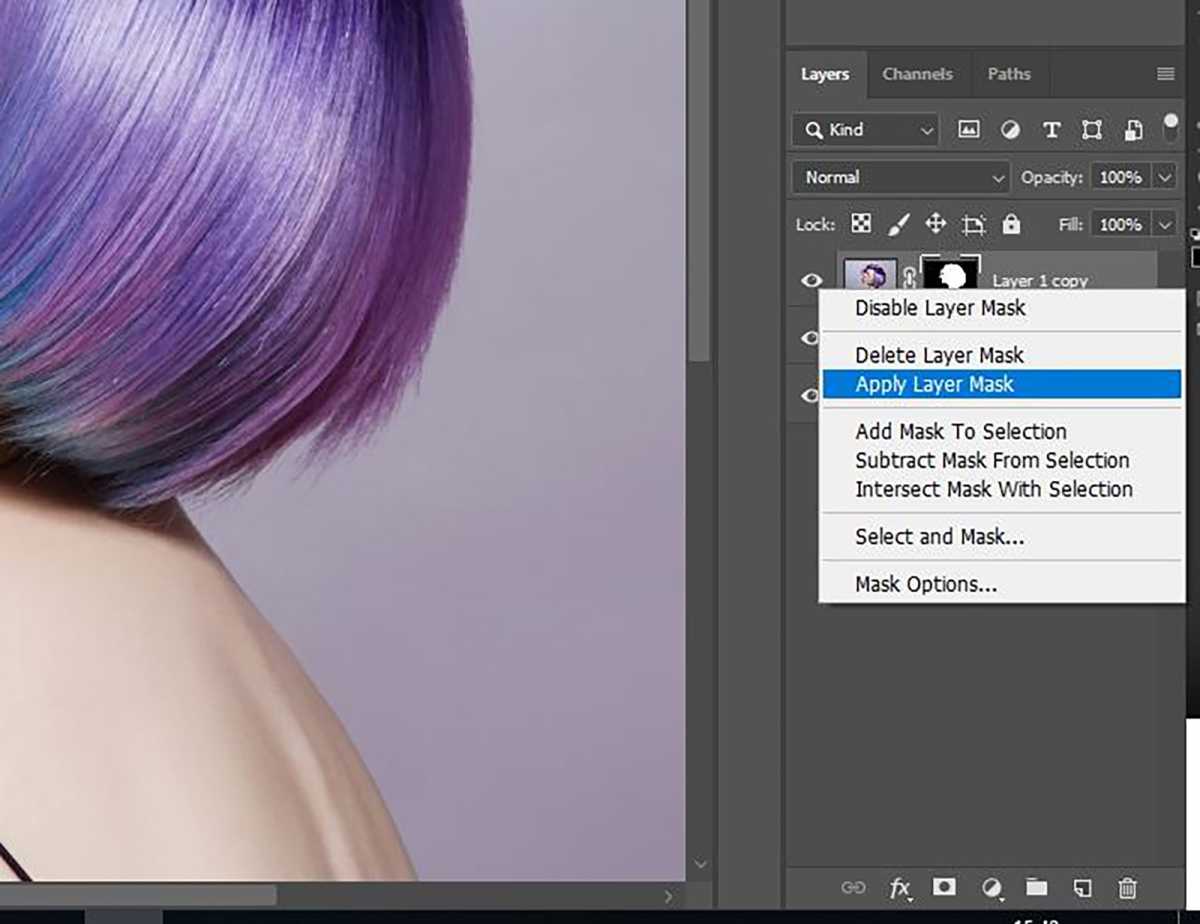
Foundry
Right click on the copied layer’s Layer Mask and click on “Apply Layer Mask”.
Step 13
Foundry
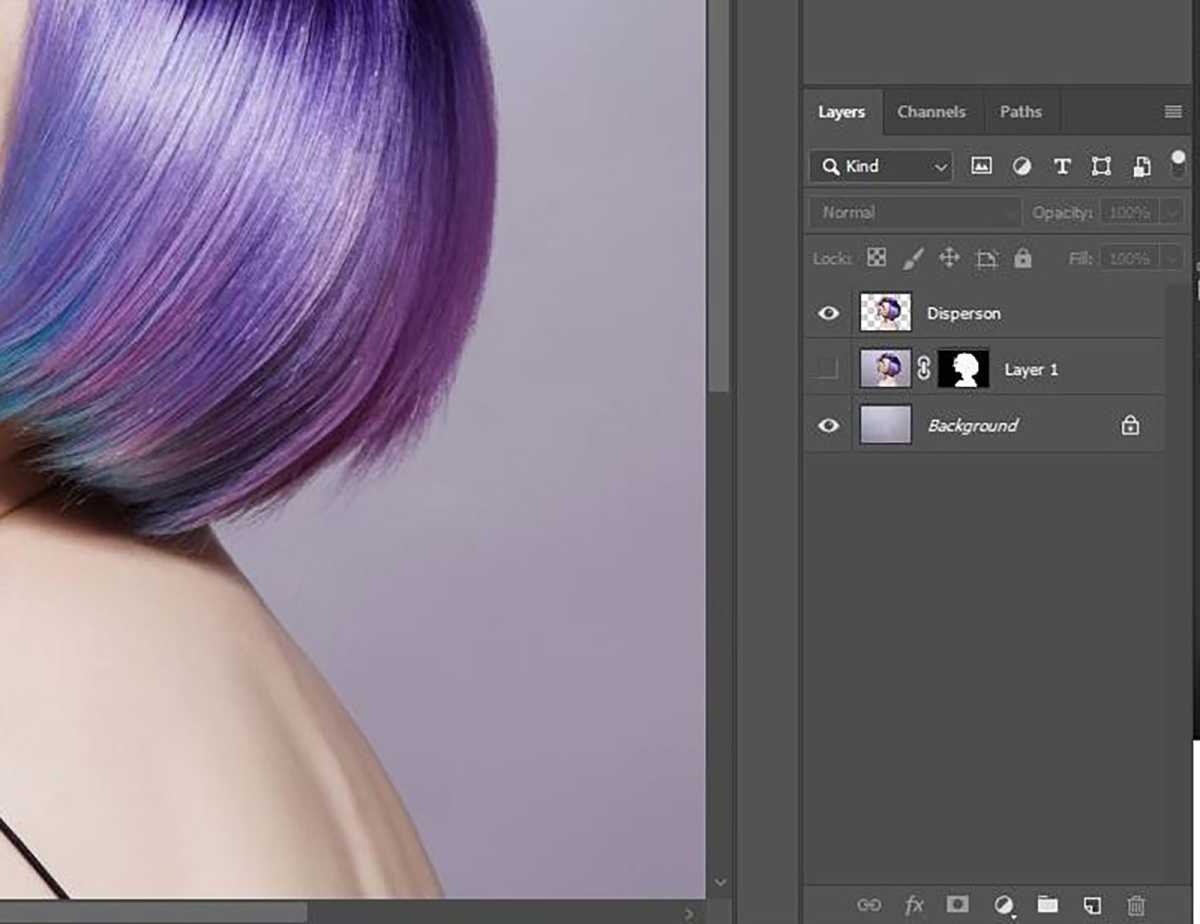
You should see that the top layer is now just your subject, isolated. Rename this layer to ‘Dispersion’ (which will help avoid confusion later) and turn off the visibility of the middle layer by clicking on the Eye icon.
Step 14
Foundry
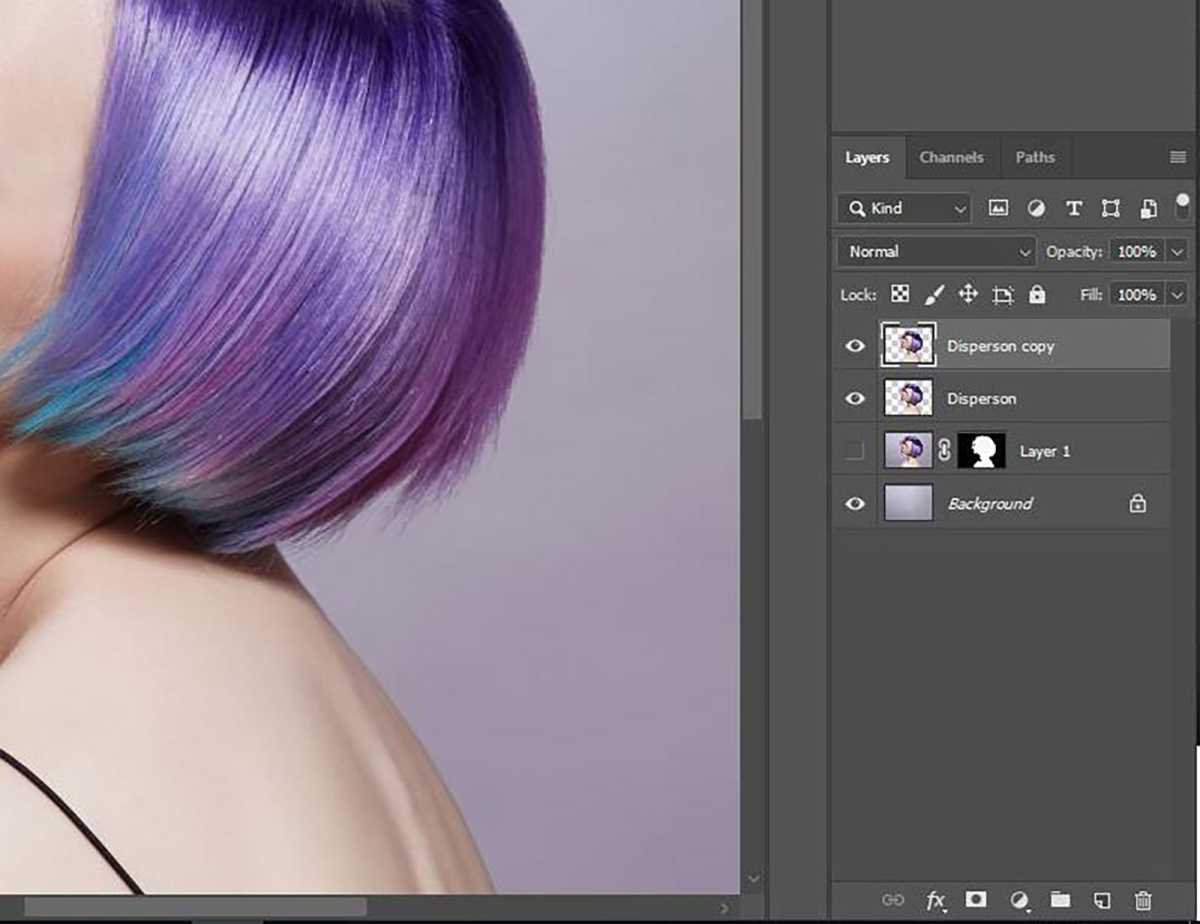
Duplicate the ‘Dispersion’ layer and rename it to “Foreground”.
Step 15
Foundry
With the ‘Disperson’ layer selected, go to the Filter option in the top menu bar and choose “Liquify”.
Step 16
Foundry
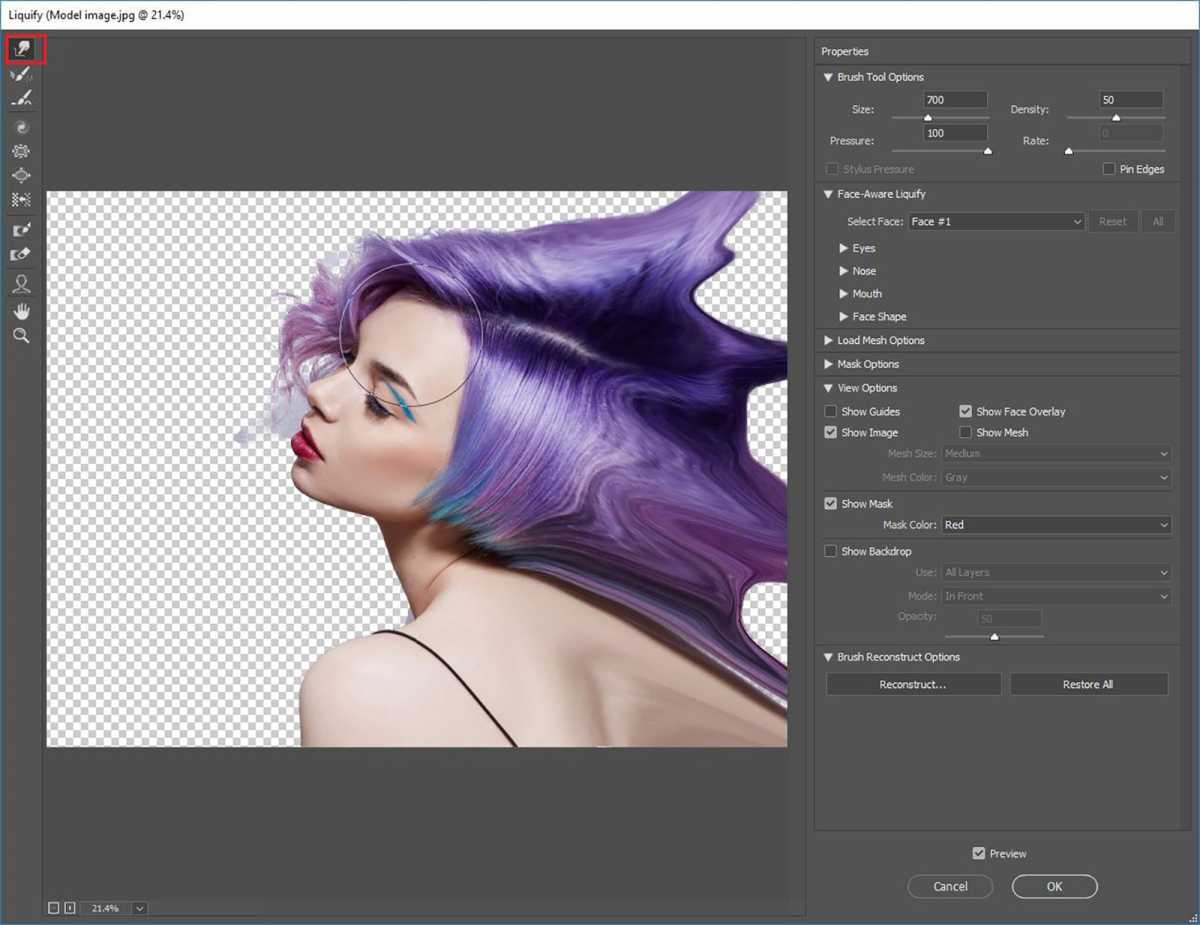
Using the Forward Warp tool (first option on left), drag out the area of the image you want to see dispersed.
You can increase or decrease the radius of the brush using the square brackets on your keyboard. Use the left bracket “[” to decrease the radius and the right bracket “]” to increase the radius.
The degree of distortion you apply will form the distance of the dispersion or disintegration in your final image. In other words, distort it as intensely as you want to see the “ashes” fly.
Once you’re happy, click OK.
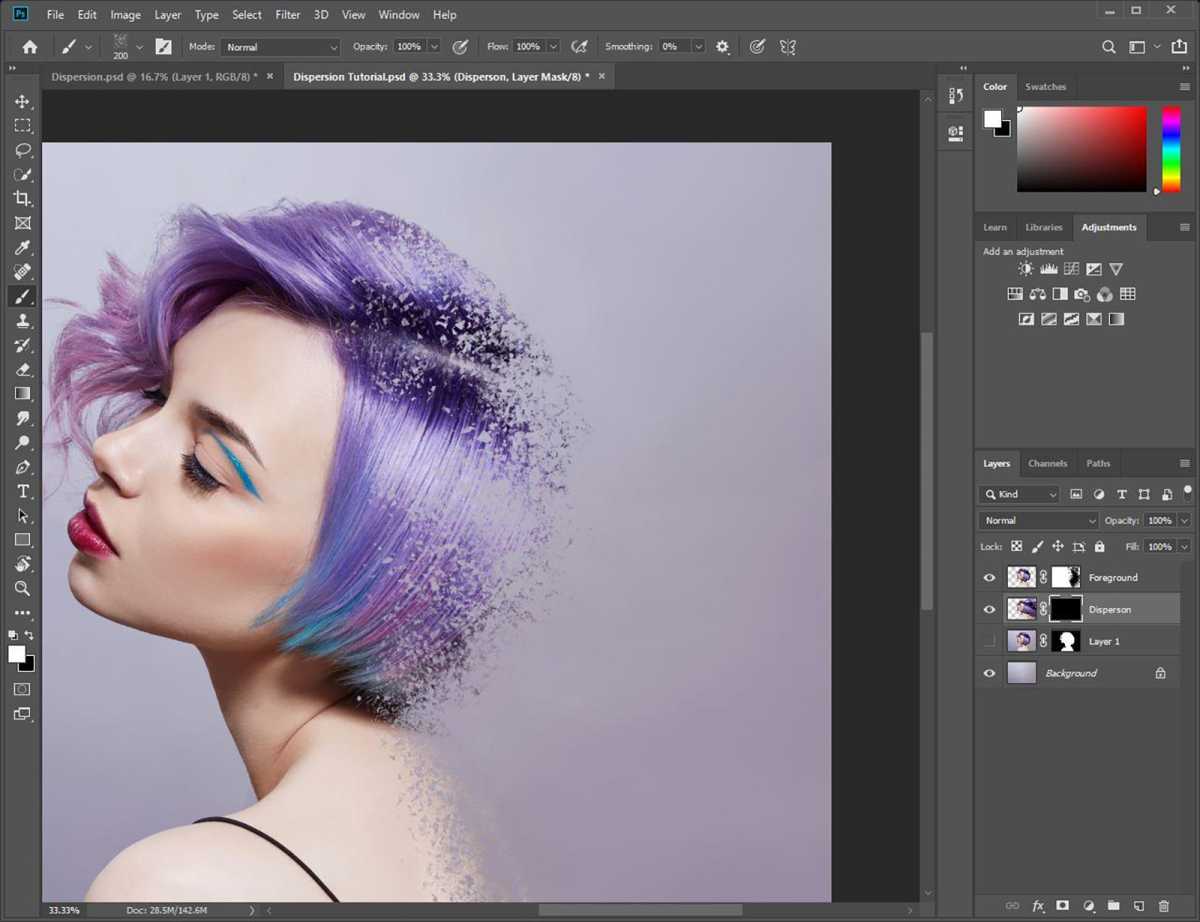
Step 17
Foundry
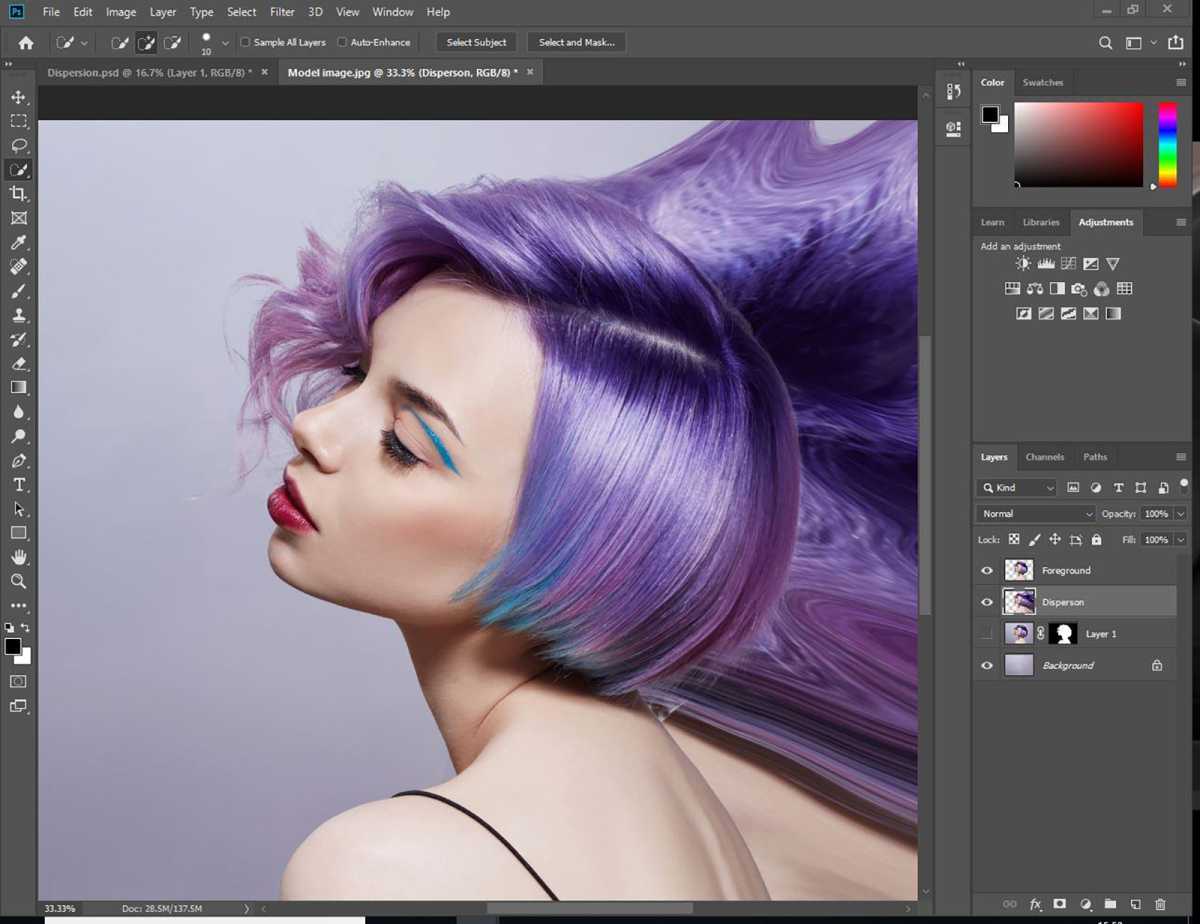
That should leave you something like this.
Next, with your Dispersion layer selected, hold Alt (or Option for Mac) on your keyboard and click on the Mask button at the bottom of the Layers panel. This masks or hides the Dispersion layer.
The Mask button is the rectangle with a circle within it (highlighted in the next slide).
Step 18
Foundry
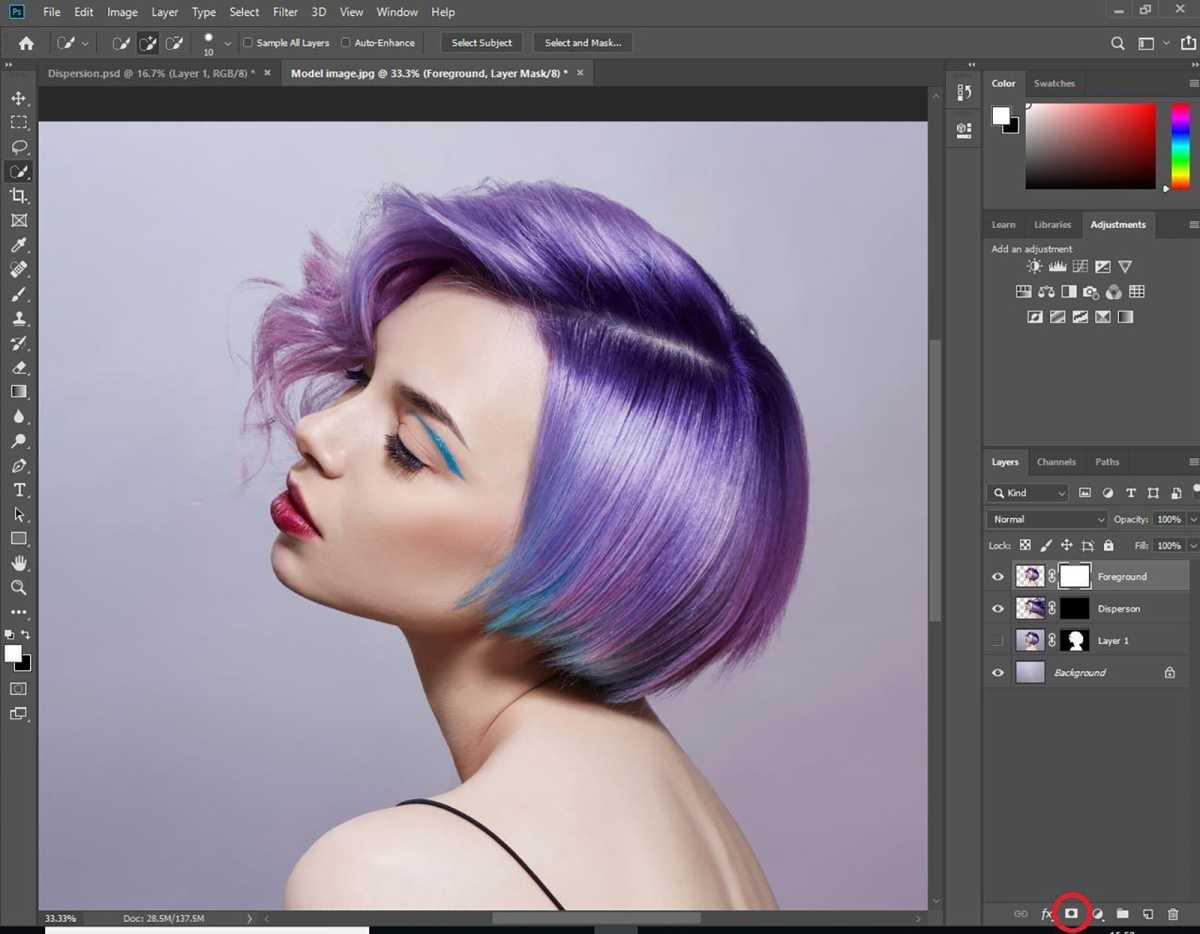
Select the “Foreground” layer in the Layers panel and click Mask without holding down Alt (or Option).
You should see that your Dispersion layer has a black mask, while the Foreground layer has a white mask. The former is a Hide Mask , while the latter is a Reveal Mask.
Step 19

Foundry
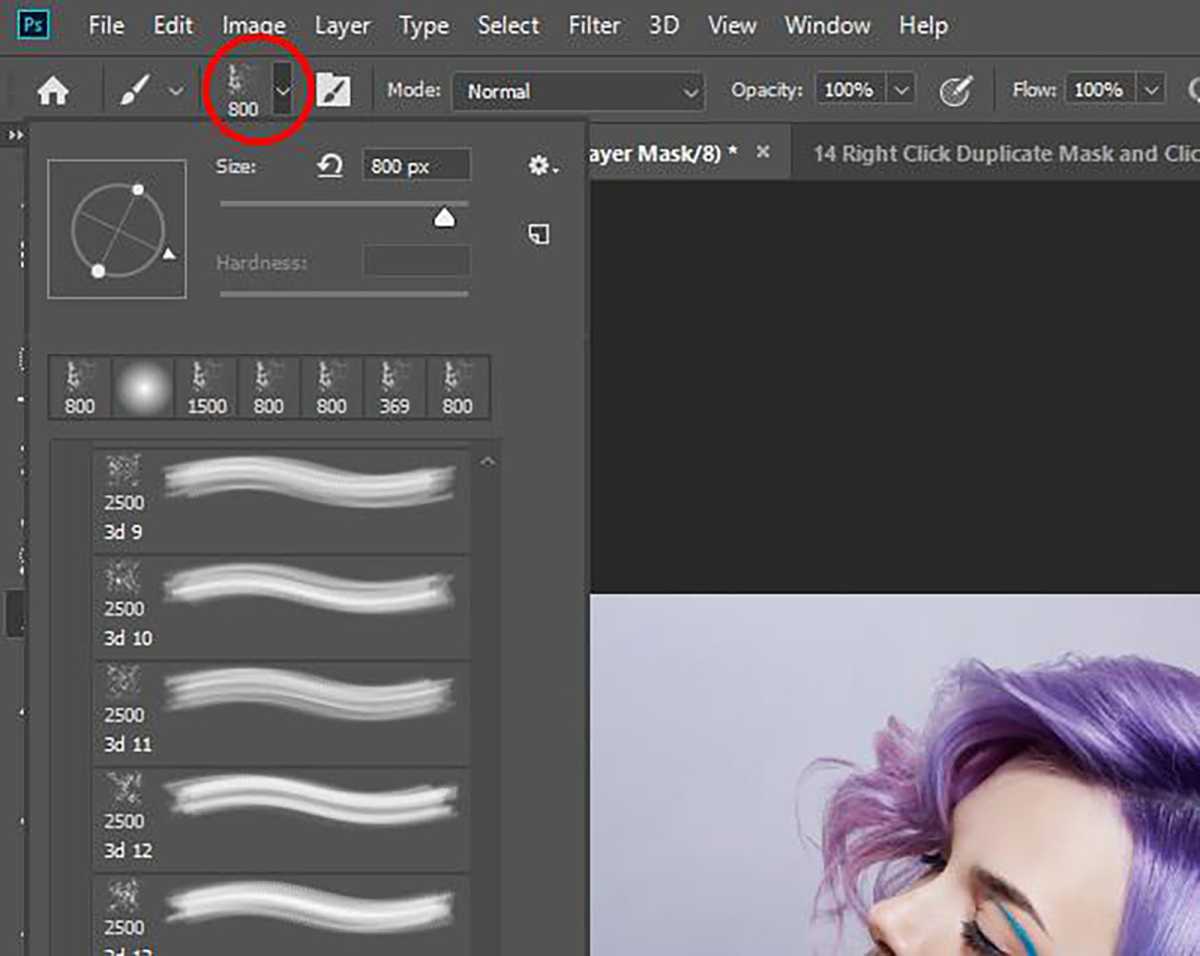
With your Foreground mask selected, click on the Brush tool and choose a dispersion brush from the Brush panel. This is where you can install a brush pack if you haven’t already.
Make sure the foreground colour of the brush is set to black when on the “Foreground” layer as this is what blocks out (that is “masks”) bits of the selected layer. Start blotting out parts of the image.
Play with the brush size, type and rotation of the brush so the dispersed bits don’t look like a pattern.
Step 20
Foundry
You can control the brush dynamics from the drop down at the top.
This is also where you can rotate the brush (by clicking the arrow on the circle with the cross-hair, which represents your brush tip).
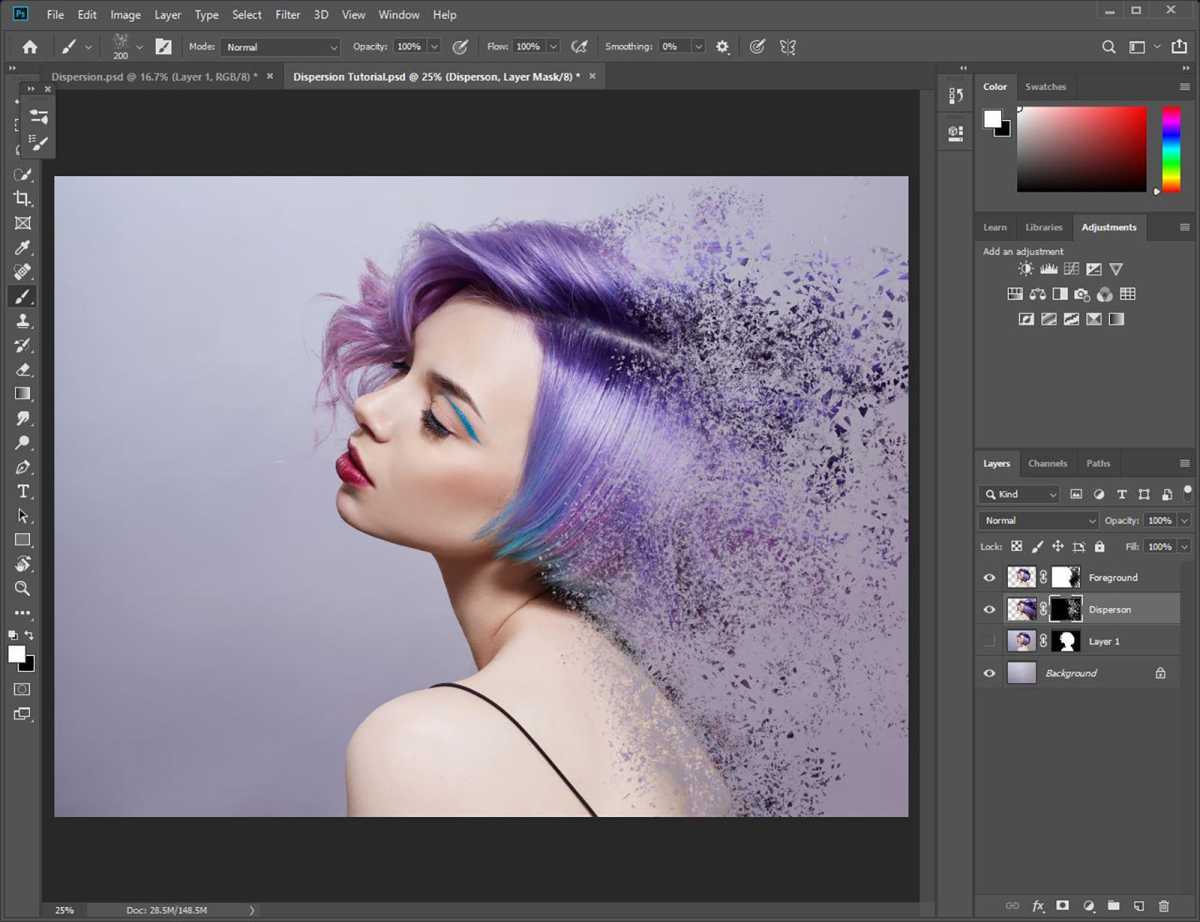
Step 21
Foundry
Next, we will start building the dispersion “ashes” by revealing parts of the Liquify distortion we made earlier. Check that the foreground colour of your brush is set to white.
Click on the “Dispersion” layer mask.
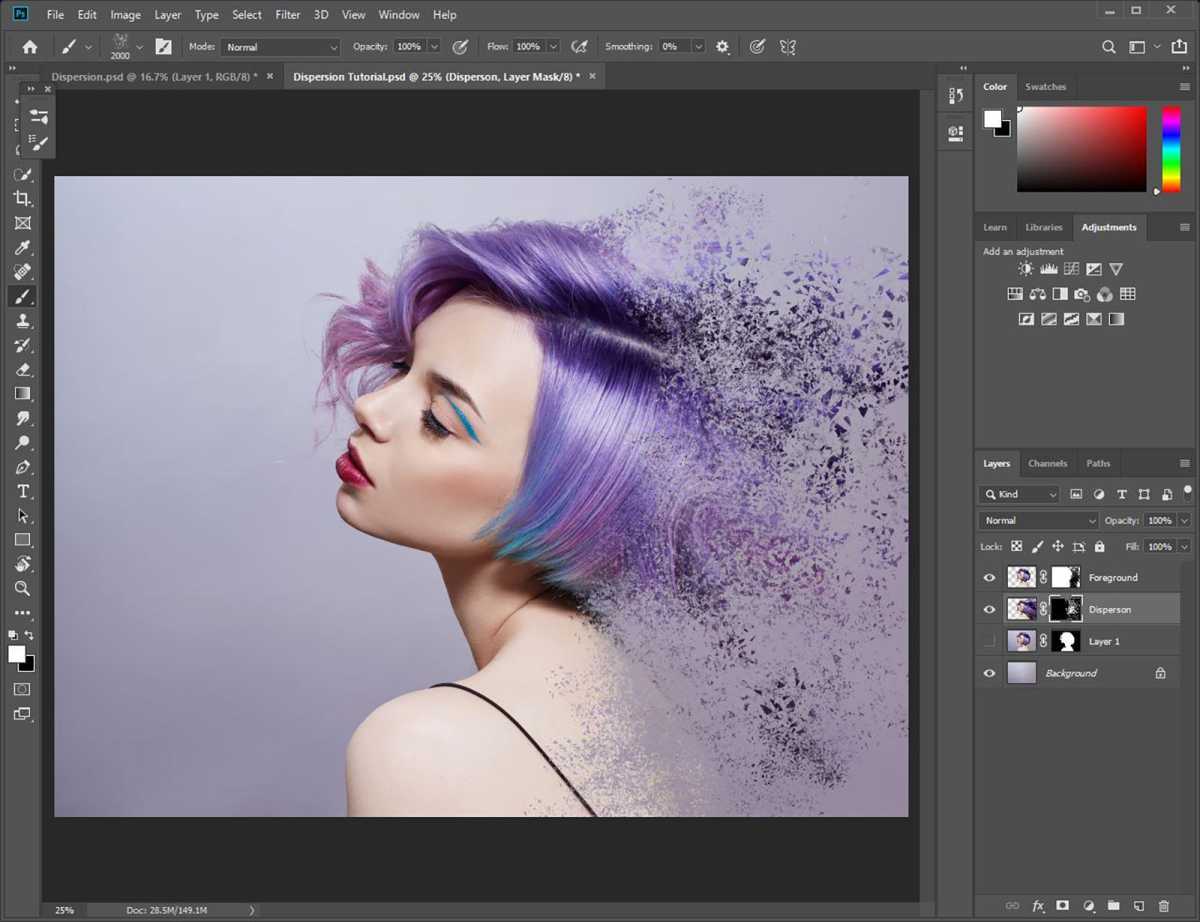
Step 22
Foundry
Start blotting away with the Brush tool, again, playing with the size and angle of the brush you use.
Take your time here to get the effect you want.
Step 23
Foundry
You can switch between the ‘Dispersion’ and ‘Foreground’ layers to add or reduce the degree of the effect. Just remember to switch your brush colour according to the layer you’re in and what you want to hide or show.
In the ‘Dispersion’ layer, use the white brush to show particles and the black brush to hide particles. In the ‘Foreground’ layer, use the white brush to hide the edges of your subject and the black brush to reveal edges.
Step 24
Foundry
Once you’re satisfied with your effect, you can clean up bits that don’t belong.
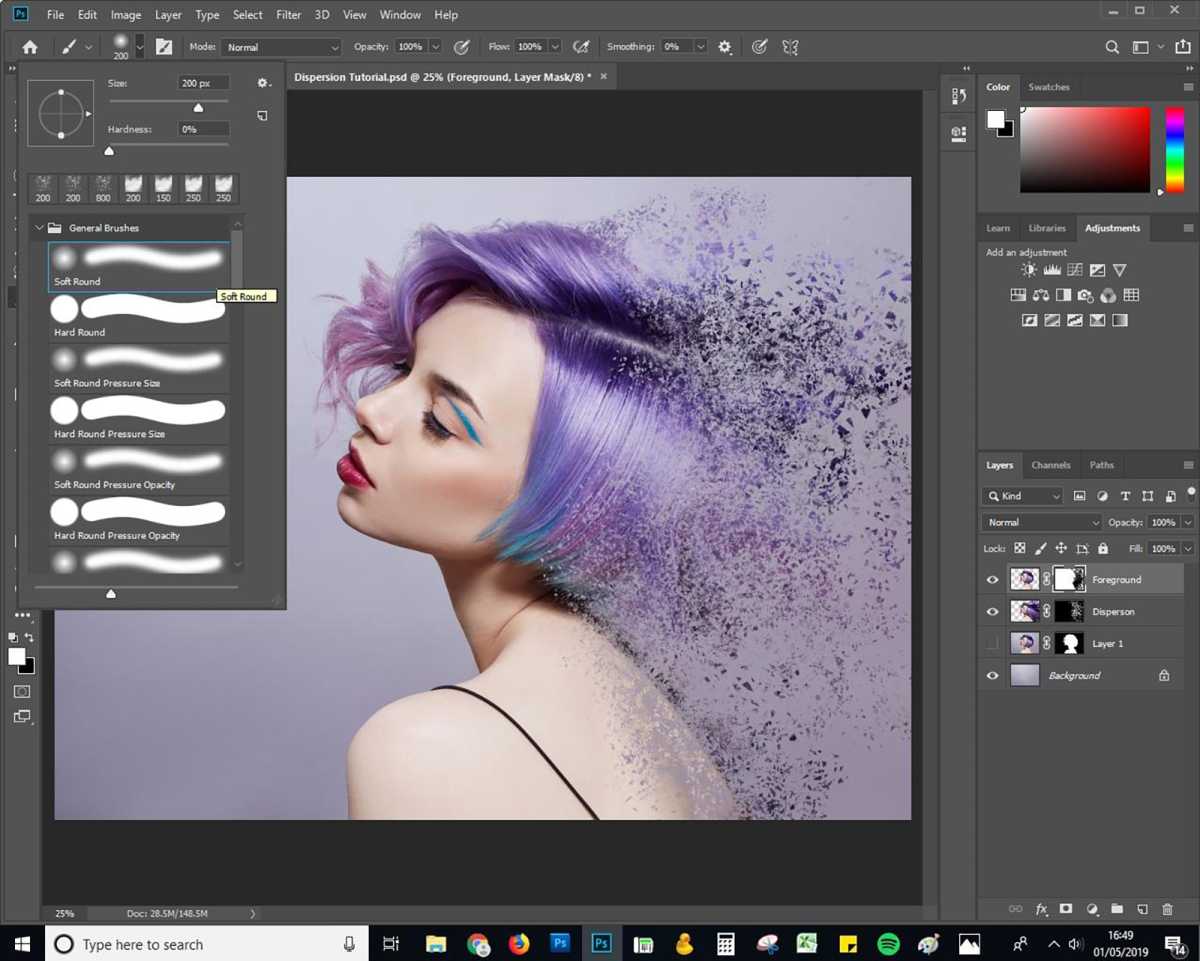
Select the Soft Round brush from the General Brushes palette in the Brush menu.
Step 25
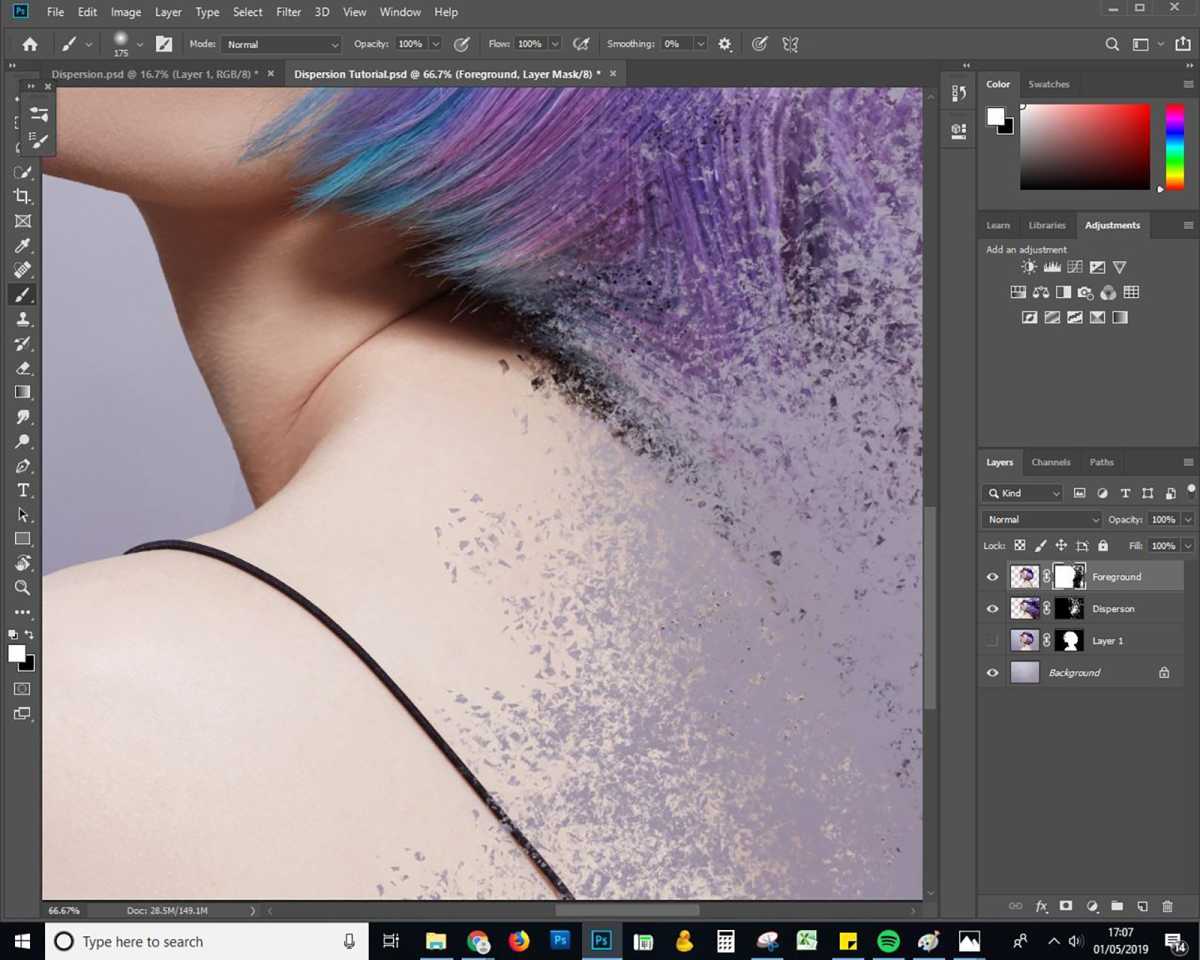
Foundry
Mask out any fragments that don’t quite belong. In our example, we’ll clean up the model’s shoulder.
Step 26
Foundry
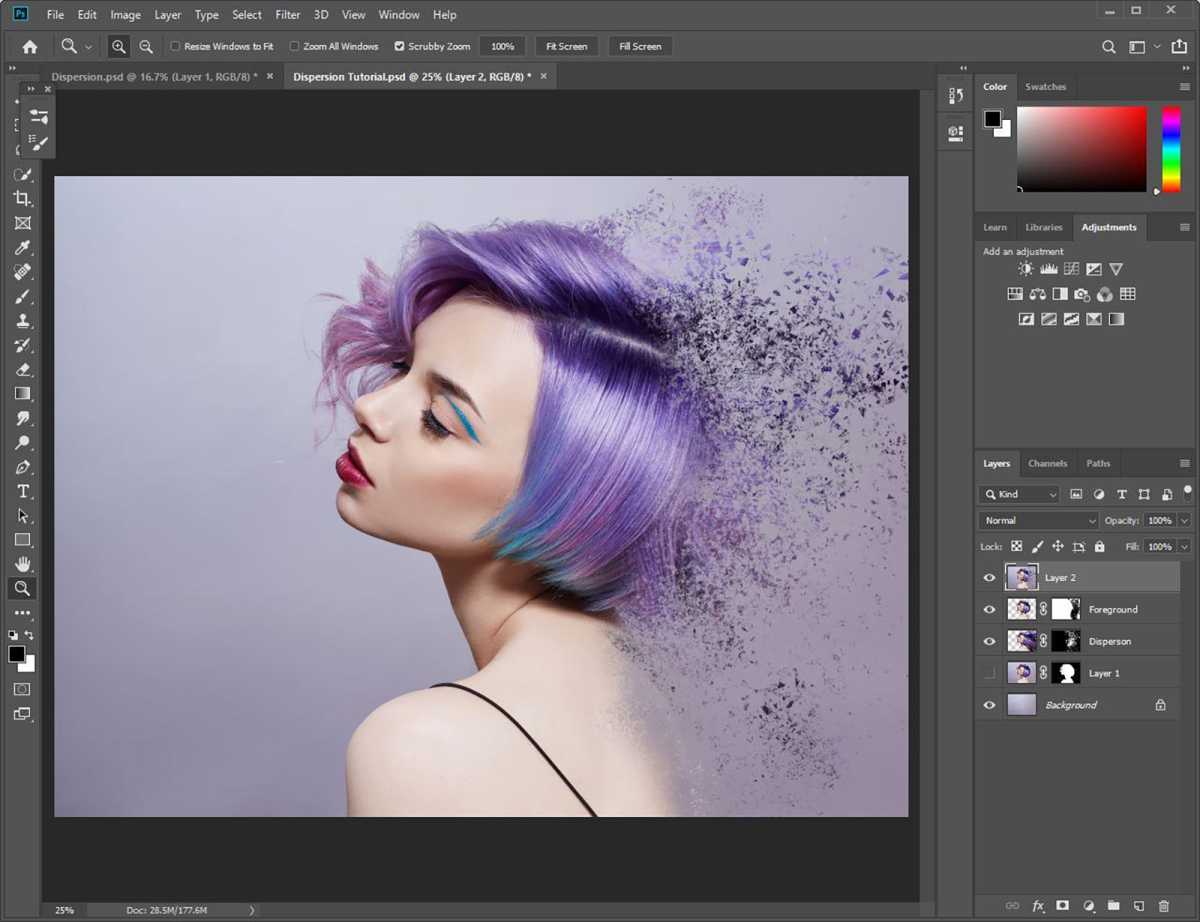
The next step, though optional, is sharpening the effect if it looks a little too feathered. To do this, hold down Ctrl + Shift + Alt + E to merge all visible layers.
This should produce a new layer, “Layer 2”.
Step 27
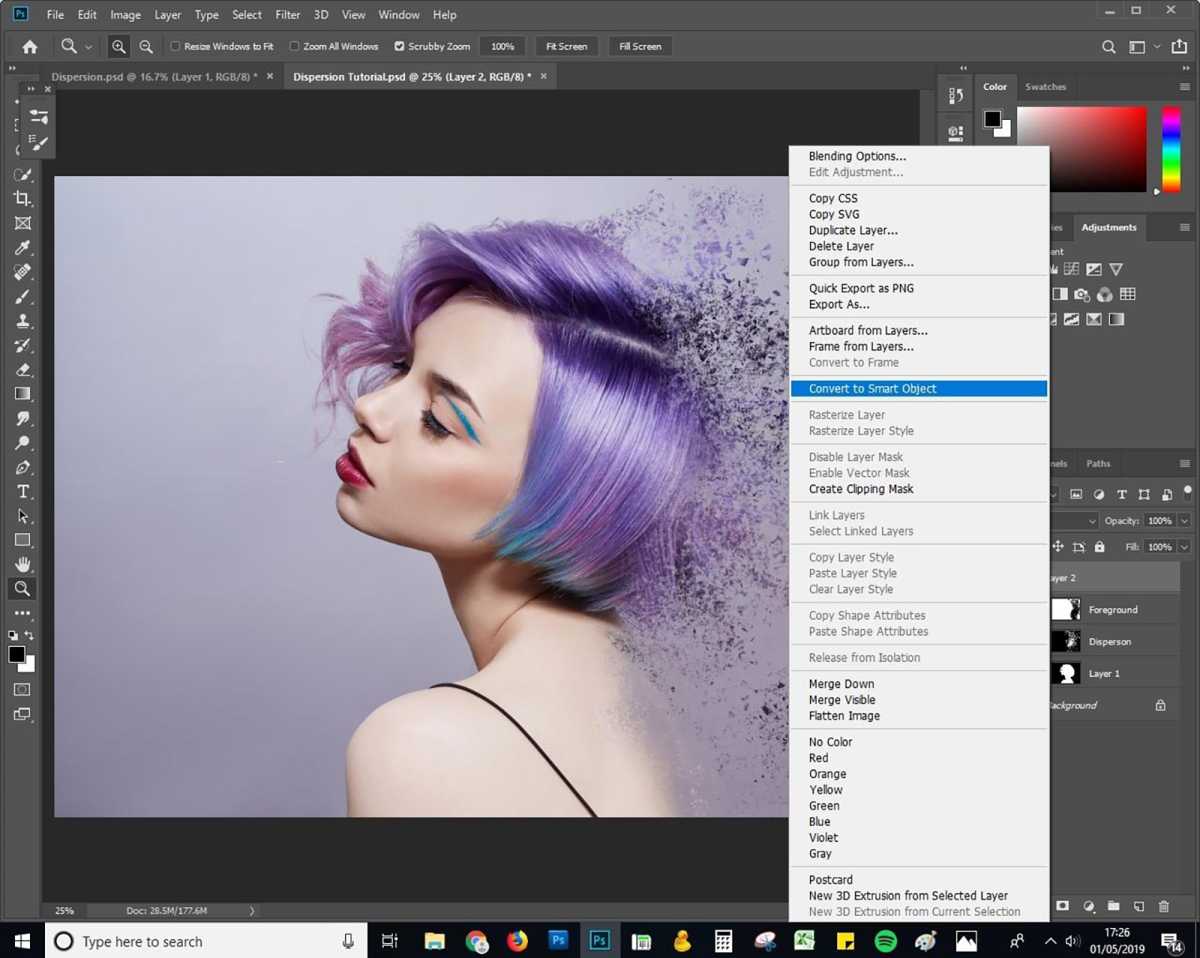
Foundry
Right click on “Layer 2” and then Convert to Smart Object.
Step 28
Foundry
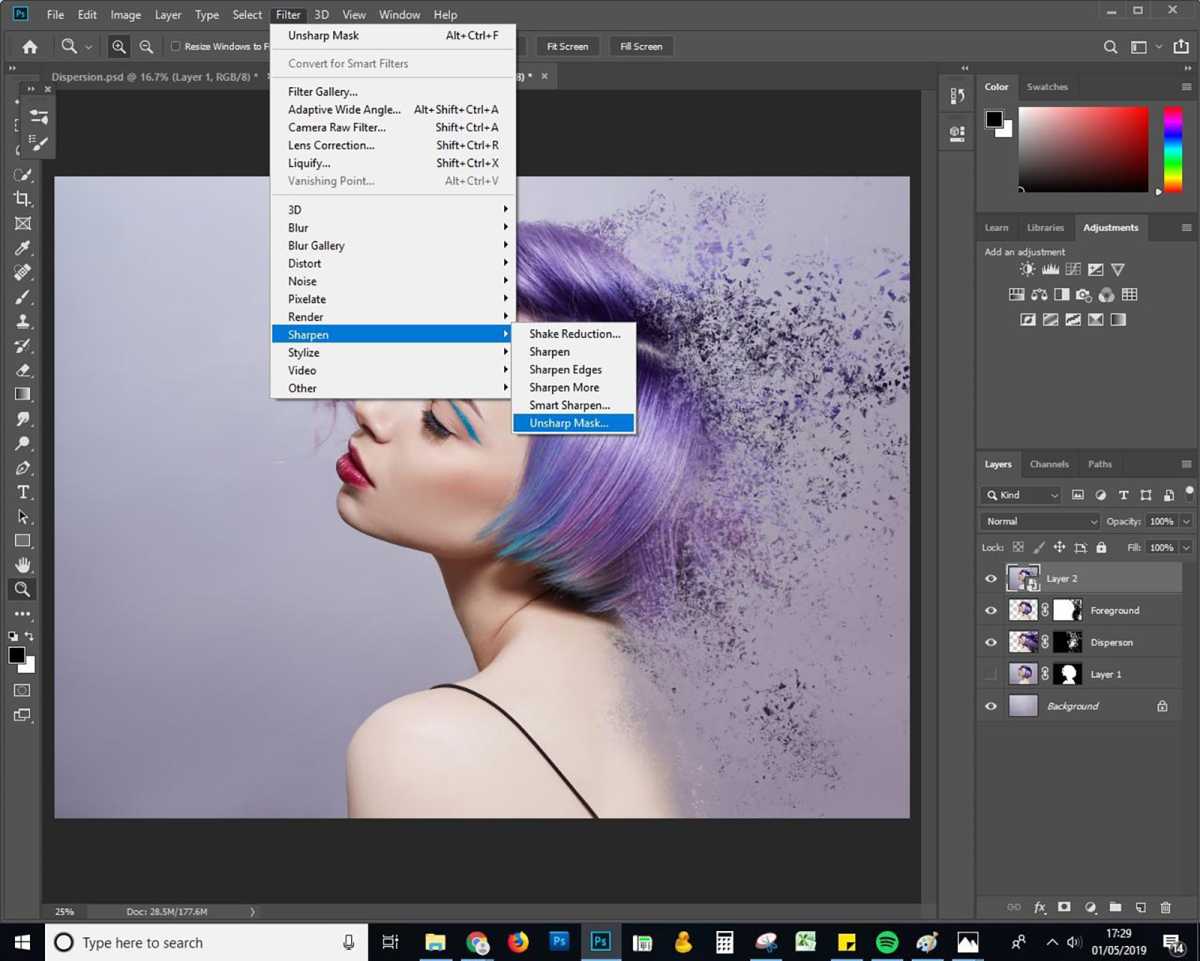
From the Filter menu at the top, choose Sharpen, and then Unsharp Mask.
Step 29
Foundry
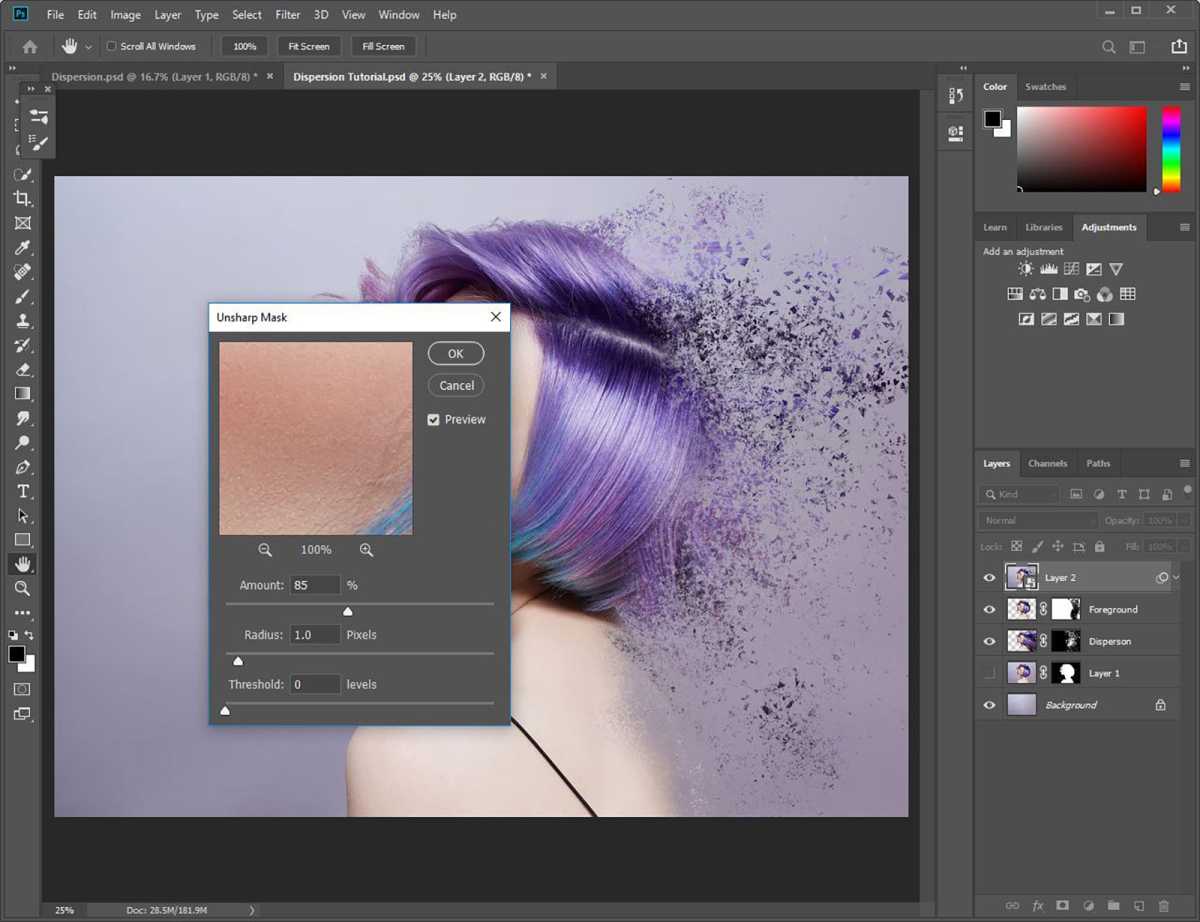
Play around with the amount based on how much you want to sharpen your image. By converting the layer to a Smart Object, you can always come back and change the amount later. We’ve gone with 85%.
Step 30
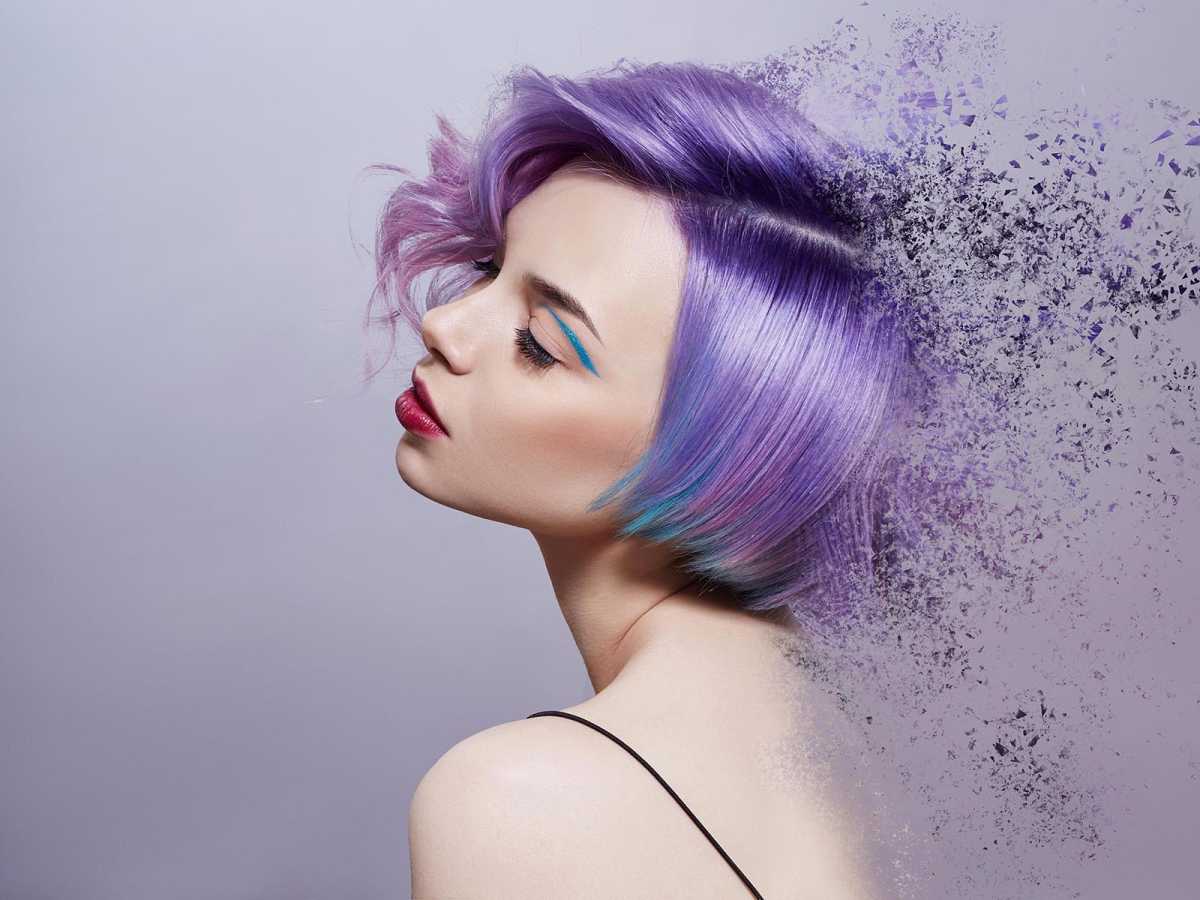
Foundry
This was our final result.
Author: Somrata Sarkar, Contributor, Tech Advisor

Previously a Tech Advisor Senior Staff Writer, Somrata researches and writes about the best tech deals to help readers make smart, informed buying decisions. She’s an expert on accessories and also reviews laptops, phones, audio and other devices.
Recent stories by Somrata Sarkar:
- Is Adobe CC free for students?
- Get 41% off Adobe CC for a year & extra discounts for students
- Does Windows 11 come with Microsoft Office?
