Sometimes the wind gets the better of us, and sometimes it’s just heat-induced frizz. Whatever the cause, if you’re looking to Photoshop out flyaways and frizz from your pictures, you’ve come to the right place.
We’ve used Adobe Photoshop to complete this process, which is available separately or as part of Adobe Creative Cloud . Some students are eligible for an extended free trial of Creative Cloud , and there are also ways to get Photoshop for free .
Our source image is from JNemchinova, on iStock .
- Time to complete: 40 minutes
- Tools required: Adobe Photoshop
- Cost: From $19.99/£19.97 per month (free trial available)
Step 1
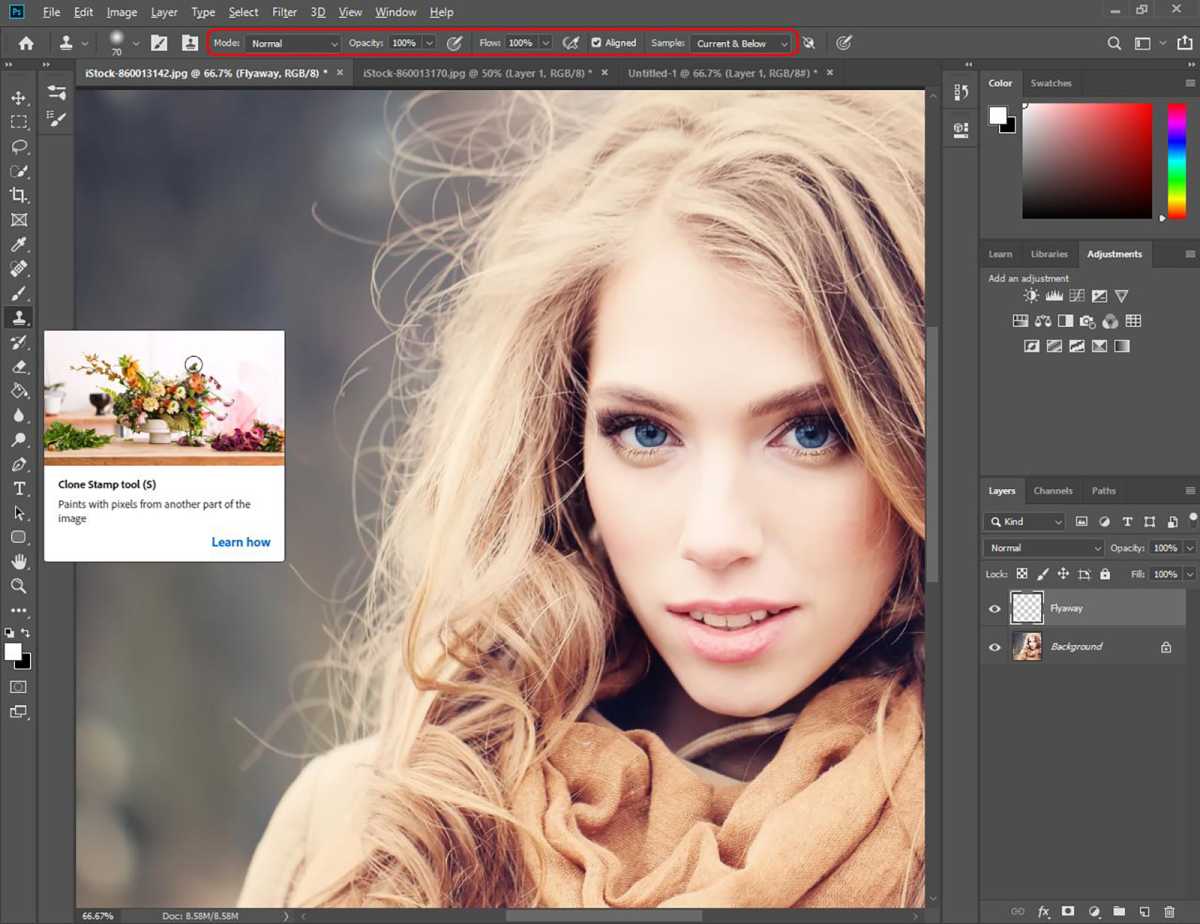
Foundry
Open your image and create a new layer. Select the Clone Stamp tool from the menu on the left and use the following settings:
Mode: Normal
Opacity: 100%
Flow: 100%
Sample: Current & Below
Step 2
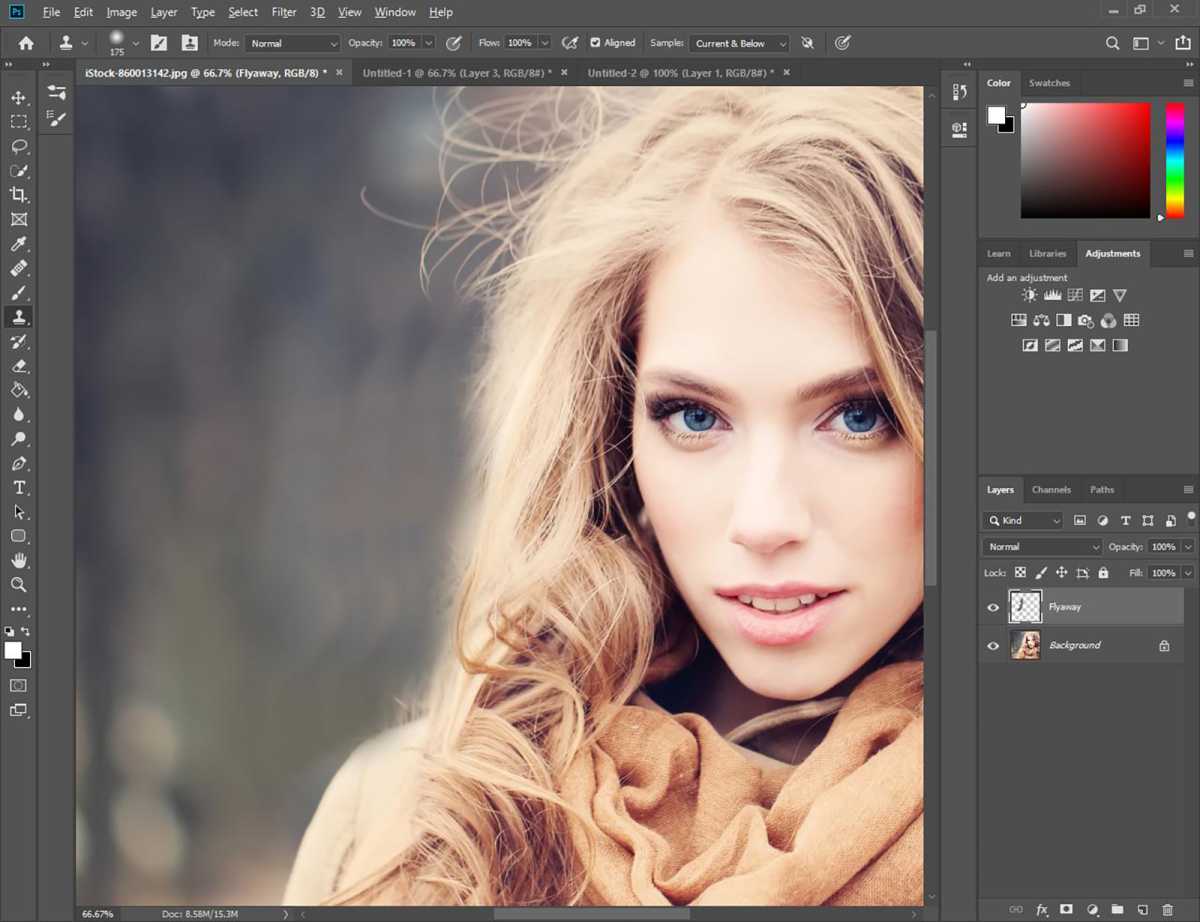
Foundry
You’ll need to select your source by holding down Alt (Option on Mac) and clicking on a point in the background. Now roughly paint away all the excess flyaways and frizz. This does not have to be perfect, as we will fine tune the look in the next few steps.
Step 3
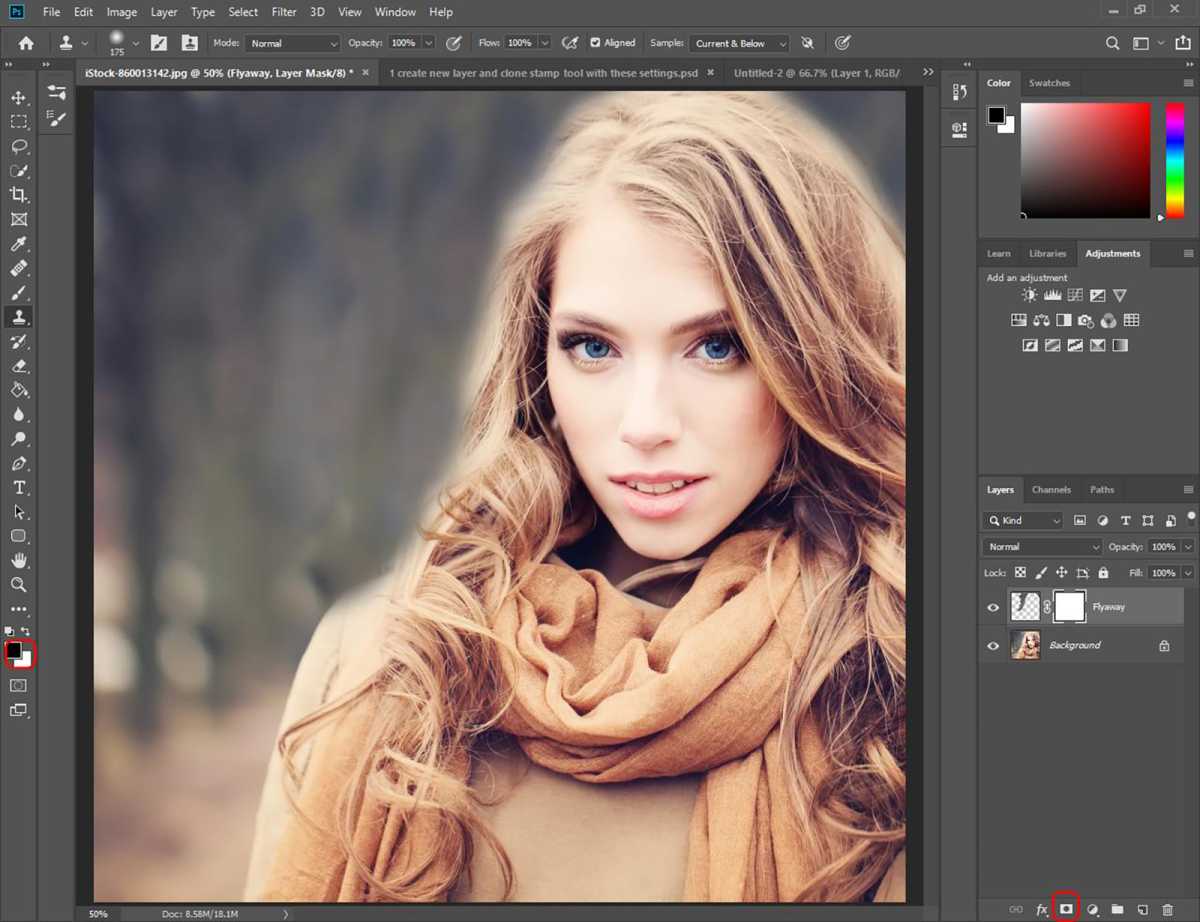
Foundry
We will now add a Mask to the layer. Click on the rectangular icon with a circle at the bottom of the Layer palette.
Check that the foreground colour is set to black, as shown.
Step 4
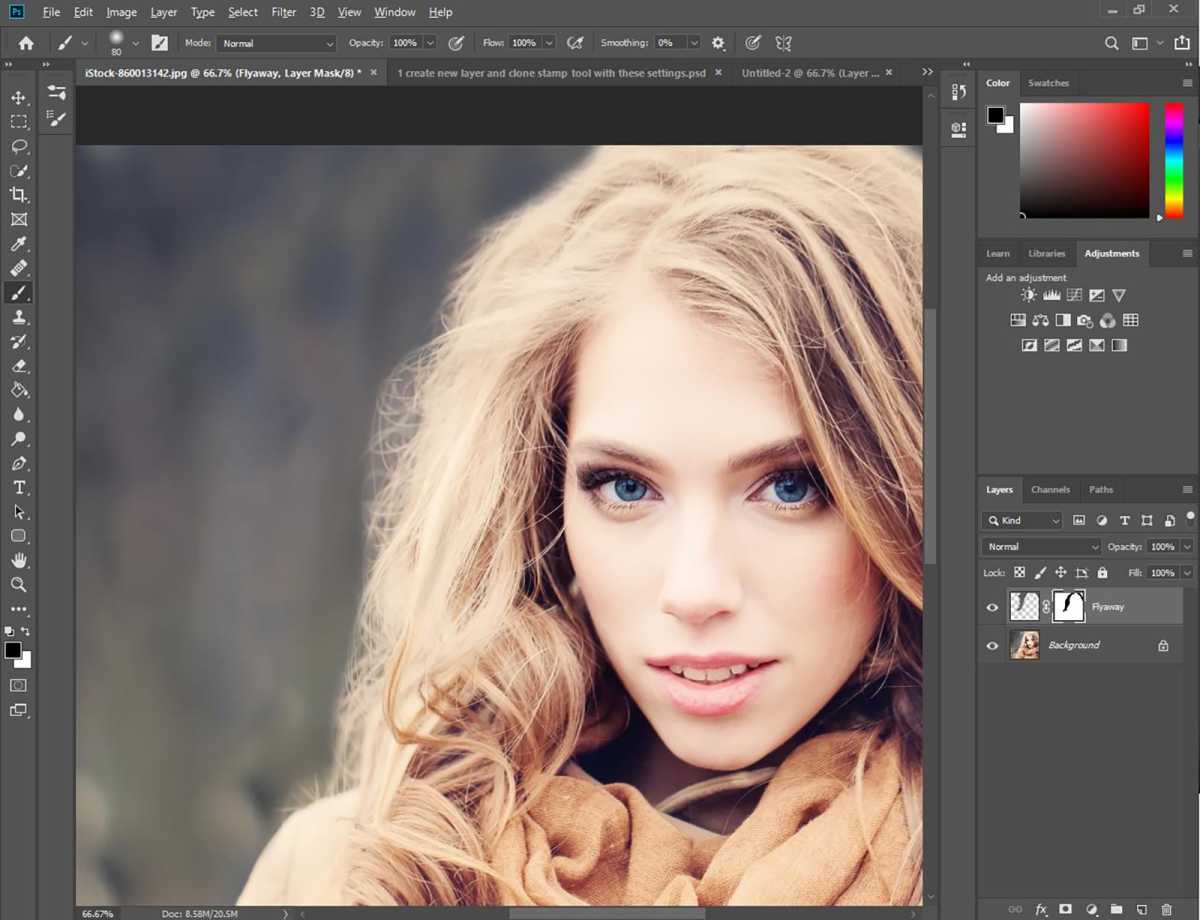
Foundry
We will now use the Brush tool on the mask to reveal some of the hair we painted over. If you choose to restore some of the flyaways you can do that now.
Step 5
Foundry
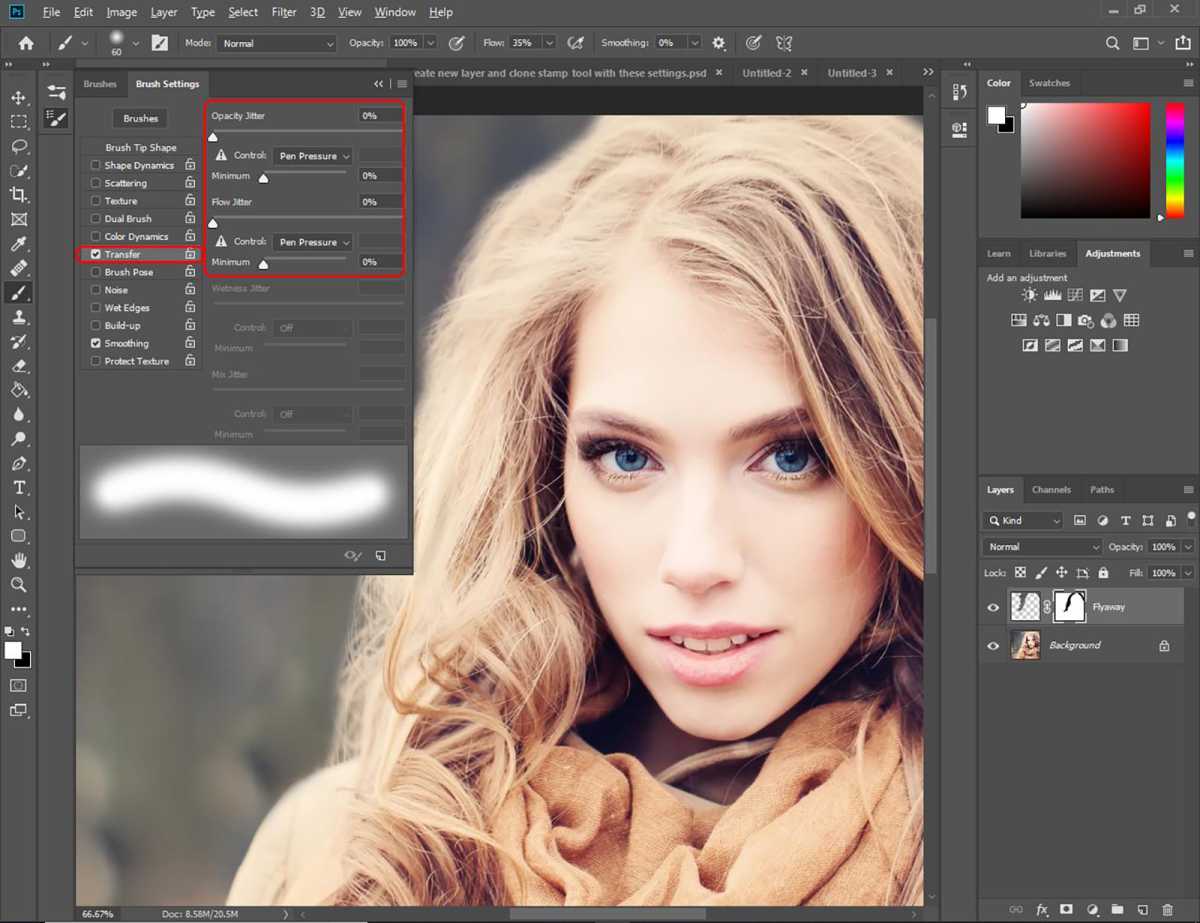
If you’re using a graphic tablet, you can fine tune your Brush settings by going to Window > Brush Settings.
Once the menu appears, check off Transfer and change the Control options to ‘Pen Pressure’, as shown.
Step 6
Foundry
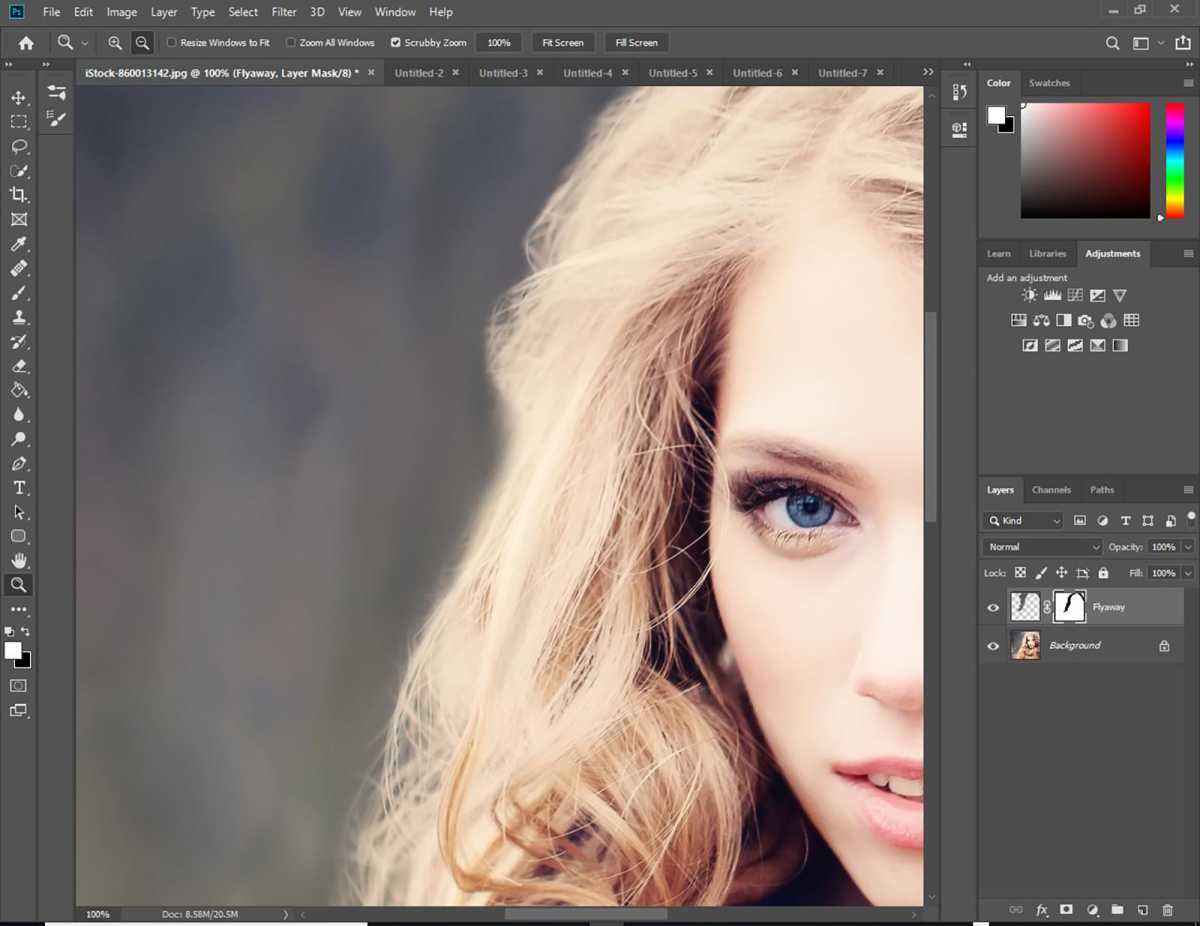
Paint over the mask using black as the foreground colour to reveal flyaways. You can also paint with white to hide flyaways. Press X on your keyboard to alternate the foreground colour between black and white.
Step 7
Foundry
If you feel comfortable with the look, you could stop while still keeping some flyaways visible.
Step 8
Foundry
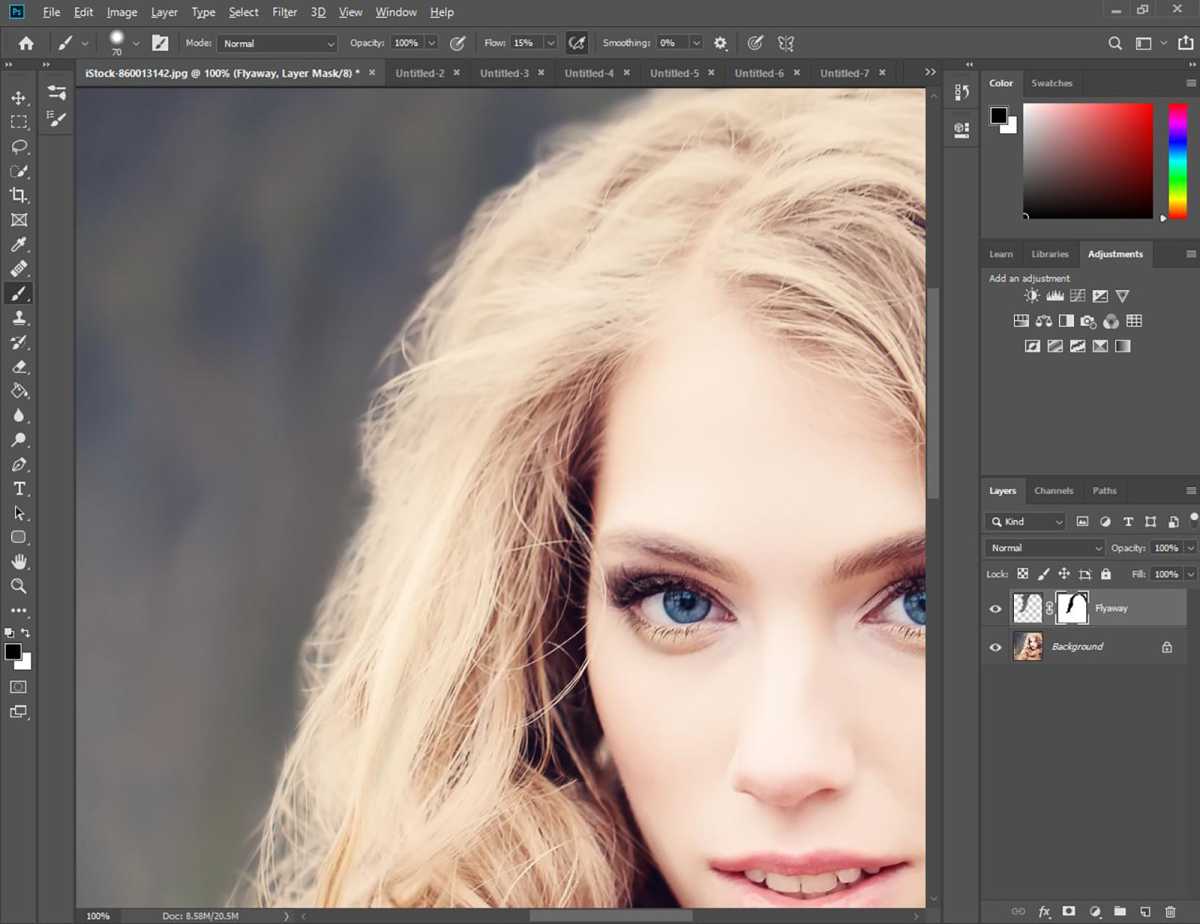
Zoom into details to add and remove back flyaways as desired.
Step 9
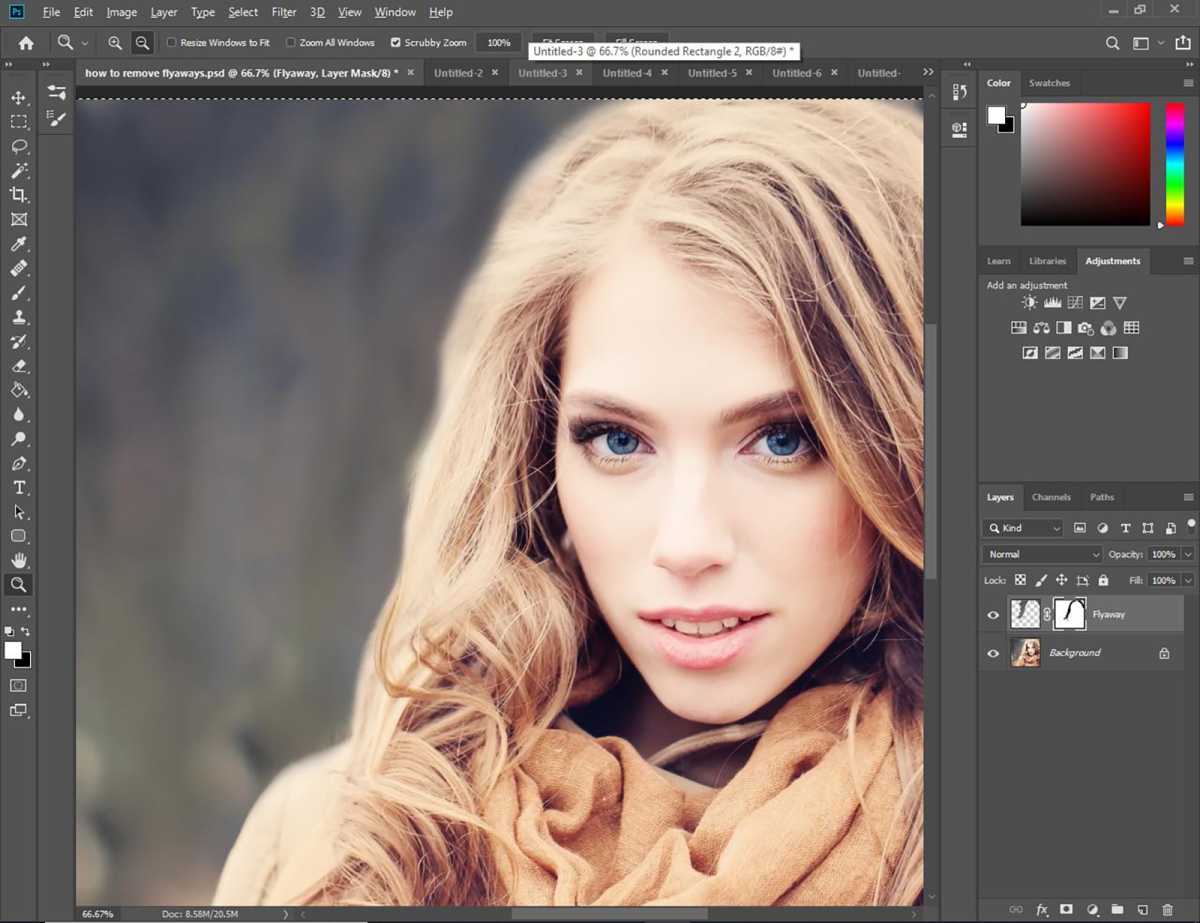
Foundry
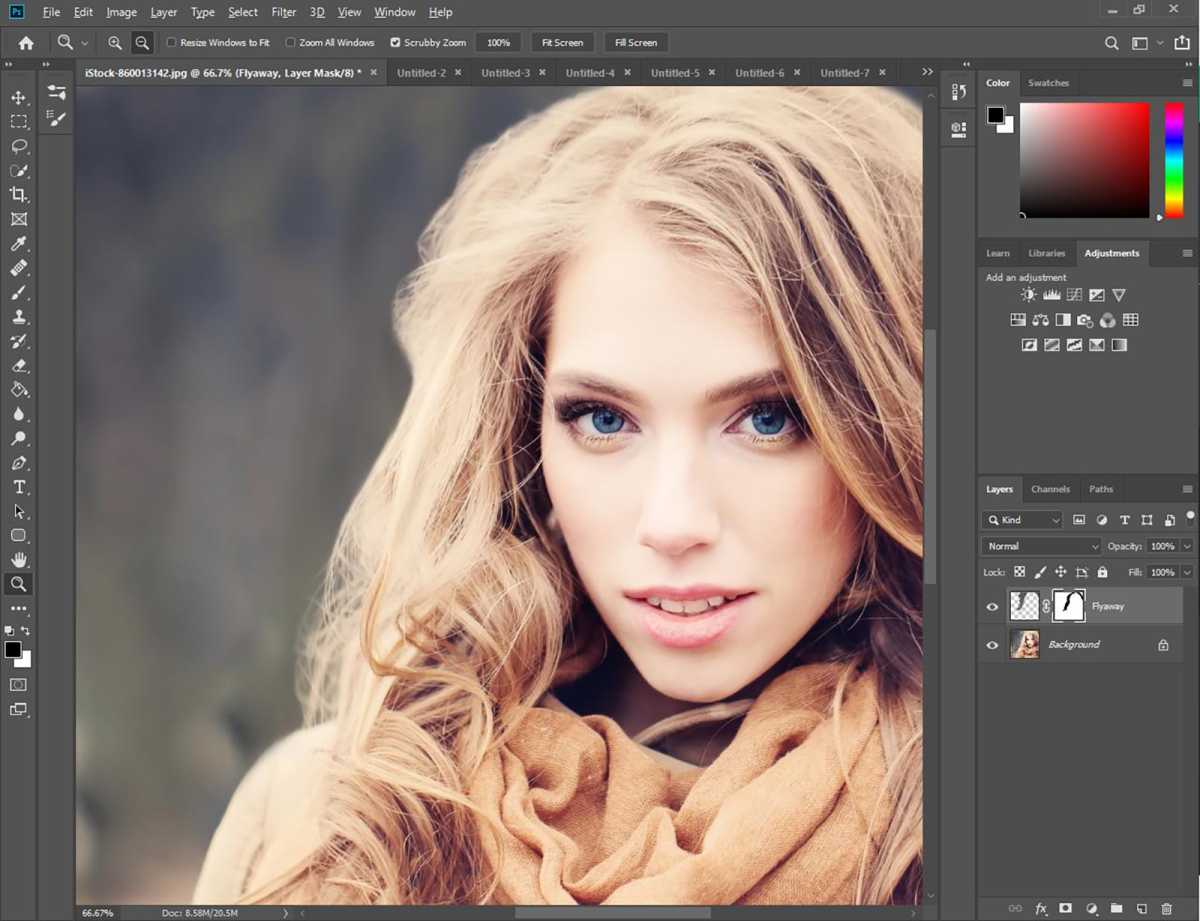
We’ve decided to remove the flyaways as well as some of the volume so hair shape appears more natural without the frizz. If you find that the edges look too soft, you can change the brush settings while you work (see next step).
Step 10

Foundry
We’ve changed the Flow setting to 79% and hardened the brush to give the edges more definition. Keep playing around with the look until you’re happy. It’s all about trial and error!
Step 11
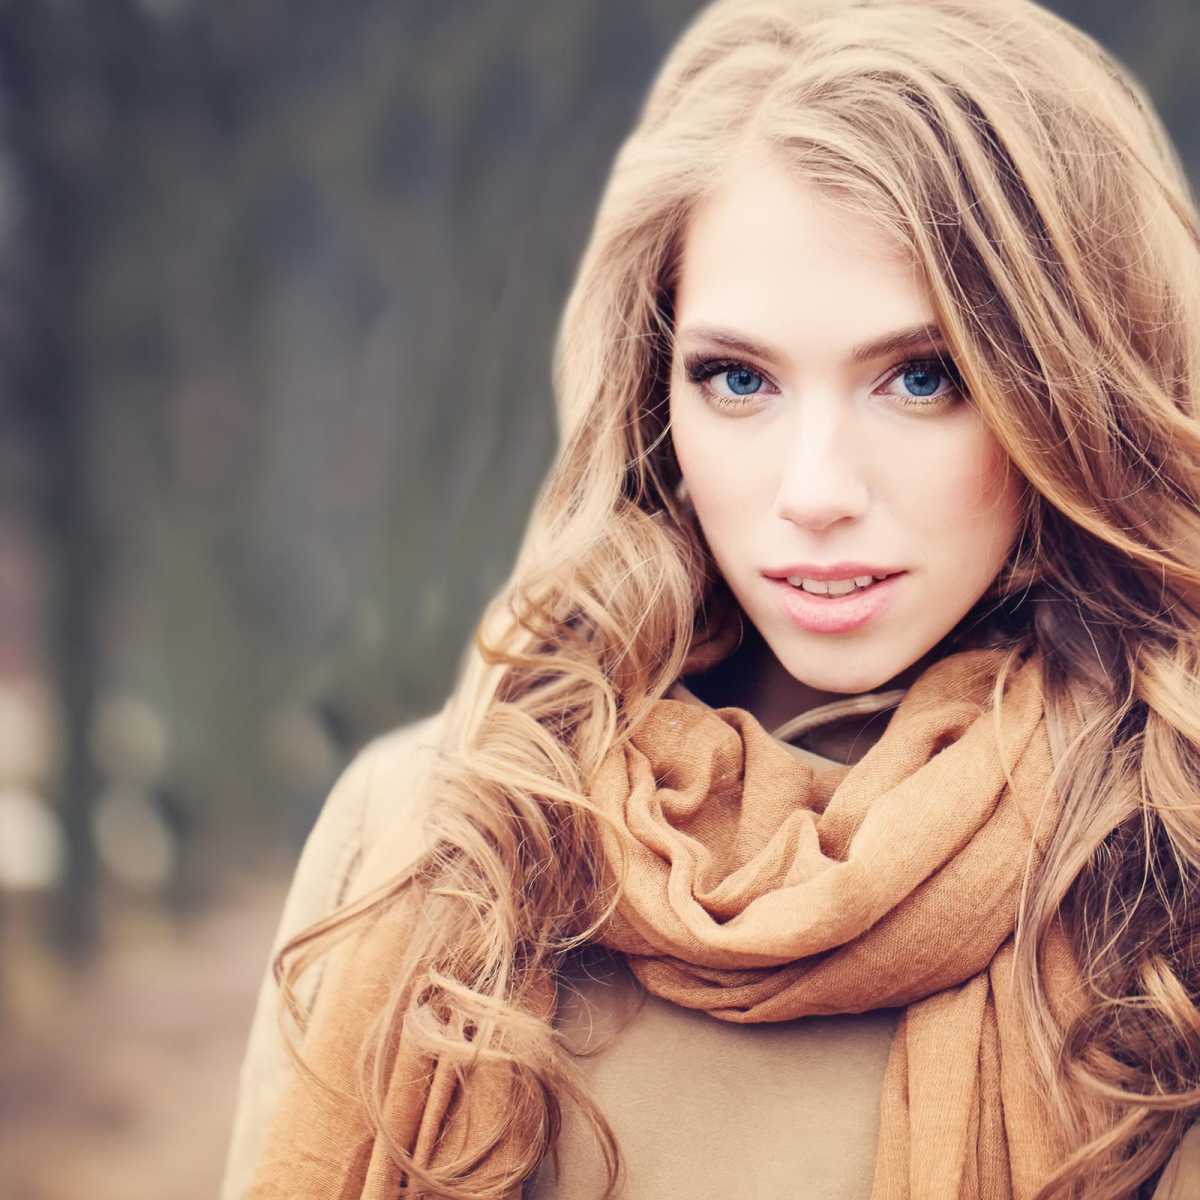
Foundry
This is our final image. We took an additional step of blurring the edge of the hair on a separate layer (with ‘Sample All Layers’ ticked off), using the Blur tool. This helps give the hair a soft focus.
Author: Somrata Sarkar, Contributor, Tech Advisor

Previously a Tech Advisor Senior Staff Writer, Somrata researches and writes about the best tech deals to help readers make smart, informed buying decisions. She’s an expert on accessories and also reviews laptops, phones, audio and other devices.
Recent stories by Somrata Sarkar:
- Is Adobe CC free for students?
- Get 41% off Adobe CC for a year & extra discounts for students
- Does Windows 11 come with Microsoft Office?
