If you’re working from home long-term, you’ll almost certainly need more than one display. A second (or third) screen can transform your productivity, even if it’s just to separate email and messaging apps from the main task you’re working on.
But getting multiple monitors set up properly on Windows 11 requires more than just plugging them in. There are a few steps needed to make sure everything runs smoothly, although it’s only usually necessary once.
Once you’ve connected the external monitor/s (usually via HDMI or DisplayPort), here are the settings worth tweaking.
Make sure all monitors have been detected
Before proceeding, it’s important to ensure that each external monitor has been connected properly and has been recognised by Windows 11.
Head to Settings > System > Display and make sure the number of displays match how many you have connected (including a laptop where applicable).
Should this not be the case, disconnect all necessary cables and restart your device. Reconnect them and return to the same page in Settings.
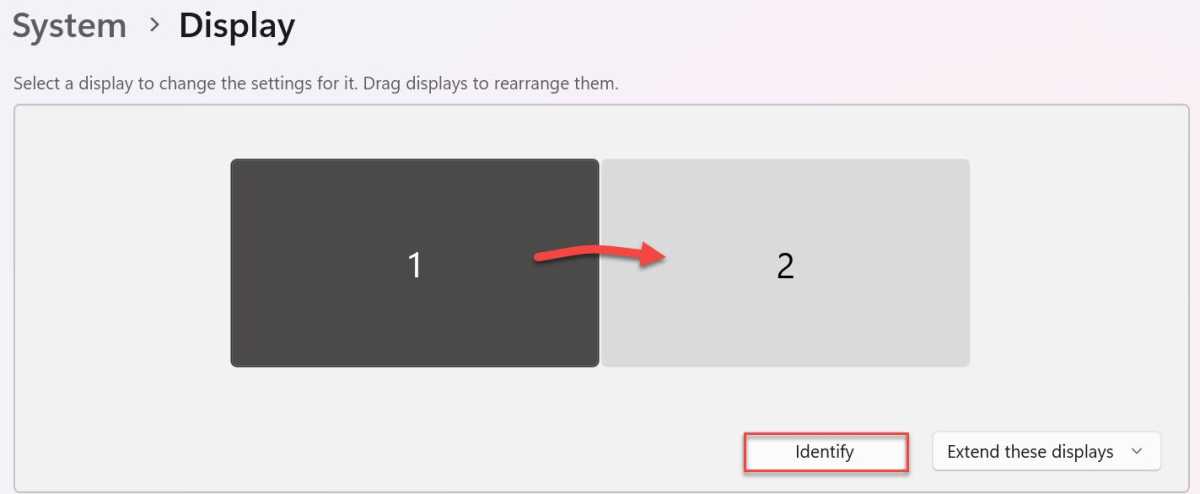
Rearrange displays
When you connect a monitor, Windows 11 doesn’t always arrange them in a way that suits you. For example, a display on the right of your laptop may appear on the left side instead, making it very confusing when you try to use the cursor.
Fortunately, this can easily be adjusted:
Head to Settings > System > Display
Click the ‘Identify’ button to see which number corresponds to which display. These will appear on all screens at the same time for a few seconds
To move any display, drag and drop it into another position. These changes will automatically be saved
Anyron Copeman / Foundry
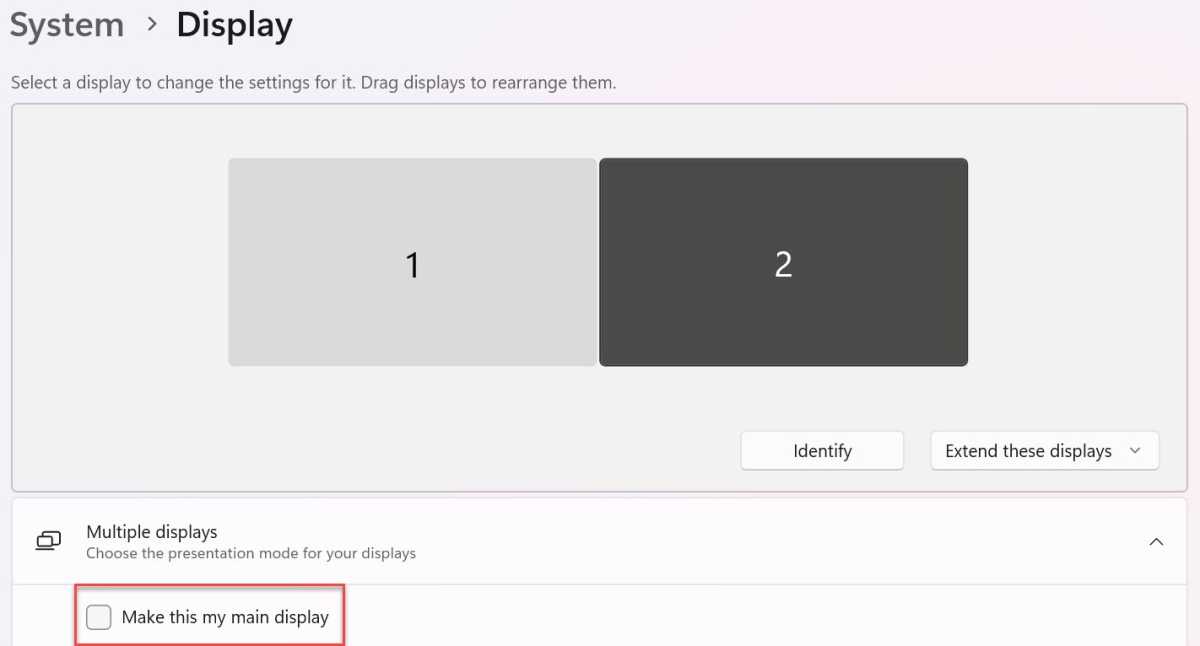
Set the primary display
On Windows 11, the primary display is where apps will open by default. To change this:
Head to Settings > System > Display
Click any of the numbered displays to select it
Under ‘Multiple displays’, click the box next to ‘Make this my main display’. If the option is greyed out, it’s already the main display
Anyron Copeman / Foundry
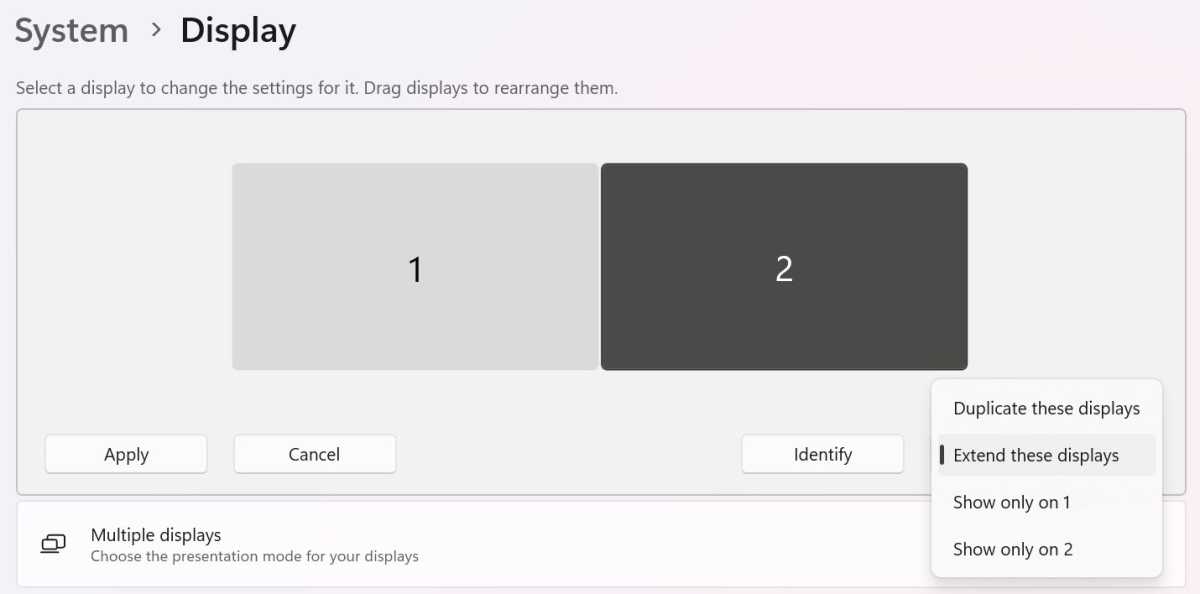
Choose how secondary displays behave
When you connect an external display to Windows 11, there are two main options. ‘Duplicate’ shows the exact same content across all screens, while ‘Extend’ means all monitors combine to act like one large one. The latter also allows the on-screen cursor to move between them.
Head to Settings > System > Display
Click a display you’d like to change
Click the drop-down button to the right of ‘Identify’
Choose either ‘Duplicate these displays’ or ‘Extend these displays’. There’s also the option to only show on one screen, but that’s only really relevant for content consumption
Anyron Copeman / Foundry
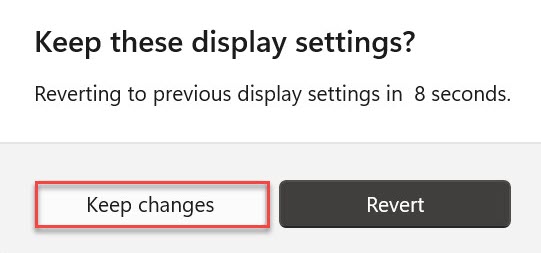
- From the pop-up that appears, click ‘Keep changes’ within 15 seconds
Anyron Copeman / Foundry
- Repeat steps 2-5 for any other displays you’d like to change
Adjust size of text and other elements
For each external monitor you connect, Windows 11 will automatically scale up the size of text, icons and other key elements to something that’s comfortable for most people to see.
However, it might not always be right for you. To change this:
Head to Settings > System > Display
At the top of the page, select the display you’d like to adjust
Under the ‘Scale and layout’ sub-heading, find ‘Scale’
Click the drop-down next to it and choose a percentage. The ‘Recommended’ one will be set by default, but there are usually three other options
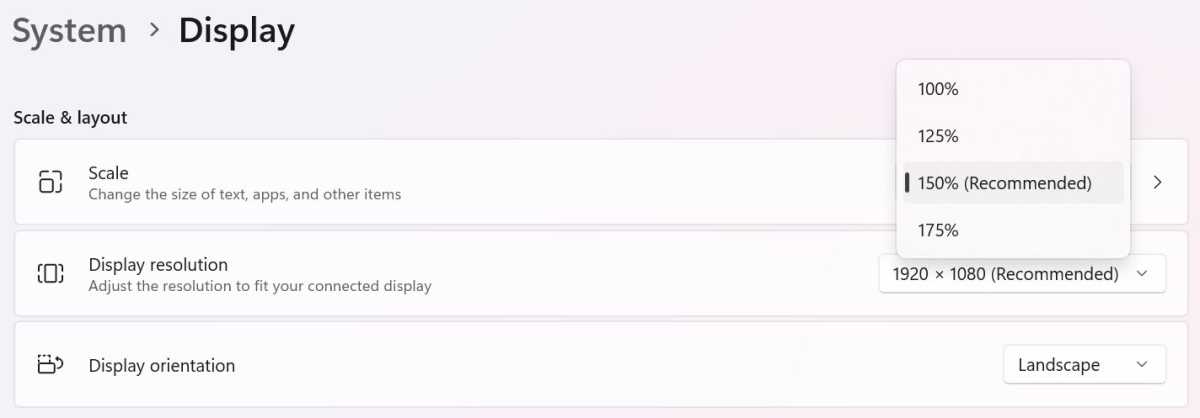
Anyron Copeman / Foundry
Choose how the taskbar appears
The taskbar is the main way you interact with Windows 11. But do you need it on all your external displays? That decision is yours.
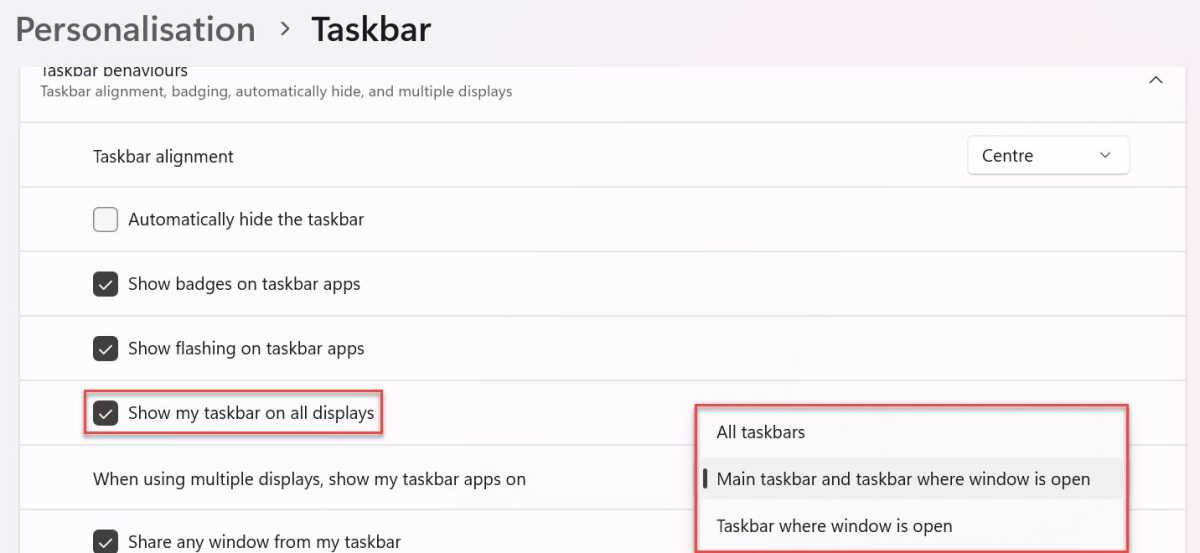
Head to Settings > Personalisation > Taskbar
Click ‘Taskbar behaviours’ to expand that section
Check or uncheck the box next to ‘Show my taskbar on all displays’
If available, click the drop-down next to ‘When using multiple displays, show my taskbar apps on’ and choose one of the three options
Anyron Copeman / Foundry
Set a different background for each display
The background image you use on your main Windows 11 desktop doesn’t have to be the same across all external monitors. Here’s how to choose a different one for each:
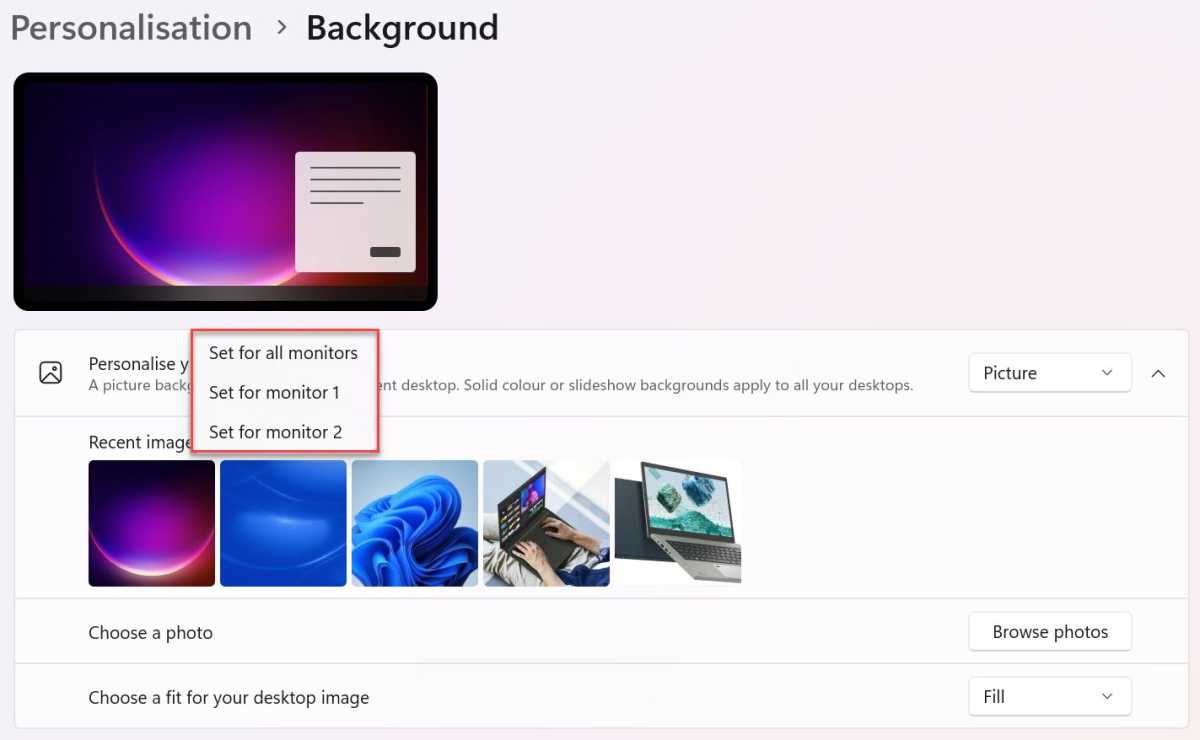
Head to Settings > Personalisation > Background
In the drop-down next to ‘Personalise your background’, make sure ‘Picture’ is selected
Identify one of the recent images or click ‘Browse photos’ and find one you’d like
Once it appears in ‘Recent images’, right-click and choose one of the ‘Set for monitor…’ options
Anyron Copeman / Foundry
- Repeat steps 3-4 for each monitor
Don’t have a dedicated external display? Here’s how to use a laptop as a second monitor .
Author: Anyron Copeman, Mobile Editor, Tech Advisor

Anyron is Mobile Editor at Tech Advisor, where he’s been a mainstay of the editorial team since 2019. In his current role, Anyron is responsible for all smartphone, tablet and mobile network coverage on the site. A BA Journalism graduate, he has experience with a wide range of consumer tech products and services, including smartphones, tablets, foldables, wearables and more.
Recent stories by Anyron Copeman:
- Windows 11 23H2 update: Everything you need to know
- Windows 12: Everything we know so far
- How to get the Google Play Store on Windows 11
