There are plenty of methods for taking a screenshot built-in to Windows 10, but they all have one thing in common – the size of your screenshot is limited by the size of your screen.
While that’s fine on many occasions, it can quickly become frustrating to have to take separate screenshots in order to capture a whole document. That also presents complications when it comes to sharing, with important details often spread across multiple images.
That’s where the idea of a scrolling screenshot comes in. It’s a feature that’s available on many smartphones these days, and with the help of some third-party software you do it on your Windows 10 PC too.
What is a scrolling screenshot?
A scrolling screenshot is the most effective way to get a whole page within one screen capture.
It allows you to continue taking a screenshot as you scroll down the page, meaning you can get lots more information in a single capture.
How to take a scrolling screenshot on Windows 10
The first step you’ll need to take is to download a program capable of taking scrolling screenshots. For the purposes of this tutorial we’ll be using Snagit , which is free for 15 days before a one-time fee of £48.43 . The process is similar on free programs such as ShareX .
- Download and install Snagit from the TechSmith website , and then create or sign-in to an account.

- Making sure you’re in the ‘Library’ section, click the red ‘Capture’ button. You may have to accept some permissions by entering the password to your Microsoft account.
- In the window that appears, under the ‘Image’ tab choose ‘Capture’
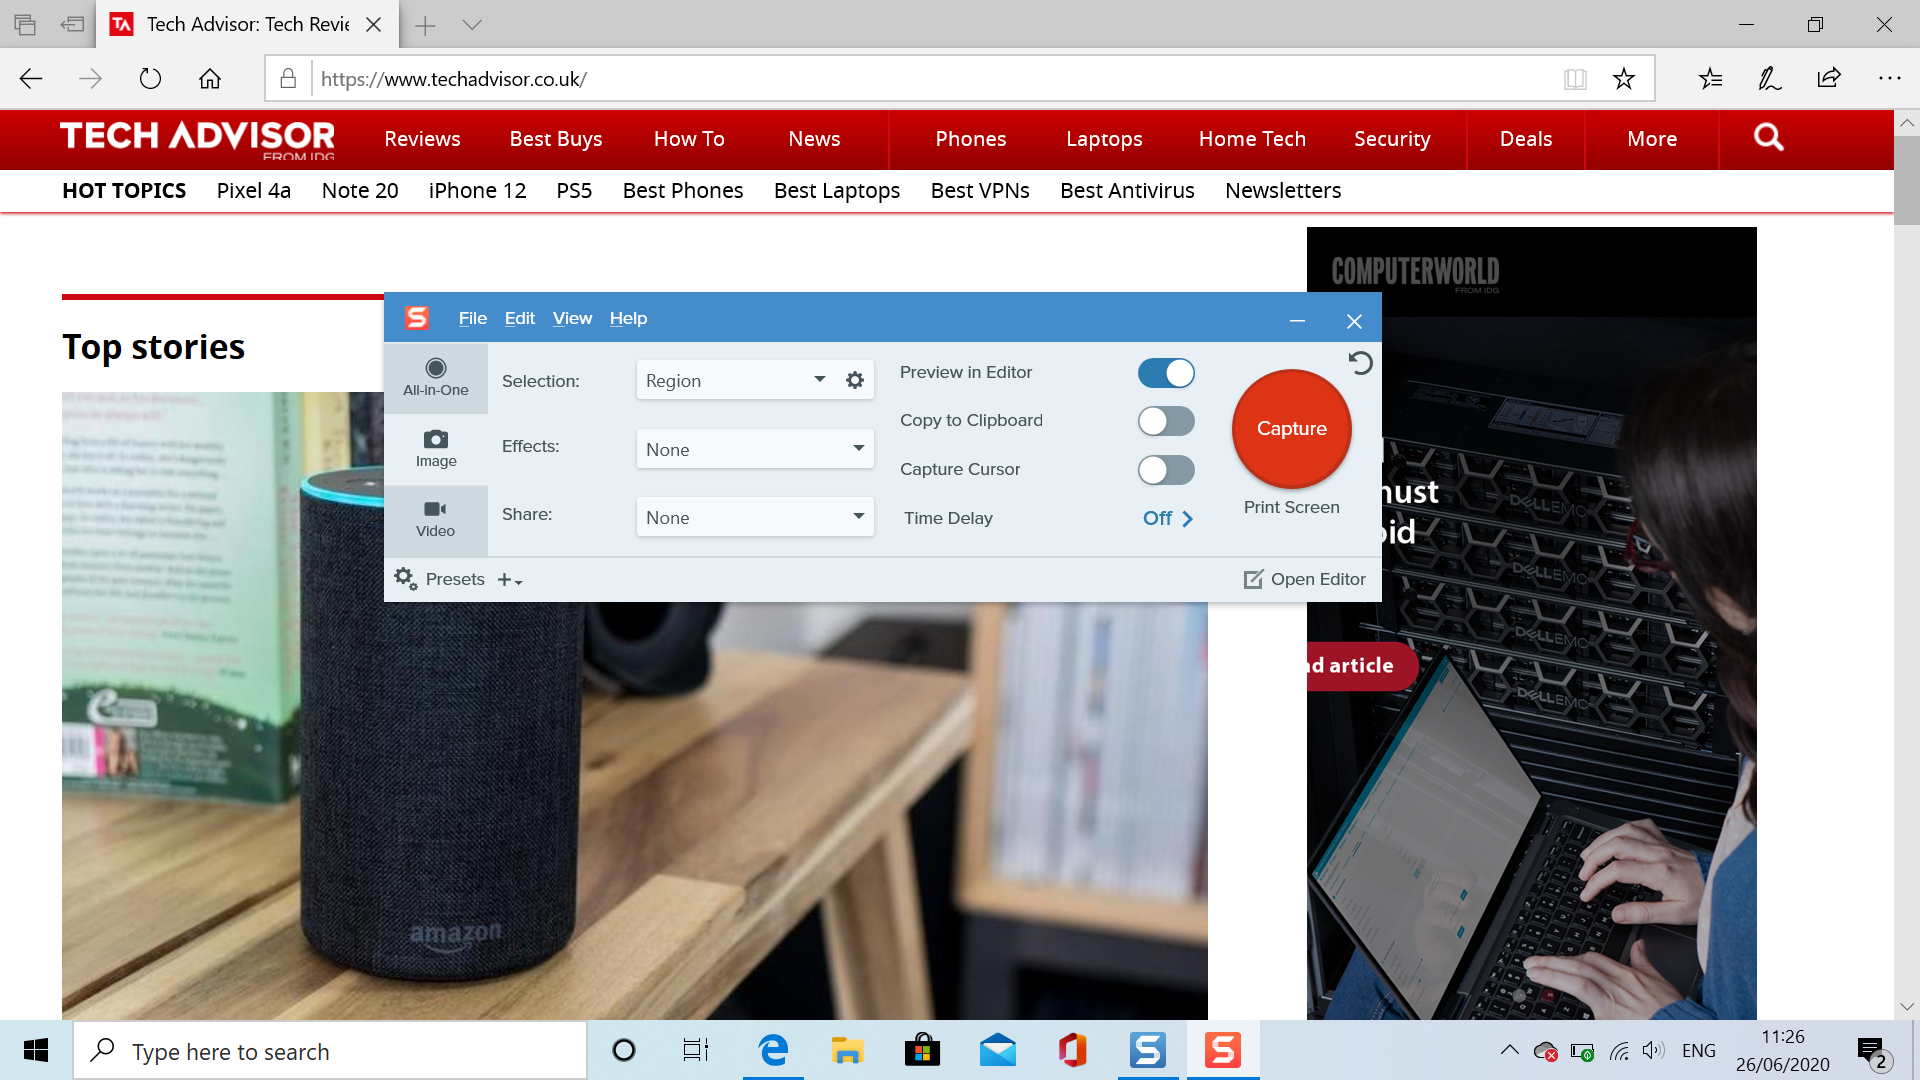
- This will now take you to a screenshot preview screen, complete with a menu guide in the top-right corner. Click the down arrow at the bottom of the screen, marked ‘Capture Vertical Scrolling Area’.
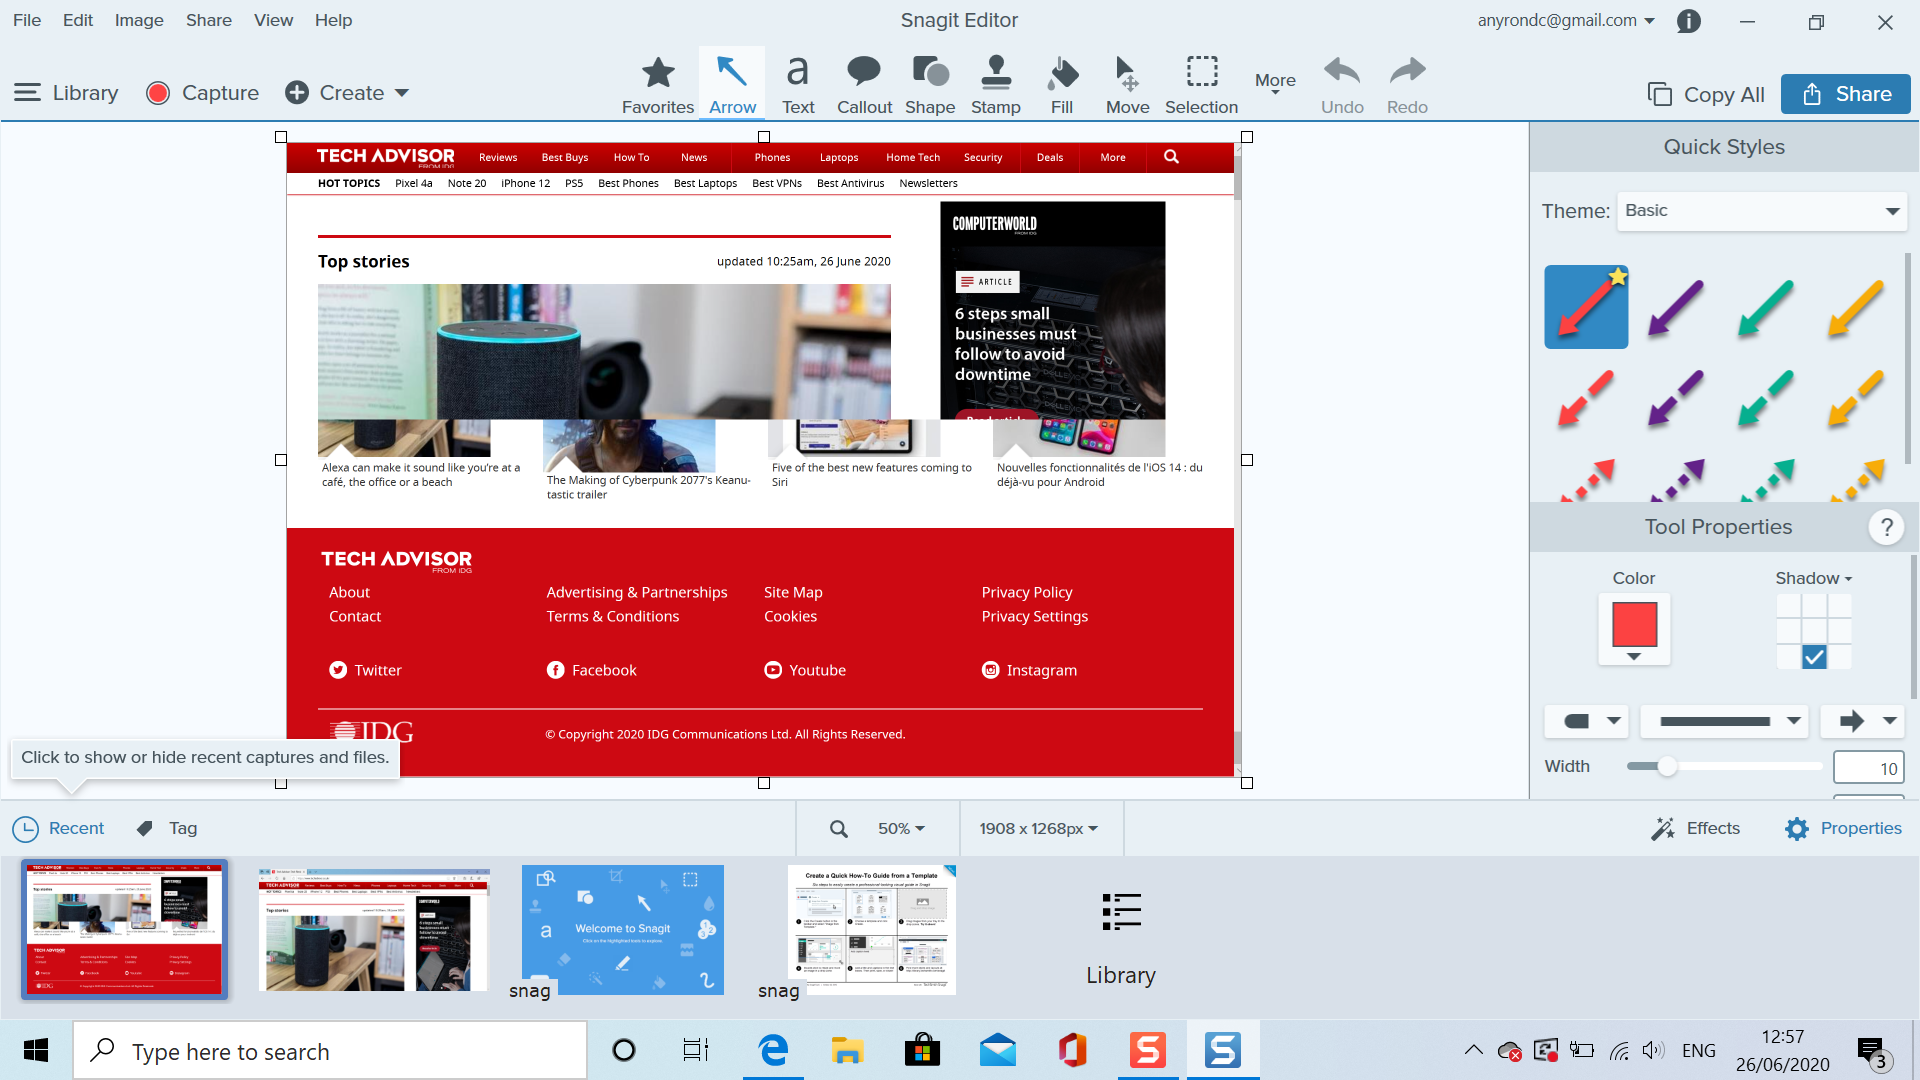
- You should see it automatically scroll down the page and process the capture, where it will then be displayed in the Snagit Editor.
Don’t need a scrolling screenshot? Here are all the ways to capture a regular screenshot in Windows 10 .
Author: Anyron Copeman, Mobile Editor, Tech Advisor

Anyron is Mobile Editor at Tech Advisor, where he’s been a mainstay of the editorial team since 2019. In his current role, Anyron is responsible for all smartphone, tablet and mobile network coverage on the site. A BA Journalism graduate, he has experience with a wide range of consumer tech products and services, including smartphones, tablets, foldables, wearables and more.
Recent stories by Anyron Copeman:
- Windows 11 23H2 update: Everything you need to know
- Windows 12: Everything we know so far
- How to get the Google Play Store on Windows 11
