If you’ve got an old pair of speakers lying around, they needn’t sit gathering dust so put them to good use. Here’s how to turn any speakers into a wireless streaming system.
You don’t need to put those old speakers you’ve got on ebay; why not create a wireless streaming system out of them with a Sonos Connect:Amp ? If your speakers are passive, or non-powered, then this is just the piece of kit you need. If they’re powered, or active, or you have an amplifier already, then you just need the Connect , £279.
Sonos is a wireless Hi-Fi system and although the firm sells speakers, you can buy its Connect products to utilise existing equipment. Priced at £399, the Connect:Amp features a Class-D amplifier and 2x55W output and fanless cooling.
How to turn any speakers into a wireless streaming system
Step One
Unbox your Sonos Connect:Amp and plug it into a power socket. You don’t need to switch it on just yet.

Step Two
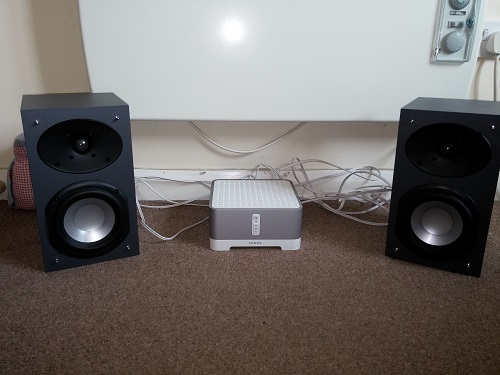
Place your speakers close enough to the Amp so you can connect them with cables (not supplied with the Amp). The Connect:Amp has easy to use sprung loaded connections – and so did our Sonos SP100 loudspeakers.

You’ll notice that there are some other connections on the back of the Connect:Amp. These are a stereo RCA line-in, in case you want to hook up something like a CD player, and an RCA subwoofer output.
There are also two ethernet connections. If you don’t want to spend an extra £39 on a Sonos Bridge, then you can connect the amp directly to your router to access content – however, this means it’s not wireless. The other port, whether you’re using the Bridge or not, is an output for any device with an ethernet port. It’s called SonosNet and provides a wired internet connection just like a home plug adapter.
Step Three
You can now switch the Connect:Amp on at the wall and add it to your Sonos system. Since we’re wanting things to be wireless, we’re connecting the Amp to a Bridge which is already part of a Sonos system.
However, if this is your first Sonos system, download the app for desktop or mobile and follow the instructions on-screen. The process is very similar to the one we’re about to detail.
Step Four
Open the Sonos app on your PC, Mac, iPhone, iPad or Android device. We’ve used an Android smartphone for the following steps so it could vary on other platforms.

Step Five
Click the menu button and select ‘Add a Sonos compontent’.

Step Six
Within two minutes, hit the volume up and mute button on your Connect:Amp simultaneously. Note that newer models will come with a play/pause button instead of mute.

Step Seven
You should get a confirmation that your Connect:Amp has been added. Next choose what room you want it to be called in the app.

Step Eight
You may now need to perform a system update. If so, follow the on-screen instructions – the app pretty much just does it all for you.

Step Nine
Now your Connect:Amp is setup and fully up-to-date, you can start playing music. Click on the room you choose to be your Amp (we chose ‘office’) and select what music you want to play.

Author: Chris Martin, Managing Editor, Tech Advisor

Tech Advisor Managing Editor Chris got his break as a reporter at infamous site The Inquirer and has been with us for more than 12 years. With a BA degree in Music Technology, audio is his specialism, but over the years he has reviewed all kinds of gadgets, from smartwatches to mesh Wi-Fi to coffee machines.
Recent stories by Chris Martin:
- Every Pixel 10a colour is now ‘confirmed’
- In 2026 my ‘previous gen’ phone rule applies more than ever
- See the Samsung Galaxy S26 Ultra in 3D spinning glory
